
Introduction
I have written a custom form, which is handled by pure C#-code, no Win32 API functions are called and everything that requires sending or retrieving messages from the message loop is done in the WndProc-function of the form. You can access all functions that forms are usually providing, such as closing, maximizing, opening a context-menu on click, etc. Even implementing own buttons and functions is an easy task!
Background
The idea and inspiration actually came from CCleaner. I downloaded the most-recent version and saw the sweet style of the form. With experience by watching this article and some other experience gained by four years of programming I managed to create something custom, which does not exist (as far as I know) on CodeProject.
If you got any requests on how to let the user customize the feel and look of SharpForm even more, don't hesitate to share them in the comments!
Classes and Properties
I will present you some classes and properties, but in order to watch the whole objects and methods, download the source-code on the top of the article.
SharpForm
-
FormIcon:
An image (no icon!) that is drawn on the top-left of the controlbox. This must be
a 16x16 .PNG, .BMP or .JPG and does not affect the taskbar-icon and app-icon. -
SystemEvent:
Handles the click on an item of the Form-ContextMenu and sends a message
to the message-loop. (restore, close, move, maximize, minimize, size ...) - (since V2)
ToolStrip:
The toolstrip that is displayed in the controlbox of the form. - (since V2)
BorderColor:
Indicates with which color the border of the form is drawn. There is also a
"InactiveBorderColor"-property which is used when the form lost focus. - (since V2)
ControlBoxColor:
Indicates with which color the controlbox of the form is drawn. There is also a
"InactiveControlBoxColor"-property which is used when the form lost focus.
SharpHelper
-
SelButton:
Indicates which button of the controlbox has been hovered. You can also implement
own buttons by extending this enum and other properties. This enum is actually used
by the paint-method, for example if you mouse-over the close-button (darker color) -
SystemCmd:
Bitfield of messages that can be sent or received in the message loop (WndProc).
Example: CMD_SIZE, CMD_MINI, CMD_MAXI, CMD_CLOSE, CMD_MOVE, ... -
NCHitTest:
Those values are mainly used for indicating which cursor should be drawn to extend
or collapse the form-border, but also for checking if the user hovers the caption, icon
or other stuff that you can implement yourself. -
NCMouseMsg:
Indicates what you do with your mouse in the non-client area. My custom form only
uses values for mouse-right/left-button-up and mouse-move, but with other useful
values like mouse-double-click you can implement crazy custom stuff!
Using the Code
But how do you actually set up an application with this custom form? As we use own properties (and might implement some more in the future) we can't let VS create a partial class and let it do all the job. Before we use this kind of form in the designer, we have to set up some basic stuff.
- Create a new Windows Forms application. Delete the
Form1 afterwards - Create a new, empty class and add some
using directives to it
using System;
using System.Drawing;
using System.Windows.Forms;
using SharpForm;

namespace YourNameSpace
{
     public class MyForm : SharpForm
     {
          public MyForm
          {
               InitializeComponent();
               base.CenterSharpForm(); // Centers the form on the desktop
               base.MeasureRects(); // First calculation of the border, buttons, etc.
          }

          private void InitializeComponent()
          {
               // Leave this empty - let the designer to the work.
          }
     }
}
- Rebuild the project and you should see that the class icon is turning into
a form icon, which you now can open in the designer. You need to correct
the "Program.cs" if your new form is not named "Form1". - (Optional) You may add a panel to the form which represents the actual client-area.
- (Optional) Set an icon, caption and more stuff you want to.
After you've finished, build the project and test it via running the program!
Points of Interest
Hey, how do I add such a nice toolbar on the top?
Basically, you could drop any control there, but now I will show you how to bind a toolstrip with the form, so its back-color gets updated right away, in case you change the controlbox-color of the form programmatically.
- If you imported SharpForm.dll as an actual reference, then right-click on any category of the toolbox. Now you pick "Choose Items" and it should show you bunch of controls. Click on "Browse" and locate the SharpForm.dll, select it after you found it. Now leave the window via "OK" and you should see a new control, the
SharpToolStrip, in your category. - Drop
SharpToolStrip on your form and try to find a nice location for it on the controlbox. Don't mind the black background - we will see how to fix that later. Just try to place the strip next to the icon and look if it fits nicely. Once you found the desired position, select the form in the designer. - After you've selected the form, go to properties and look for a category called "
SharpForm". There you can change back-color, border-color and also "ToolStrip". Now you just have to choose your recently created SharpToolStrip and the black background should now disappear! After that step, you can crazily add any functioning to the tools, it will all work. :)
How do I change the visual look of the form?
- Select your form in the designer.
- Look up the properties and find a category called "
SharpForm". - The properties there, "
BorderColor, ControlBoxColor, InactiveBorderColor and InactiveControlBoxColor" should give you the customization you wanted. :)
Todo
- Creating some flat components, that fit the style of
SharpForm. If you have any special request, I might come after your wish and create such a control. :)
History
26.12.2014
- You can decide to active Aero-Snap or not
- Form has a thicker border now - alternatively you
can still download V2 for a single-line border
- Some bugfixes
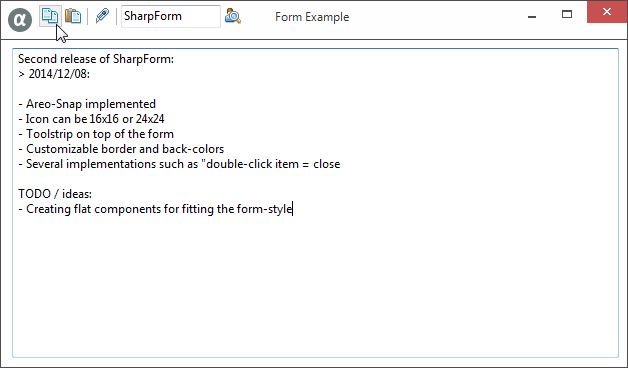
08.12.2014
- Aero-Snap functioning added
- Icons can now be 16x16 or 24x24
- When icon is double-clicked, form closes
- When icon is left-clicked, context menu pops up
- Border-color and back-color of the form can now
be customized via special properties
- Small customization possibilities for "
SharpToolStrip"
02.12.2014
- First release of
SharpForm
This member has not yet provided a Biography. Assume it's interesting and varied, and probably something to do with programming.


 General
  News
News  Suggestion
  Question
  Bug
Bug  Answer
  Joke
Joke  Praise
  Rant
Rant  Admin
Admin 


