Introduction
This is a useful and simple tutorial to implement Amazon SES Service in your application to send
bulk-emails in an efficient way and outside the scope of your website
which makes the operation of sending around 600 emails go faster which can help you a lot in building a successful CRM Automated System.
Main Steps
- Create your SMTP credentials with Amazon SES
- Setup your application to use Amazon SES SMTP Interface
- Send emails through Amazon SES
1. Create your SMTP Credentials with Amazon SES
This step requires that the user has an account on Amazon Web Services or create a new account in order to log in.
You must create your SMTP credentials - a username and a password. Follow these
steps to create your SMTP credentials:
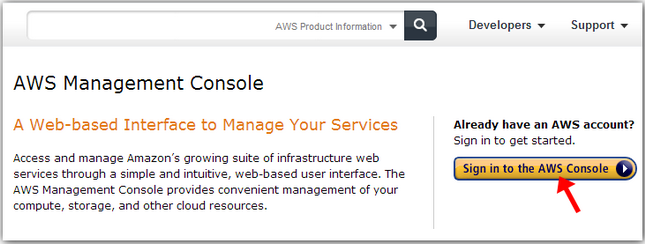
- Go to AWS Management Console. Click on Sign in to the AWS Console.
- Click on SES Email Sending Service

- Click on SMTP Settings at the left side. Then click on Create My SMTP Credentials
- Enter your SMTP user name [this user name will be used to identify you in the Amazon AWS panel only]. Click Create. A password and a user name for SMTP will be generated for you.
Copy your credentials or click on "Download Credentials" because you won't be able to view your SMTP password again.
- After you created your SMTP credentials, you are ready to configure your ASP.NET Web Application to send emails through the Amazon SES SMTP interface.
NB: Only creating SMTP credentials are copied with some modifications from other
article -
http://www.glocksoft.com/how-to-use-amazon-ses-smtp-interface-to-send-emails/.
2. Setup your Application to Use Amazon SES SMTP Interface
We need to get our web application ready to send emails through Amazon SES by getting your AWS Access Key and AWS Secret Key. Then
download the Amazon API and load the AWSSDK.dll inside your project.
- Inside your Web.config, add these two lines to hold your secret and access key.
<appSettings>
    <add key="AWSAccessKey" value="YourAccessKey"/>
    <add key="AWSSecretKey" value="YourSecretKey"/>
</appSettings>
Download Amazon API and install it. Then add a reference to AWSSDK.dll.
Now you are ready to implement the code and send email successfully.
3. Send Emails through Amazon SES
In this step, you have to implement the code required to send emails through Amazon SES on any function you like. NB: When you send email using an email address,
it must be verified by Amazon SES Service. You can check the list from your Admin Panel or through
the code shown at the end of the article.
Code
using System;
using System.Collections.Generic;
using System.Linq;
using System.Web;
using System.Web.UI;
using System.Globalization;
using Amazon.SimpleEmail;
using System.Collections;
using System.Configuration;
using Amazon.SimpleEmail.Model;
public bool SendEmail(){
AmazonSimpleEmailServiceConfig amConfig = new AmazonSimpleEmailServiceConfig();
amConfig.UseSecureStringForAwsSecretKey = false;
AmazonSimpleEmailServiceClient amzClient = new AmazonSimpleEmailServiceClient(
ConfigurationManager.AppSettings["AWSAccessKey"].ToString(),
ConfigurationManager.AppSettings["AWSSecretKey"].ToString(), amConfig);
ArrayList to = new ArrayList();
to.Add(EMAIL_HERE);
Destination dest = new Destination();
dest.WithBccAddresses((string[])to.ToArray(typeof(string)));
string body = Body;
string subject = "Subject : " + txtSubject.Text;
Body bdy = new Body();
bdy.Html = new Amazon.SimpleEmail.Model.Content(body);
Amazon.SimpleEmail.Model.Content title = new Amazon.SimpleEmail.Model.Content(subject);
Message message = new Message(title, bdy);
try
{
SendEmailRequest ser = new SendEmailRequest(Send_From_Email_MUST_BE_VERIFIED_BY_AMAZON, dest, message);
SendEmailResponse seResponse = amzClient.SendEmail(ser);
SendEmailResult seResult = seResponse.SendEmailResult;
}catch(Exception ex){
}
}
Now you have a successful function that sends email efficiently through the Amazon SES
system without interpreting your page progress.
Additional Info that Might Help
Create a function that lists all the emails verified by Amazon SES and can send
emails from.
Code
using System;
using System.Collections.Generic;
using System.Linq;
using System.Web;
using System.Web.UI;
using System.Globalization;
using Amazon.SimpleEmail;
using System.Collections;
using System.Configuration;
using Amazon.SimpleEmail.Model;
public void ListVerifiedEmail(){
AmazonSimpleEmailServiceConfig amConfig = new AmazonSimpleEmailServiceConfig();
amConfig.UseSecureStringForAwsSecretKey = false;
AmazonSimpleEmailServiceClient amzClient =
new AmazonSimpleEmailServiceClient(ConfigurationManager.AppSettings["AWSAccessKey"].ToString(),
ConfigurationManager.AppSettings["AWSSecretKey"].ToString(), amConfig);
ListVerifiedEmailAddressesRequest lveReq = new ListVerifiedEmailAddressesRequest();
ListVerifiedEmailAddressesResponse lveResp = amzClient.ListVerifiedEmailAddresses(lveReq);
ListVerifiedEmailAddressesResult lveResult = lveResp.ListVerifiedEmailAddressesResult;
foreach (Object email in lveResult.VerifiedEmailAddresses)
{
Response.Write(email.ToString() + ",");
}
}
Create a function that adds an email to Amazon SES Verified Email. You will receive a confirmation
email from Amazon to confirm the email.
Code
using System;
using System.Collections.Generic;
using System.Linq;
using System.Web;
using System.Web.UI;
using System.Globalization;
using Amazon.SimpleEmail;
using System.Collections;
using System.Configuration;
using Amazon.SimpleEmail.Model;
public void SendVerificationEmailAmazonSES
{
AmazonSimpleEmailServiceConfig amConfig = new AmazonSimpleEmailServiceConfig();
amConfig.UseSecureStringForAwsSecretKey = false;
AmazonSimpleEmailServiceClient amzClient = new AmazonSimpleEmailServiceClient(
ConfigurationManager.AppSettings["AWSAccessKey"].ToString(),
ConfigurationManager.AppSettings["AWSSecretKey"].ToString(), amConfig);
VerifyEmailAddressRequest veaRequest = new VerifyEmailAddressRequest();
veaRequest.EmailAddress = "Your_Email_To_Verify";
VerifyEmailAddressResponse veaResponse = amzClient.VerifyEmailAddress(veaRequest);
Response.Write(veaResponse.ResponseMetadata.RequestId);
}
The tip is done. I hope everyone gets to profit from this tip. You can download
the source code project which is very helpful. I'm looking forward to hear from you about any suggestions or edits or even questions. Feel
free to contact me.
This member has not yet provided a Biography. Assume it's interesting and varied, and probably something to do with programming.


 General
  News
News  Suggestion
  Question
  Bug
Bug  Answer
  Joke
Joke  Praise
  Rant
Rant  Admin
Admin 


