A tutorial on how to use different libraries and combine them all to make a nice fancy calculator. You will learn how to build a smart calculator which you can use to solve your daily math problems by using Tkinter for GUI, sympy and matplotlib for solving math issues, and pytesseract for image-to-text extraction.
Introduction
I know many of you loved the article that I posted earlier this month, so if you didn't have the chance to read it or if you are willing to apply your skills and learn Python or web development, I encourage you to read it.
You will learn many libraries and how to combine them to make a useful application.
I like my articles to be useful, exciting, challenging, and to simulate real-world scenarios, so I have crafted this tutorial for you. I hope you learn something valuable from it. So let's begin.
Background
You need to know the basics of Python to follow the tutorial as this is not a Python course.
I recommend you read this article to get familiar with Tkinter and be ready to go (optional).
For more information on sympy library, click here.
Requirements
Create a new virtual environment:
python -m venv .venv
Activate the virtual environment:
. .venv/Scripts/activate
Download the file here or copy its content, then paste it into a new file called requirements.txt.
Install the requirements by using the following command:
pip install -r requirements.txt
Also, download the Tesseract setup which is necessary for image-to-text extraction and follow the steps shown. Download here.
Implementation
To build a simple window in Tkinter, we must import the module and then create a window that will contain all our elements, give it a title, and finally call the window.
Create a new file named main.py, then write the following code:
import tkinter as tk

win = tk.Tk()
win.title('Hello world')

win.mainloop()
Make sure you have activated the virtual environment then to run the program, execute the command:
python main.py
You should get a blank window with a Hello world header.
Now we need to fill in the window with some Tkinter widgets.
Tkinter has many widgets, in this tutorial, we will use Button, Entry, Text, Frame, and LabelFrame which is a panel with a title above.
Every Tkinter widget has a parent, so a button can be inside a window or a frame (panel) which is a container where you can put widgets inside of it.
Let's create a basic interface with an entry (textbox) and some buttons.
import tkinter as tk

win = tk.Tk()
win.title('Smart Calculator')

frm_txtbox = tk.Frame()
frm_txtbox.pack()

txt_box = tk.Text(master=frm_txtbox, width=32, height=8, font=('default', 16))
txt_box.insert(tk.INSERT, 'Type here your math problem ...')
txt_box.pack()

win.mainloop()
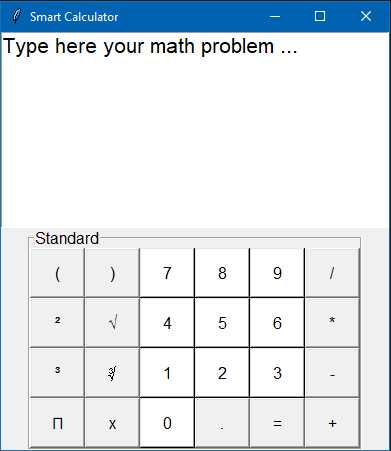
This will create a basic user interface with an entry to type some information.
First, we initialized the window and created a frame called frm_txtbox and put in place by pack() function. Then, we created a Textbox inside frm_txtbox (master=frm_txtbox) and some parameters to customize it.
However, it does nothing so let's update the code to make some buttons.
import tkinter as tk

win = tk.Tk()
win.title('Smart Calculator')

frm_txtbox = tk.Frame()
frm_txtbox.pack()

txt_box = tk.Text(master=frm_txtbox, width=32, height=8, font=('default', 16))
txt_box.insert(tk.INSERT, 'Type here your math problem ...')
txt_box.pack()

frm_standard = tk.LabelFrame(text='Standard', font=('default', 12))
frm_standard.pack()

btn_parentheses_right = tk.Button(master=frm_standard, text='(', width=5, height=2, cursor='hand2', font=('default', 12))
btn_parentheses_left = tk.Button(master=frm_standard, text=')', width=5, height=2, cursor='hand2', font=('default', 12))
btn_seven = tk.Button(master=frm_standard, text='7', bg='white', width=5, height=2, cursor='hand2', font=('default', 12))
btn_eight = tk.Button(master=frm_standard, text='8', bg='white', width=5, height=2, cursor='hand2', font=('default', 12))
btn_nine = tk.Button(master=frm_standard, text='9', bg='white', width=5, height=2, cursor='hand2', font=('default', 12))
btn_divide = tk.Button(master=frm_standard, text='/', width=5, height=2, cursor='hand2', font=('default', 12))

btn_square = tk.Button(master=frm_standard, text='²', width=5, height=2, cursor='hand2', font=('default', 12))
btn_square_root = tk.Button(master=frm_standard, text='√', width=5, height=2, cursor='hand2', font=('default', 12))
btn_four = tk.Button(master=frm_standard, text='4', bg='white', width=5, height=2, cursor='hand2', font=('default', 12))
btn_five = tk.Button(master=frm_standard, text='5', bg='white', width=5, height=2, cursor='hand2', font=('default', 12))
btn_six = tk.Button(master=frm_standard, text='6', bg='white', width=5, height=2, cursor='hand2', font=('default', 12))
btn_multiply = tk.Button(master=frm_standard, text='*', width=5, height=2, cursor='hand2', font=('default', 12))

btn_cube = tk.Button(master=frm_standard, text='³', width=5, height=2, cursor='hand2', font=('default', 12))
btn_cube_root = tk.Button(master=frm_standard, text='∛', width=5, height=2, cursor='hand2', font=('default', 12))
btn_one = tk.Button(master=frm_standard, text='1', bg='white', width=5, height=2, cursor='hand2', font=('default', 12))
btn_two = tk.Button(master=frm_standard, text='2', bg='white', width=5, height=2, cursor='hand2', font=('default', 12))
btn_three = tk.Button(master=frm_standard, text='3', bg='white', width=5, height=2, cursor='hand2', font=('default', 12))
btn_minus = tk.Button(master=frm_standard, text='-', width=5, height=2, cursor='hand2', font=('default', 12))

btn_pi = tk.Button(master=frm_standard, text='Ⲡ', width=5, height=2, cursor='hand2', font=('default', 12))
btn_x = tk.Button(master=frm_standard, text='x', width=5, height=2, cursor='hand2', font=('default', 12))
btn_zero = tk.Button(master=frm_standard, text='0', bg='white', width=5, height=2, cursor='hand2', font=('default', 12))
btn_dot = tk.Button(master=frm_standard, text='.', width=5, height=2, cursor='hand2', font=('default', 12))
btn_equal = tk.Button(master=frm_standard, text='=', width=5, height=2, cursor='hand2', font=('default', 12))
btn_plus = tk.Button(master=frm_standard, text='+', width=5, height=2, cursor='hand2', font=('default', 12))

i,j = 0,0
for btn in frm_standard.children:
    frm_standard.children[btn].grid(row=j, column=i)
    i += 1
    if i == 6:
        i = 0
        j += 1


win.mainloop()
You should get something like this:
The first change is we added the standard calculator buttons like the numbers from 0 to 9 and the fundamental operations.
Then I created two variables, i and j to place the buttons in order using the grid function which requires two parameters as you can see (row and column). You may ask why i is set to zero when it's 6, well .. once we have created six buttons, we need to move to a new line to insert those buttons. You can, of course, add buttons the way you like. But I found this is the proper order to do this.
For large-scale applications, we can avoid confusion and make our code manageable by splitting our code into files, let's create a new file called gui_layout.py where we will make the full layout of the GUI.
from main import *
def place_std_btns():
i,j = 0,0
for btn in frm_standard.children:
frm_standard.children[btn].grid(row=j, column=i)
i += 1
if i == 6:
i = 0
j += 1
place_std_btns()
frm_txtbox.pack()
txt_box.pack()
frm_standard.pack()
win.mainloop()
Update main.py as the following:
import tkinter as tk

win = tk.Tk()
win.title('Smart Calculator')

frm_txtbox = tk.Frame()

txt_box = tk.Text(master=frm_txtbox, width=32, height=8, font=('default', 16))
txt_box.insert(tk.INSERT, 'Type here your math problem ...')

frm_standard = tk.LabelFrame(text='Standard', font=('default', 12))

btn_parentheses_right = tk.Button(master=frm_standard, text='(', width=5, height=2, cursor='hand2', font=('default', 12))
btn_parentheses_left = tk.Button(master=frm_standard, text=')', width=5, height=2, cursor='hand2', font=('default', 12))
btn_seven = tk.Button(master=frm_standard, text='7', bg='white', width=5, height=2, cursor='hand2', font=('default', 12))
btn_eight = tk.Button(master=frm_standard, text='8', bg='white', width=5, height=2, cursor='hand2', font=('default', 12))
btn_nine = tk.Button(master=frm_standard, text='9', bg='white', width=5, height=2, cursor='hand2', font=('default', 12))
btn_divide = tk.Button(master=frm_standard, text='/', width=5, height=2, cursor='hand2', font=('default', 12))

btn_square = tk.Button(master=frm_standard, text='²', width=5, height=2, cursor='hand2', font=('default', 12))
btn_square_root = tk.Button(master=frm_standard, text='√', width=5, height=2, cursor='hand2', font=('default', 12))
btn_four = tk.Button(master=frm_standard, text='4', bg='white', width=5, height=2, cursor='hand2', font=('default', 12))
btn_five = tk.Button(master=frm_standard, text='5', bg='white', width=5, height=2, cursor='hand2', font=('default', 12))
btn_six = tk.Button(master=frm_standard, text='6', bg='white', width=5, height=2, cursor='hand2', font=('default', 12))
btn_multiply = tk.Button(master=frm_standard, text='*', width=5, height=2, cursor='hand2', font=('default', 12))

btn_cube = tk.Button(master=frm_standard, text='³', width=5, height=2, cursor='hand2', font=('default', 12))
btn_cube_root = tk.Button(master=frm_standard, text='∛', width=5, height=2, cursor='hand2', font=('default', 12))
btn_one = tk.Button(master=frm_standard, text='1', bg='white', width=5, height=2, cursor='hand2', font=('default', 12))
btn_two = tk.Button(master=frm_standard, text='2', bg='white', width=5, height=2, cursor='hand2', font=('default', 12))
btn_three = tk.Button(master=frm_standard, text='3', bg='white', width=5, height=2, cursor='hand2', font=('default', 12))
btn_minus = tk.Button(master=frm_standard, text='-', width=5, height=2, cursor='hand2', font=('default', 12))

btn_pi = tk.Button(master=frm_standard, text='Ⲡ', width=5, height=2, cursor='hand2', font=('default', 12))
btn_x = tk.Button(master=frm_standard, text='x', width=5, height=2, cursor='hand2', font=('default', 12))
btn_zero = tk.Button(master=frm_standard, text='0', bg='white', width=5, height=2, cursor='hand2', font=('default', 12))
btn_dot = tk.Button(master=frm_standard, text='.', width=5, height=2, cursor='hand2', font=('default', 12))
btn_equal = tk.Button(master=frm_standard, text='=', width=5, height=2, cursor='hand2', font=('default', 12))
btn_plus = tk.Button(master=frm_standard, text='+', width=5, height=2, cursor='hand2', font=('default', 12))
We have now some sort of a calculator but still... It does not do anything.
Let's make the buttons functional so that when we click on them, they do something.
Update gui_layout.py:
from main import *
def place_std_btns():
i,j = 0,0
for btn in frm_standard.children:
frm_standard.children[btn].grid(row=j, column=i)
i += 1
if i == 6:
i = 0
j += 1
def insert_btn_txt(btn):
txt_box.config(state='normal')
txt_box.insert(tk.END, btn['text'])
txt_box.config(state='disabled')
def assign_btn_funcs():
for btn in frm_standard.children:
frm_standard.children[btn]['command'] = lambda x=frm_standard.children[btn]: insert_btn_txt(x)
def init_gui_layout():
place_std_btns()
frm_txtbox.pack()
txt_box.pack()
frm_standard.pack()
assign_btn_funcs()
init_gui_layout()
We have added a function called assign_btn_funcs to make every button on the screen functional by assigning a lambda function which will add to the textbox what the button contains in it. Say we clicked on 7, then 7 will be added to the textbox.
But if you may have noticed, the default text is still apparent, so let's remove it by adding a delete function that removes the default text by calling a clear text function:
from main import *
def place_std_btns():
i,j = 0,0
for btn in frm_standard.children:
frm_standard.children[btn].grid(row=j, column=i)
i += 1
if i == 6:
i = 0
j += 1
def clear_txt():
txt_box.config(state='normal')
txt_box.delete('1.0', tk.END)
txt_box.config(state='disabled')
def delete_paceholder():
if txt_box.get(1.0, "end-1c") == 'Type here your math problem ...':
clear_txt()
def insert_btn_txt(btn):
delete_paceholder()
txt_box.config(state='normal')
txt_box.insert(tk.END, btn['text'])
txt_box.config(state='disabled')
def assign_btn_funcs():
for btn in frm_standard.children:
frm_standard.children[btn]['command'] = lambda x=frm_standard.children[btn]: insert_btn_txt(x)
def init_gui_layout():
place_std_btns()
frm_txtbox.pack()
txt_box.pack()
frm_standard.pack()
assign_btn_funcs()
init_gui_layout()
win.mainloop()
Now we will restructure the code so everything should be in its proper place.
We will have four files:

First, make a new file called functions.py which will handle the math-related functions:
from widgets import *
def clear_txt():
txt_box.config(state='normal')
txt_box.delete('1.0', tk.END)
txt_box.config(state='disabled')
def delete_paceholder():
if txt_box.get(1.0, "end-1c") == 'Type here your math problem ...':
clear_txt()
def insert_btn_txt(btn):
delete_paceholder()
txt_box.config(state='normal')
txt_box.insert(tk.END, btn['text'])
txt_box.config(state='disabled')
Secondly, change the gui_layout.py as the following:
from functions import *
def place_std_btns():
i,j = 0,0
for btn in frm_standard.children:
frm_standard.children[btn].grid(row=j, column=i)
i += 1
if i == 6:
i = 0
j += 1
def assign_btn_funcs():
for btn in frm_standard.children:
frm_standard.children[btn]['command'] = lambda x=frm_standard.children[btn]: insert_btn_txt(x)
def init_gui_layout():
place_std_btns()
frm_txtbox.pack()
txt_box.pack()
frm_standard.pack()
After that, make a new file (widgets.py) and move main.py content inside widgets.py.
Finally adjust main.py as shown below:
from gui_layout import assign_btn_funcs, init_gui_layout
from widgets import win


assign_btn_funcs()
init_gui_layout()

win.mainloop()
We have now the foundation to go on!
Before we add more user interfaces and math functions, let's discover some interesting Sympy functions so we get a sense on what's going on.
As we can see, Sympy has many features like calculating an integral or plotting a function.
This is the library we will use to make life easier and fulfill our program requirements.
Recently, we made our standard calculator interface, however, we did not make it calculate anything so let's add some buttons that are going to be essential like submitting our input and removing it.
We will add the basic navigation buttons, so open widgets.py and the code as shown below:
frm_nav_buttons = tk.Frame(pady=8, padx=5)
btn_submit = tk.Button(master=frm_nav_buttons, text='Submit', bg='lightgray', width=5, height=2, cursor='hand2', font=('default', 11))
btn_remove = tk.Button(master=frm_nav_buttons, text='⌫', bg='lightgray', width=5, height=2, cursor='hand2', font=('default', 11))
btn_clear_txt = tk.Button(master=frm_nav_buttons, text='Clear', bg='lightgray', width=5, height=2, cursor='hand2', font=('default', 11))
btn_new_line = tk.Button(master=frm_nav_buttons, text='⤶', bg='lightgray', width=5, height=2, cursor='hand2', font=('default', 11))
btn_sci_functions= tk.Button(master=frm_nav_buttons, text='∑ⅆഽ', bg='lightgray', width=5, height=2, cursor='hand2', font=('default', 11))
btn_symbols = tk.Button(master=frm_nav_buttons, text='abc', bg='lightgray', width=5, height=2, cursor='hand2', font=('default', 11))
btn_open_image = tk.Button(master=frm_nav_buttons, text='🖼', bg='lightgray', width=5, height=2, cursor='hand2', font=('default', 11))
Now to actually render the widgets, we need to call the pack and grid functions.
Change the gui_layout.py as the following:
from functions import *
def place_std_btns():
i,j = 0,0
for btn in frm_standard.children:
frm_standard.children[btn].grid(row=j, column=i)
i += 1
if i == 6:
i = 0
j += 1
def place_nav_panel():
txt_box.grid(row=1, column=0, sticky='new')
i = 0
for btn in frm_nav_buttons.children:
frm_nav_buttons.children[btn].grid(row=0, column=i)
i += 1
def assign_btn_funcs():
for btn in frm_standard.children:
frm_standard.children[btn]['command'] = lambda x=frm_standard.children[btn]: insert_btn_txt(x)
def init_gui_layout():
place_std_btns()
place_nav_panel()
frm_txtbox.pack()
frm_nav_buttons.pack()
frm_standard.pack()
With that done, you should see the navigation panel populated with numerous buttons that we will program later to do interesting stuff.
Let's program the first four buttons and see what will happen.
We already have the clear function ready. We will now add the delete character functionally and insert new line inside functions.py:
def remove_char():
txt_box.config(state='normal')
txt_box.delete('end-2c', tk.END)
txt_box.config(state='disabled')
def insert_new_line():
delete_paceholder()
txt_box.config(state='normal')
txt_box.insert(tk.END, '\n')
txt_box.config(state='disabled')
The reason I am adding txt_box.config(state='normal') and txt_box.config(state='disabled') to make sure only the buttons have the ability to add input into the textbox. We don't want the user to add random entries.
With that done, update the assign_btn_funcs function in gui_layout.py to assign those functions to the corresponding buttons:
def assign_btn_funcs():
for btn in frm_standard.children:
frm_standard.children[btn]['command'] = lambda x=frm_standard.children[btn]: insert_btn_txt(x)
btn_remove.configure(command=lambda: remove_char())
btn_clear_txt.configure(command=lambda: clear_txt())
btn_new_line.configure(command=lambda: insert_new_line())
We are now able to add, remove, and clear the textbox.
We need to program the submit button so when we add some input. The input will be processed then we will make a decision based on what we have entered. For example, if we enter a function, the function will be plotted, if we enter an equation, the equation must be solved, if we enter some mathematical expression, then we will need to calculate that expression, and so on...
First, we will add a function that will process the raw input that we will provide in the textbox.
Add the following code at the top of functions.py:
import sympy
def plot_expression():
exprs = process_input()
if txt_box.index(tk.INSERT)[0] == '1':
sympy.plot(sympy.sympify(exprs[0]), xlabel='x', ylabel='f(x)')
if txt_box.index(tk.INSERT)[0] == '2':
sympy.plot(sympy.sympify(exprs[0]), sympy.sympify(exprs[1]), xlabel='x', ylabel='f(x)')
if txt_box.index(tk.INSERT)[0] == '3':
sympy.plot(sympy.sympify(exprs[0]), sympy.sympify(exprs[1]), sympy.sympify(exprs[2]), xlabel='x', ylabel='f(x)')
def digit_index(expr, char):
start_index = expr.index(char) + 1
index = 0
while True:
if expr[start_index].isdigit() or expr[start_index].isalpha():
index = start_index
else:
return index
start_index += 1
def process_equation(equation):
equal_index = equation.index('=')
expr1 = sympy.sympify(equation[:equal_index])
expr2 = sympy.sympify(equation[equal_index + 1:])
return expr1 - expr2
def process_inequality(inequality, char):
inequality_index = inequality.index(char)
expr1 = sympy.sympify(inequality[:inequality_index])
expr2 = sympy.sympify(inequality[inequality_index + 1:])
final_expr = expr1 - expr2
coeff = int(final_expr.coeff([x for x in final_expr.free_symbols][0]))
if coeff < 0:
if char == '>':
return final_expr, '<'
elif char == '<':
return final_expr, '>'
elif char == '≥':
return final_expr, '≤'
elif char == '≤':
return final_expr, '≥'
else:
return final_expr, char
def extract_numbers(expr):
numbers = []
for char in expr:
if char.isdigit():
numbers.append(char)
return float(''.join(numbers))
def has_symbol(expr):
try:
right_parentheses = expr.index('(')
left_parentheses = expr.index(')')
for char in expr[right_parentheses + 1:left_parentheses]:
if char.isalpha() and char != 'Ⲡ' and char != 'e':
return True
return False
except:
for char in expr:
if char in 'abcdefghijklmnopqrstuvwxyz':
return True
return False
def add_star(expr):
if 'sin' not in expr and 'cos' not in expr and 'tan' not in expr and 'cot' not in expr and 'log' not in expr:
for i in range(len(expr)):
if expr[i].isdigit() and expr[i + 1].isalpha() and expr[i+1] != '°' or expr[i] == ')' and expr[i+1] == '(' and expr[i+1] != '°':
expr = expr[:i+1] + '*' + expr[i+1:]
if expr[i].isalpha() and expr[i + 1].isalpha() and expr[i+1] != '°' or expr[i] == ')' and expr[i+1] == '(' and expr[i+1] != '°':
if str(sympy.pi) not in expr:
expr = expr[:i+1] + '*' + expr[i+1:]
return expr
def process_input():
exprs = []
for i in range(1, int(txt_box.index(tk.INSERT)[0]) + 1):
expr = txt_box.get(f'{i}.0', f'{i+1}.0')
expr = expr.replace('Ⲡ', str(sympy.pi))
expr = expr.replace('e', str(sympy.E))
expr = expr.replace('²', '** 2 ')
expr = expr.replace('³', '** 3 ')
expr = add_star(expr)
if '(' in expr and expr[0] != '(':
parentheses_indexes = [m.start() for m in re.finditer("\(", expr)]
for parentheses_index in parentheses_indexes:
if not expr[parentheses_index - 1].isalpha():
expr = expr[:parentheses_index] + '*' + expr[parentheses_index:]
if '√' in expr:
square_root_index = digit_index(expr, '√')
expr = expr.replace('√', '')
expr = expr[:square_root_index] + '** 0.5 ' + expr[square_root_index:]
if '∛' in expr:
cube_root_index = digit_index(expr, '∛')
expr = expr.replace('∛', '')
expr = expr[:cube_root_index] + '** (1/3) ' + expr[cube_root_index:]
if '°' in expr:
deg = extract_numbers(expr)
func = expr[:3]
expr = f'{func}({sympy.rad(deg)})'
if '=' in expr:
expr = process_equation(expr)
if '>' in str(expr):
expr = process_inequality(expr, '>')
elif '≥' in str(expr):
expr = process_inequality(expr, '≥')
elif '<' in str(expr):
expr = process_inequality(expr, '<')
elif '≤' in str(expr):
expr = process_inequality(expr, '≤')
try:
i_index = expr.index('i')
if expr[i_index - 1].isdigit():
expr = expr.replace('i', 'j')
except:
pass
exprs.append(expr)
return exprs
We start the process_input function first with a list of expressions, this list will contain all the rows we have entered as a user, and this expression int(txt_box.index(tk.INSERT)[0]) + 1 will convert the current line count into an integer and then add one to get the last line. After that, we iterate over each line and change each symbol so Python can understand the mathematical expression. For instance, if we entered ² then python will have a problem identifying the symbol, so we change it to ** 2.
We need to separate each variable with the coefficient, using the add star function which adds a multiplication sign after each coefficient. Then we make sure a parenthesis is separated from the coefficient by a multiplication sign. Afterward, we change every symbol to an understandable symbol as before to make sure Sympy and python understand like changing the root symbol to ** 0.5. Then we see if there is an equal sign or inequal sign, we call the functions to move all the terms to one side in order to solve it.
This is the core function of our application which turns the raw mathematical expression into a Python expression to be processed.
It's about time we see the results. So let's do it.
Add the submit function before the plot_expression function:
import re
def submit():
exprs = txt_box.get('1.0', tk.END)
if '=' in exprs:
compute('solve_equality')
elif '<' in exprs or '>' in exprs or '≥' in exprs or '≤' in exprs:
compute('solve_inequality')
else:
if has_symbol(exprs):
plot_expression()
else:
compute('calculate_expression')
Notice that the submit function will call compute which calls process input.
Now add the compute function that will return the result and add it to the text.
def compute(operation):
txt_box.config(state='normal')
expr = process_input()[0]
if operation == 'calculate_expression':
result = f'{round(float(sympy.sympify(expr)), 2)}'
elif operation == 'solve_equality':
exprs = process_input()
solutions = None
if len(exprs) == 1:
solutions = sympy.solve(sympy.sympify(exprs[0]))
if len(solutions) == 1:
solutions = solutions[0]
elif len(exprs) == 2:
solutions = sympy.solve((sympy.sympify(exprs[0]), sympy.sympify(exprs[1])))
result = solutions
elif operation == 'solve_inequality':
symbol = [symbol for symbol in sympy.solve(expr[0], dict=True)[0].items()][0][0]
solution = [symbol for symbol in sympy.solve(expr[0], dict=True)[0].items()][0][1]
result = f'{symbol}{expr[1]}{solution}'
elif operation == 'factor_expression':
result = sympy.sympify(expr).factor()
elif operation == 'expand_expression':
result = sympy.sympify(expr).expand()
elif operation == 'absolute':
result = abs(int(sympy.sympify(expr)))
elif operation == 'limit':
value = ent_limit_value.get()
value = value.replace('∞', str(sympy.S.Infinity))
limit = sympy.Limit(sympy.sympify(expr), sympy.Symbol('x'), sympy.sympify(value)).doit()
result = limit
elif operation == 'derivative':
derivative = sympy.Derivative(sympy.sympify(expr), sympy.Symbol('x')).doit()
result = derivative
elif operation == 'integral':
integral = sympy.Integral(sympy.sympify(expr), sympy.Symbol('x')).doit()
result = integral
elif operation == 'summation':
x = sympy.Symbol('x')
summation = sympy.summation(sympy.sympify(expr), (x, sympy.sympify(ent_summation_start.get()), sympy.sympify(ent_summation_n.get())))
result = summation
txt_box.insert(tk.END, f'\n{result}')
txt_box.config(state='disabled')
Now run the app and try to enter something and see what happens.
It's rewarding, isn't it?
With that said, there a few things left to do.
Let's add the scientific functions panel to our program so when we click on ∑ⅆഽ, it show us the panel.
Open widgets.py and add the following code at the end of the file:
frm_sci = tk.LabelFrame(text='Sci', font=('default', 12))
lbl_trigonometry = tk.Label(master=frm_sci, text='Trigonometry:', font=('default', 12))
lbl_inequality = tk.Label(master=frm_sci, text='Inequality:', width=8, height=1, font=('default', 12))
lbl_calculus = tk.Label(master=frm_sci, text='Calculus:', width=8, height=1, font=('default', 12))
lbl_log = tk.Label(master=frm_sci, text='Log:', width=4, height=1, font=('default', 12))
lbl_other = tk.Label(master=frm_sci, text='Other:', width=4, height=1, font=('default', 12))
frm_trig = tk.Frame(master=frm_sci, pady=8)
deg_type_choice = tk.IntVar()
btn_sin = tk.Button(master=frm_trig, text='sin', width=5, height=1, font=('default', 12), cursor='hand2')
btn_cos = tk.Button(master=frm_trig, text='cos', width=5, height=1, font=('default', 12), cursor='hand2')
btn_tan = tk.Button(master=frm_trig, text='tan', width=5, height=1, font=('default', 12), cursor='hand2')
btn_cot = tk.Button(master=frm_trig, text='cot', width=5, height=1, font=('default', 12), cursor='hand2')
btn_degree = tk.Button(master=frm_trig, text='°', width=5, height=1, font=('default', 12), cursor='hand2')
frm_inequality = tk.Frame(master=frm_sci, pady=8)
btn_greater = tk.Button(master=frm_inequality, text='>', width=5, height=1, font=('default', 12), cursor='hand2')
btn_greater_equal = tk.Button(master=frm_inequality, text='≥', width=5, height=1, font=('default', 12), cursor='hand2')
btn_less = tk.Button(master=frm_inequality, text='<', width=5, height=1, font=('default', 12), cursor='hand2')
btn_less_equal = tk.Button(master=frm_inequality, text='≤', width=5, height=1, font=('default', 12), cursor='hand2')
frm_calculus = tk.Frame(master=frm_sci, pady=8)
btn_limit = tk.Button(master=frm_calculus ,text='Limit:\n x-->', width=5, height=1, font=('default', 12), cursor='hand2')
ent_limit_value = tk.Entry(master=frm_calculus, width=5, font=('default', 12))
btn_insert_infinity = tk.Button(master=frm_calculus, text='∞', width=5, height=1, font=('default', 12), cursor='hand2')
btn_derivative = tk.Button(master=frm_calculus, text='ⅆ', width=5, height=1, font=('default', 12), cursor='hand2')
btn_integral = tk.Button(master=frm_calculus, text='⎰', width=5, height=1, font=('default', 12), cursor='hand2')
frm_log = tk.Frame(master=frm_sci, pady=8)
base_choice = tk.IntVar()
btn_log = tk.Button(master=frm_log, text='log', width=5, height=1, font=('default', 12))
lbl_base = tk.Label(master=frm_log, text='Base:', width=5, height=1, font=('default', 12))
ent_base = tk.Entry(master=frm_log, width=5, font=('default', 12))
btn_e = tk.Button(master=frm_log, text='e', width=5, height=1, font=('default', 12), cursor='hand2')
frm_expand_factor = tk.Frame(master=frm_sci, pady=8)
btn_expand = tk.Button(master=frm_expand_factor, text='Expand', bg='white', width=6, height=1, font=('default', 12), cursor='hand2')
btn_factor = tk.Button(master=frm_expand_factor, text='Factor', bg='white', width=6, height=1, font=('default', 12), cursor='hand2')
frm_other_sci = tk.Frame(master=frm_sci, pady=8)
ent_summation_n = tk.Entry(master=frm_other_sci, width=5, font=('default', 12))
btn_summation = tk.Button(master=frm_other_sci, text='∑', width=5, height=1, font=('default', 12), cursor='hand2')
btn_absolute = tk.Button(master=frm_other_sci, text='| |', width=5, height=1, font=('default', 12), cursor='hand2')
btn_imag = tk.Button(master=frm_other_sci, text='I', width=5, height=1, font=('default', 12), cursor='hand2')
btn_factorial = tk.Button(master=frm_other_sci, text='!', width=5, height=1, font=('default', 12), cursor='hand2')
ent_summation_start = tk.Entry(master=frm_other_sci, width=5, font=('default', 12))
Now to map the functions with buttons, add the code shown below at the end of assign_btn_function:
for btn in frm_trig.children:
     frm_trig.children[btn]['command'] = lambda x=frm_trig.children[btn]: insert_btn_txt(x)

 btn_log.configure(command=lambda: insert_btn_txt(btn_log))

 btn_e.configure(command=lambda: insert_btn_txt(btn_e))
 btn_factorial.configure(command=lambda: insert_btn_txt(btn_factorial))
 btn_absolute.configure(command=lambda: compute('absolute'))
 btn_imag.configure(command=lambda: insert_btn_txt(btn_imag))
 btn_derivative.configure(command=lambda: compute('derivative'))
 btn_integral.configure(command=lambda: compute('integral'))

 btn_greater.configure(command=lambda: insert_btn_txt(btn_greater))
 btn_greater_equal.configure(command=lambda: insert_btn_txt(btn_greater_equal))
 btn_less.configure(command=lambda: insert_btn_txt(btn_less))
 btn_less_equal.configure(command=lambda: insert_btn_txt(btn_less_equal))

 btn_remove.configure(command=lambda: remove_char())
 btn_clear_txt.configure(command=lambda: clear_txt())
 btn_new_line.configure(command=lambda: insert_new_line())
 btn_sci_functions.configure(command=lambda: show_hide_sci_functions())
 btn_symbols.configure(command=lambda: show_hide_symbols())
 btn_open_image.config(command=lambda: read_from_image(open_file()))

 btn_expand.configure(command=lambda: compute('expand_expression'))
 btn_factor.configure(command=lambda: compute('factor_expression'))

 btn_limit.configure(command=lambda: compute('limit'))
 btn_insert_infinity.configure(command=lambda: ent_limit_value.insert(tk.END, '∞'))

 btn_summation.configure(command=lambda: compute('summation'))aster=frm_other_sci, text='I',  width=5, height=1, font=('default', 12), cursor='hand2')
 btn_factorial = tk.Button(master=frm_other_sci, text='!',  width=5, height=1, font=('default', 12), cursor='hand2')
 ent_summation_start = tk.Entry(master=frm_other_sci, width=5, font=('default', 12))
Add this function to place the elements in the correct order:
def place_sci_func_btns():
ent_summation_n.grid(row=0, column=0)
btn_summation.grid(row=1, column=0)
btn_absolute.grid(row=1, column=1)
btn_imag.grid(row=1, column=2)
btn_factorial.grid(row=1, column=3)
ent_summation_start.grid(row=2, column=0)
i = 0
for btn in frm_calculus.children:
frm_calculus.children[btn].grid(row=0, column=i)
i += 1
i = 0
for btn in frm_expand_factor.children:
frm_expand_factor.children[btn].grid(row=0, column=i, padx=4)
i += 1
i = 0
for btn in frm_log.children:
frm_log.children[btn].grid(row=0, column=i)
i += 1
i = 0
for btn in frm_trig.children:
frm_trig.children[btn].grid(row=0, column=i)
i += 1
i = 0
for btn in frm_inequality.children:
frm_inequality.children[btn].grid(row=0, column=i)
i += 1
Update the init_gui_layout to actually render the gui components:
def init_gui_layout():
place_nav_panel()
place_std_btns()
place_sci_func_btns()
frm_txtbox.pack()
frm_nav_buttons.pack()
frm_standard.pack()
lbl_trigonometry.pack()
frm_trig.pack()
lbl_inequality.pack()
frm_inequality.pack()
lbl_calculus.pack()
frm_calculus.pack()
lbl_log.pack()
frm_log.pack()
lbl_other.pack()
frm_other_sci.pack()
frm_expand_factor.pack()
Finally, add this function to functions.py to show and hide the scientific functions panel.
def show_hide_sci_functions():
if frm_sci.winfo_ismapped():
frm_standard.pack()
frm_sci.pack_forget()
frm_symbols.pack_forget()
else:
frm_standard.pack_forget()
frm_symbols.pack_forget()
frm_sci.pack()
Now you should be able to use the scientific functions.
In the same manner, we will program the symbols button.
First, add the symbols widgets which are the letters from a to z:
frm_symbols = tk.LabelFrame(text='Symbols', font=('default', 12))
symbol_btns = [tk.Button(master=frm_symbols, text=chr(i), width=5, height=2, cursor='hand2', font=('default', 12))
for i in range(97, 123)]
To map the symbol buttons, add the code shown below at the end of assign_btn_function:
btn_symbols.configure(command=lambda: show_hide_symbols())
for btn in frm_symbols.children:
    frm_symbols.children[btn]['command'] = lambda x=frm_symbols.children[btn]: insert_btn_txt(x)
Now add the place_symbols_btns to place the elements in the correct order:
def place_symbols_btns():
i, j = 0, 0
for btn in frm_symbols.children:
frm_symbols.children[btn].grid(row=j, column=i)
i += 1
if i % 10 == 0:
j += 1
i = 0
Finally, update functions.py by adding show_hide_symbols function to trigger the symbols panel and update show_hide_sci_functions:
def show_hide_symbols():
if frm_symbols.winfo_ismapped():
frm_standard.pack()
frm_symbols.pack_forget()
frm_sci.pack_forget()
else:
frm_symbols.pack()
frm_standard.pack_forget()
frm_sci.pack_forget()
def show_hide_sci_functions():
if frm_sci.winfo_ismapped():
frm_standard.pack()
frm_sci.pack_forget()
frm_symbols.pack_forget()
else:
frm_standard.pack_forget()
frm_symbols.pack_forget()
frm_sci.pack()
Finally, update init_gui_layout function in gui_layout.py:
def init_gui_layout():
place_nav_panel()
place_std_btns()
place_sci_func_btns()
place_symbols_btns()
frm_txtbox.pack()
frm_nav_buttons.pack()
frm_standard.pack()
lbl_trigonometry.pack()
frm_trig.pack()
lbl_inequality.pack()
frm_inequality.pack()
lbl_calculus.pack()
frm_calculus.pack()
lbl_log.pack()
frm_log.pack()
lbl_other.pack()
frm_other_sci.pack()
frm_expand_factor.pack()
Almost done! Now we need to program the last button, which will convert the text on an image to a string that Python can grasp.
Go to function.py and add the following functions:
def open_file():
filetypes = (
('Images files', '*.png'),
('All files', '*.*')
)
file_path = fd.askopenfile(filetypes=filetypes).name
return file_path
def read_from_image(image_path):
from PIL import Image
from pytesseract import pytesseract
path_to_tesseract = r"C:\Program Files\Tesseract-OCR\tesseract.exe"
img = Image.open(image_path)
pytesseract.tesseract_cmd = path_to_tesseract
text = pytesseract.image_to_string(img)
delete_paceholder()
txt_box.config(state='normal')
txt_box.insert(tk.END, text[:-1])
txt_box.config(state='disabled')
and add the line below:
from tkinter import filedialog as fd
which will import the file dialog from Tkinter to get the image path.
Wrapping Up
Congratulations, well done! I hope my article was of use. If you have any suggestions, I will be happy to respond to you.
Thank you for your time, take care.
To discover more interesting projects, click here.
History
- 30th October, 2023: Initial version
I am Rami Alshaar, and I'm passionate about software development. I'm currently seeking a software engineering degree. I mostly code in Python and I am working on becoming a better developer.


 General
  News
News  Suggestion
  Question
  Bug
Bug  Answer
  Joke
Joke  Praise
  Rant
Rant  Admin
Admin 


