Here we explore how to create a customer information application for a personalized retail shopping service, using Power Apps for Microsoft Teams.
In 2020, the pandemic brought the world to its knees, and nobody was prepared. Luckily, humans are a resilient bunch, and with disruption came transformation.
People and businesses have evolved: employees can now work remotely and coordinate with their team from the comfort of their own home. More small businesses are offering their products and services online.
Microsoft Teams and Power Apps have helped aid this digital transformation. Teams helps everyone communicate while Power Apps makes it easier for small businesses to conduct more of their business online.
Professional developers tend to shy away from user-friendly, low-code tools like Power Apps. However, when prototyping an idea, it’s easy to build a minimum viable product (MVP) with a Teams Power App and quickly share it with your client. You don’t need any additional hosting infrastructure, and you don’t need to write much boilerplate code. Best of all, there’s no maintenance. The small business owner can handle that themselves.
In this series, we’ll explore how a retail business can harness the power of both Power Apps and Teams for clienteling: using customer data to personalize interactions. We’ll build a simple, but powerful app that helps retail employees pull up a customer profile before an appointment. This profile contains the customer’s entire purchase history, helping employees customize each experience (and hopefully make more sales!)
In this first article of the series, we’ll demonstrate how to create and publish a Power Apps application for Teams, with a Dataverse database to hold customer information. In the second article, we’ll demonstrate how to create a user interface to create and modify customer records, connecting the application to the customer’s appointment history. In the final article, we’ll create and customize the customer’s user interface, then experience how it all comes together.
First, let’s define our use case. Acme Shop, a high-end fashion store, offers a personal shopping service. For every appointment, an associate needs to note what a customer is looking for and when they expect to pick it up. They also need to see the customer’s previous appointment and purchase details, guiding them in providing more personal, informed customer service.
Solution Overview
Let’s create an app that supports the following workflow:
- A customer contacts the shop to book an appointment.
- The customer representative creates a new entry in the app.
- The representative records the customer’s needs and makes recommendations based on data from prior appointments.
- A personal shopper sees a list of appointments, prepares a list of options, and sets them aside.
- The customer comes into the shop, meets with a consultant, tries on the clothes, and makes the purchase.
- The consultant then goes into the app and marks the appointment as completed.
There are two ways we can approach this: We can create a client-server application that involves registering a domain, hosting a server backend, purchasing storage, and using a client application in a platform. Or, we can build a simple Power Apps application inside Microsoft Teams, a communications tool many small businesses are already using, while Microsoft hosts our application and protects our sensitive data.
Let’s build our app in Microsoft Teams.
Why Teams?
Year over year, Teams’ daily active users in retail grew more than 280 percent. Front-line workers have increased their reliance on the Teams mobile app, with daily active users doubling since the beginning of the pandemic.
Embedding our app with Teams means employees can perform more of their duties in a single app, increasing their effectiveness and facilitating communications among team members.
Why should you care as a professional developer? While Power Apps for Teams is initially focused on low-code and no-code developers, it’s enough for a small retail business to create simple applications that satisfy their needs. There are many ways to use Power Apps to simplify your day-to-day work.
Adhering to the principle of "fail fast, validate early," Power Apps for Teams is a great tool for creating small prototypes to share with your client. Don’t be surprised when the business sees the potential of embedding an app within Teams then demands more complex functions.
There are more than 400 data sources available to Power Apps. Dataverse for Teams includes a robust set of capabilities for professional developers to create their data source, so we’ll use it for our retail application.
Without further ado, let’s start building our app.
Enable Power Apps for Teams
To create a Power Apps application for Teams, your organization first needs a Microsoft Office 365 subscription.
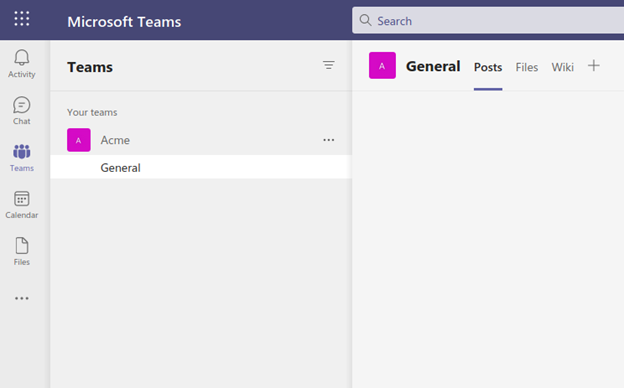
The image above is likely what your Teams application looks like when you initially log in. You need to enable Power Apps to start creating applications. To do this, click on the More option on the sidebar and search for Power Apps.

Follow the prompt to enable Power Apps.
Create a Power App for Teams
When you receive the "Power App is ready to go" message, you can create a new Power Apps application using the Power Apps menu.
Provide an app name and Power Apps studio will create a new templated app.
To experience the power of Power Apps, click the "Connect to Data" button and choose a data source.
This reveals the Data pane. Click on Add data, then click See all tables.
Notice you can choose from a set of ready-to-use tables and over 400 connectors. Let’s choose the ApplicationUsers table.
You should now see warning icons on the left side. It means the control on the left (BrowseGallery1) also needs to connect to the ApplicationUsers table.
Select the control and choose ApplicationUsers from the Data source dropdown.
Click Preview. You’ll see that, while simple, this is a fully functional create, read, update, and delete (CRUD) application using only data from the ApplicationUsers table.
Our CRUD app relies heavily on two controls: Vertical Gallery and Edit Form. Vertical Gallery is the control on the left, providing a summary of all available records in the table. The Edit Form is pre-configured to display the information selected from the gallery, enabling users to not only modify existing records, but also add new records to the table.
Let’s now create tables for our retail app.
Planning Our Entities
Our clienteling app needs two types of entities:
- Information about the customer, such as their name, email, and phone number.
- Information about the appointment, such as the date, its goal, notes, and an order number.
A customer can have many appointments, but each appointment can only link to one customer.
First, click Create a new table.
Enter "CustomerInfo" for our customer table. This reveals a data editor where we can create our columns and enter our initial data set.
Create the following columns using the appropriate data type:
Name: Text
A text field representing the name of the customer.
CustomerSince: Date
A date field indicating the date the customer signed up.
Email: Email
Stores the customer’s email address. Notice the field type is Email.
Phone: Phone
Stores the customer’s phone number.
Now, create the Appointment table with the following columns:
CustomerName: Text
A text field matching the customer’s name in the CustomerInfos table.
AppointmentDate: Date
A date field indicating when the customer is expected for the appointment.
Notes: Text
Any notes about the appointment. This can be filled by the person booking the appointment or the person completing the appointment. Click Advanced to increase text length.
Order #: Text
The order number associated with the purchase. It’s possible for a customer to not buy anything at the end of the consultation.
Purchases: Text
A text field filled by the consultant, describing what the customer has purchased. This information is valuable for future consultations.
Completed: Yes/No
A Boolean field with yes or no responses, indicating if the consultation is complete.
Notice these two tables are now available from the Data pane upon creation.
Next, let’s enter some data for these tables.
Try connecting the data source to the AppointmentInfo table (on the form, then on the gallery) and you’ll notice the app only allows you to perform CRUD operations on the AppointmentInfo table.
Now, we have a fully functional app that enables us to book and edit customer appointments.
Sharing the Application
When ready, you can add a Power Apps application to your Teams channel using the following steps:
- Click Publish to Teams.
- Select the channel to add the application to.
- Click Save and Close.
You can find more information regarding the available options in Microsoft’s Documentation.
Next Steps
This article explored how to create a customer information application for a personalized retail shopping service, using Power Apps for Microsoft Teams. We have enabled Power Apps in Teams and created a functional app using out-of-box defaults.
You can apply all sorts of customizations to the data source. For example, you can filter appointments by different criteria, such as today’s date. You can also configure the form layout on the Edit form.
In the next article, we’ll expand our basic app by connecting customer’s information with their appointment history, using some basic filtering and screen layouts. Later, we’ll close the series by modifying and creating data.
Check out our 7-Step Guide to Low-Code App Development to get starting using Power Apps today.
This member has not yet provided a Biography. Assume it's interesting and varied, and probably something to do with programming.


 General
  News
News  Suggestion
  Question
  Bug
Bug  Answer
  Joke
Joke  Praise
  Rant
Rant  Admin
Admin 


