Introduction
This post describes what I think is a fairly simple way to swap the eight soldered RAM chips found on many Apple IIe computers. There are many methods posted on the various forums about how to de-solder the existing RAM, however, I found the following approach using enamelled wire, to be very simple and effective.
Whilst this method did require some soldering skills, it did not require, the harder to obtain, de-soldering skills. Nor did the approach need any special tools apart from a simple 15 Watt soldering iron and some side cutters. Having said that, I would always recommend anti-static precautions.
The aim, in my case was to add sockets to the system board so that the new RAM could be plugged in. I found that by selecting a particular socket type, the job became even more straight forward.
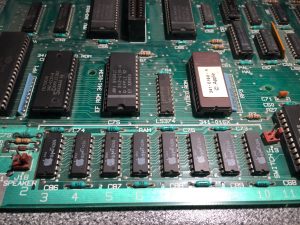
Before starting, disconnect the keyboard, speaker, ROM switch (if fitted) and PSU. Remove the system board, this can be done through the open lid, and retire to the bench with a mug of your favourite brew.
Removing the Existing RAM
This can be done most easily using side cutters from the top. Doing it from the top causes each successfully ‘snipped’ lead to spring away from the IC body and makes it very clear when the chip is free. DO NOT put any physical effort into removing the IC or you will most probably remove the track as well. The IC in question should fall away once all leads are cut.
Removing the IC pins is a simple matter using a soldering iron and a pair of tweezers.
If the track does become damaged, this should be fairly easy to fix from the underside of the board as many of the pins form the data bus and are simply connected to each IC in turn.
Removing Solder from the Plated Holes
This, I found, was best achieved from the top of the circuit board using some 24swg enamel wire. Enamel wire can easily be found in old transformers and so on, alternatively buy a few meters, it should be worth it.
Heat the top of the hole using the soldering iron, once the solder has properly melted, push the end of the length of wire through the hole and keep going for an inch or so. The wire should be pushed through with only a little force but quite quickly. If, as the wire touches the molten solder, the solder solidifies, simply try again but with an extra second or two of heat first. Snip the wire at the top and pull through from the bottom. With the enamelled wire, the solder doesn't stick to it, it is simply pushed/dragged clear of the hole. Repeat this another 127 times and you're done. If the hole doesn’t seem to clear of solder, just repeat the process.
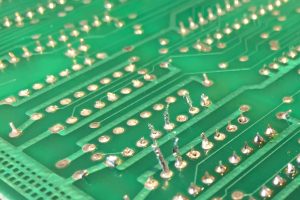
The photo of the underside of the board shows how the enamel wire pushes and drags the solder through the hole.
The Sockets
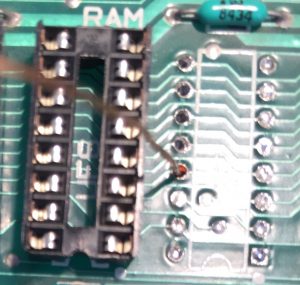
When re-socketing, I found that the IC Sockets that worked the best were those where the pin can be removed from the top (see photos). This meant that as I pushed the socket gently into position, any holes that were not quite clear enough would simply push the respective pin proud of the top of the socket. This meant that the socket would sit on the board quite easily with the odd pin sticking up. A dob with the soldering iron underneath whilst pushing any protruding pins down, easily sorts this out. I suspect other socket types would have been a little trickier.
New RAM
I bought a collection of second hand RAM from Steve Buggie (ebay: buggie4vrl) who, as usual, was very helpful. I have noticed that there are several sellers claiming to be selling new stock also.
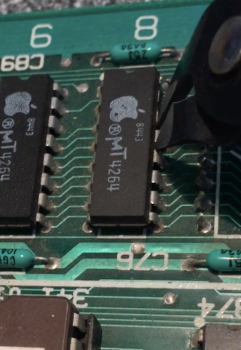
My machine had 4264 RAM but I fitted 4164 as it was what I had from Steve. The 4264 seems to be compatible with devices needing the 1×64 4164, despite the different internal organisation of memory. The IIe needs 64×1 bit so 4164 should be OK.
The RAM that was removed seemed to be 150ns (4264-15) I replaced with the faster 4124-12 and figured this would be within Apples original spec.
Testing
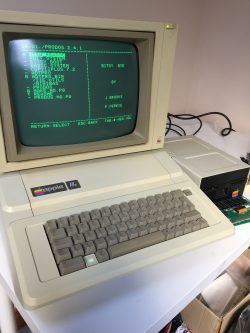
I tested continuity of the power and data bus connections using a digital multimeter to make sure that no tracks were damaged before popping in the new RAM and reconnecting the system board. The internal diagnostics routine of the IIe was used to check things further followed by some diagnostics software to confirm that all was well. The system now boots up and is a fully working UK Apple IIe.
Conclusion
I found this fairly easy using only basic tools, and whilst I am reasonably experienced at soldering, I am no expert.
I know that the IIe is not rare, however, it is still very satisfying to return one to full health for someone to enjoy.


 General
  News
News  Suggestion
  Question
  Bug
Bug  Answer
  Joke
Joke  Praise
  Rant
Rant  Admin
Admin 


