In this article, I will be presenting the ASP.NET Web API Javascript Clients NuGet that generates Javascript/AngularJS/JQuery/NodeJS boilerplate code to access your ASP.NET Web API services.
Introduction
Creating REST services, or at least web services that communicate over HTTP using simple XML or JSON from Visual Studio has never been that easy as with the ASP.NET Web API (2).
But what about the service consuming side? Suppose you’re also writing an AngularJS client to your API. What will come in really handy, are the help pages to your API that have been generated by the ASP.NET Web API toolkit.
Still, you’ll have some boilerplate code to write. The richer your API, the more boilerplate code you’ll have to write. And while you are developing both your API and client in parallel, you will constantly have to edit/extend that boilerplate code.
This article presents a NuGet component that generates boilerplate code to access your API from JavaScript so you don’t have to write it anymore.
The NuGet package is published on NuGet.org:
https://www.nuget.org/packages/Arebis.AspNet.WebApi.JsClients.cs/.
The Idea
In fact, the idea is simple: the documentation pages of the Web API are generated on the fly based on your API code. Great about this, is that the documentation is always up to date with your online API version.
Now, take the same code that generates the documentation pages, but change the output to be not HTML, but JavaScript code that will be able to call the API, and you have the client side boilerplate code needed to call your API, and what’s more, it is always up to date with your online API version.
Getting Started
Try out the package as follows: create a new ASP.NET Web Application (in C#). Then select the Web API template. Don’t forget to change authentication to whatever you want:

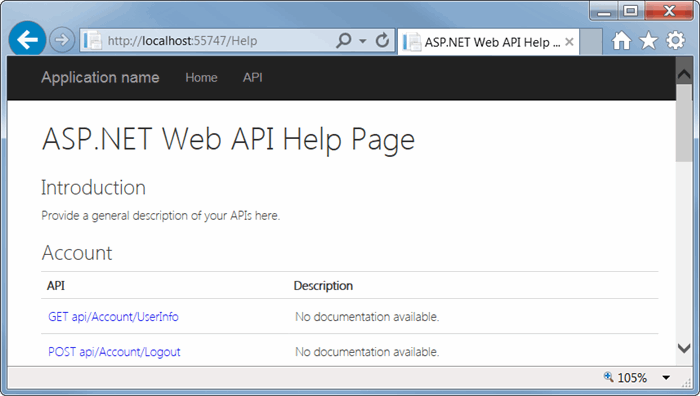
If you now press F5 to run your site, you get the following homepage:
The API link on top of the page brings you to the API help pages.
Close your browser to stop your application, and choose to add a NuGet package (right-click on your project, and choose “Manage NuGet Packages…”)
In the search box (top right), type “arebis” and install the “Arebis ASP.NET Web API Javascript Clients”:
Run your solution again by pressing F5. You will now find a “Clients” link on top of your page:
Note: If you do not have the “Clients” link, don’t worry, simply navigate to the “/Client” page of your site (i.e., http://localhost:55747/Client, but with the portnumber of your site). The NuGet package may fail to add the “Clients” link if your _Layout.cshtml template was altered.
Clicking on the “Clients” link will bring you to the following page, where you can choose what client library you want to use, depending on the type of JavaScript client you want to write:
Clicking on the AngularJS link will bring you to the following page:
You can now download the client code to embed in your client app locally. Or you can copy the <script> tag to the HTML of your Angular application to have an autogenerated and always up-to-date version of the client code.
The remainder of the page shows what code is generated to call your API. In the case of Angular, an Angular module is generated with a service factory for each API controller class.
Note that the module name is “api_AppName_From_WebConfig_AppSettings.service”. As the name suggests, this name is based on the Api.AppName key in your web.config.
Stop your application, update the Web.config’s Api.AppName appSetting value to whatever you want to name your API:
Then start your application again (F5), click on Clients, the Angular client, and you will see the module’s name has changed. The code now looks like (shortened to contain only the first method of the first controller):
angular
.module('myAwesomeApi.services', [])
.factory('accountService', ['$http', function($http) {
function AccountService() {
this.getUserInfo = function () {
return $http({
method: 'GET',
url: _myAwesomeApi_services_url + '/api/Account/UserInfo',
cache: false
});
};
}
return new AccountService();
}])
;
You will also find NodeJS boilerplate code, that exports a module. JQuery/Ajax code. And plain JavaScript code using XMLHttpRequest.
More about the Generated Code
Be it the AngularJS, NodeJS, JQuery or XMLHTTPRequest template, they all generate code in a similar manner: the whole API forms a single JavaScript file.
For each API controller class, a ‘service’ is created.
For each API controller action, a method is defined on the service. The return value of the method depends on the client template used. To support asynchronous calls, usually an object is returned that will perform the call asynchronously and return a result later.
For instance, in the AngularJS templates, the methods return a HttpPromise object from the $http service (https://docs.angularjs.org/api/ng/service/$http).
For JQuery, the methods return a jqXHR object from $.ajax() (http://api.jquery.com/jquery.ajax/).
The name of the method on the service matches the name of the .NET controller’s method. This can be a problem when overloading is used in .NET. For instance, the ValuesController that is given with the Web API template has two ‘Get’ methods. One, with no arguments, that returns all values, and one that takes an id and only returns the matching value.
Since JavaScript does not support overloading, the generated methods will be named ‘get’ and ‘get2’. You can easily avoid this situation by renaming the first Get action method into GetAll. The generated JavaScript methods will now be named ‘getAll’ and ‘get’.
In fact, since the JavaScript code generator uses the names of the .NET action methods, it’s a good idea to give more descriptive names to your .NET methods. You can even get rid over the requirement to start the method name with Get, Post, Put, Delete… by using [HttpGet], [HttpPost], [HttpPut], [HttpDelete],… attributes to override the naming convention.
Sample
Take, for instance, the following API controller action:
[HttpGet, Route("OfCustomer/{customerId:int}/Unpaid")]
[ResponseType(typeof(Invoice[]))]
public IHttpActionResult ListOpenInvoicesOfCustomer(int customerId)
{
var invoices = new Invoice[] {
new Invoice() { Id = 1, CustomerId = customerId, Date = DateTime.Today },
new Invoice() { Id = 2, CustomerId = customerId, Date = DateTime.Today },
new Invoice() { Id = 3, CustomerId = customerId, Date = DateTime.Today }
};
return Ok(invoices);
}
As you see, I have named the action method “ListOpenInvoicesOfCustomer”, but using attributes, made clear to WebAPI that a GET request is expected.
The API Help page will show this API method as:
Notice how the action name “ListOpenInvoicesOfCustomer” is not part of the URL. This means I can change the action method name without impacting the URL on which the API method is called.
Note:
If the Description column of your Web API Help Page says “No documentation available” while you added XML documentation on your controller class and action methods, make sure you have enabled XML documentation file generation in the Build settings of your project, and have edited the Areas/HelpPage/App_Start/HelpPageConfig.cs file to install an XmlDocumentationProvider using the generated XML documentation file.
Calling the Operation from AngularJS
The following page contains an AngularJS application that calls the ListOpenInvoicesOfCustomer operation:
<!DOCTYPE html>
<html>
<head>
    <title>Open Invoices</title>
    <script src="https://ajax.googleapis.com/ajax/libs/angularjs/1.2.0/angular.min.js">
    </script>
    <script src="http://localhost:55747/Client/AngularJS"></script>
    <script>
        angular
            .module('MyApp', ['myAwesomeApi.services'])

            .controller('openInvoicesController', function ($scope, invoiceService) {
                invoiceService.listOpenInvoicesOfCustomer(5)
                .success(function (data) {
                    $scope.invoices = data;
                });
            });
    </script>
</head>
<body ng-app="MyApp" ng-controller="openInvoicesController">

    <h1>Open invoices</h1>
    <table>
        <tr>
            <th>Id</th>
            <th>CustomerId</th>
            <th>Date</th>
        </tr>
        <tr ng-repeat="invoice in invoices">
            <td>{{invoice.Id}}</td>
            <td>{{invoice.CustomerId}}</td>
            <td>{{invoice.Date | date:'shortDate'}}</td>
        </tr>
    </table>

</body>
</html>
In the head, the angular.min.js script is included from the Google CDN. Then, also the service’s script is included using:
<script src="http://localhost:55747/Client/AngularJS"></script>
Next, an Angular application is defined with a dependency on the myAwesomeApi.services, which makes the invoiceService available for injection in the openInvoicesController. This controller calls the listOpenInvoicesOfCustomer method, for – hardcoded in this example – customer 5 and on success writes the information on the $scope.
The body of the page contains a table that lists all invoices on the $scope.
Calling the Operation with JQuery
The following page shows how you could use the JQuery code to fill a datatable from datatables.net.
<!DOCTYPE html>
<head>
    <title>Open Invoices</title>
    <script src="https://code.jquery.com/jquery-2.1.3.min.js"></script>
    <link rel="stylesheet" type="text/css"
          href="//cdn.datatables.net/1.10.4/css/jquery.dataTables.css">
    <script src="//cdn.datatables.net/1.10.4/js/jquery.dataTables.js"></script>
    <script src="http://localhost:55747/Client/JQueryAjax"></script>
    <script>
        $(function () {
            $.myAwesomeApiServices.invoice.listOpenInvoicesOfCustomer(5)
            .success(function (data, textStatus, jqXHR) {
                $('#openInvoices').DataTable({
                    data: data,
                    columns: [
                        { title: 'Id', data: 'Id' },
                        { title: 'CustomerId', data: 'CustomerId' },
                        { title: 'Date', data: 'Date', type: 'date' }
                    ]
                });
            });
        });
    </script>
</head>
<body>
    <h1>Open invoices</h1>
    <table id="openInvoices"></table>
</body>
</html>
In the head, you’ll find the references to JQuery and the JQuery datatables, then you’ll find the reference to the JQueryAjax service script.
Then the jQuery document ready handler calls the lostOpenInvoicesOfCustomer method, for – hardcoded in this example – customer 5 and on success transforms the openInvoices table into a data table using the returned data.
How is it Implemented ?
Installing the NuGet package adds a ClientController class (in C#, that’s why you need a C# project) as well as a series of views for the Client controller. The following screendump highlights the files that are added by the NuGet package.
In addition, the NuGet package adds an “Api.AppName” AppSetting key to your Web.config, and tries to add the “Clients” top menu link in the Views/Shared/_Layout.cshtml page.
The ClientController is quite special, as it has no actions, but instead overrides the HandleUnknownAction method. That way, to add a client, simply add its view. There’s no need to change the controller or to add an additional controller action method.
The controller’s HandleUnknownAction will fill the ViewBag with some information about your application, and then execute the view matching the given action name.
AngularJS.cshtml, jQueryAjax.cshtml, NodeJs.cshtml and XMLHttpRequest.cshtml are just regular views returning JavaScript code.
Index.cshtml is the view you get when navigating to the Clients link: it gives you an overview of the available client libraries by listing the *.cshtml files located in the Views/Client folder.
View.cshtml is a view that shows the download link and source code of the client identified by the Id of the route. For instance, http://localhost:55747/Client/View/AngularJS will display a page with a download link to http://localhost:55747/Client/AngularJS.
Updating and Extending
Since the NuGet only contains source code, you can easily change the output of the generated code. Or add support for additional libraries, by copying an existing client view and change it to match the client you want to support.
If you create cool additional boilerplate templates, you could even distribute them as NuGet package that adds views to the Views/Client folder and is marked dependent on this package…
History
- 2nd February, 2015: Initial version
Senior Software Architect and independent consultant.


 General
  News
News  Suggestion
  Question
  Bug
Bug  Answer
  Joke
Joke  Praise
  Rant
Rant  Admin
Admin 


