Introduction
This article demonstrates how easy it is to implement validations in your WPF Application based on MVVM pattern. The article assumes that you are familiar with WPF and have a sound knowledge of MVVM pattern (if not, then there are lots of articles available online to learn).
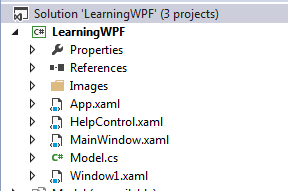
Let’s begin by first creating a simple demo WPF application as shown in the below screenshot, I have named my application as LearningWPF and we shall work with MainWindow.xaml file for this example.
To design this application using MVVM pattern, I have created one model class Employee in Model.cs file. With basic properties like EmpName for employee’s name, EmpSalary for employee’s salary, Gender for employee’s gender & TaxApplicable to store/get tax applicable and variables encapsulated by these properties.
using System.ComponentModel;
public class Employee : INotifyPropertyChanged, IDataErrorInfo
{
string empname;
string empSalary;
public Employee()
{
}
public string EmpName { get { return empname; } set { empname = value; } }
public string EmpSalary { get { return empSalary; } set { empSalary = value; } }
public event PropertyChangedEventHandler PropertyChanged;
protected void OnPropertyChanged(string name)
{
PropertyChangedEventHandler handler = PropertyChanged;
if (handler != null)
{
handler(this, new PropertyChangedEventArgs(name));
}
}
}
As required in MVVM pattern, my View Model is implementing INotifyPropertyChanged interface and has implemented method OnPropertyChanged, along with this the view model also implements IDataErrorInfo interface which is the center of attraction for this article. You need to add a reference to System.ComponentModel to your view model references to implement IDataErrorInfo interface. Once you add the interface, Visual Studio IDE will give you option to implement the interface like below:

When you implement the interface, it creates one public property Error of return type string and one Indexer which again returns a string. Both of these properties are read-only.
public string Error
{
    get { throw new NotImplementedException(); }
}

public string this[string columnName]
{
    get { throw new NotImplementedException(); }
}
Out of these two, we can leave Error Property for now the way it is. The indexer property is where all the action is. Let’s say we want to validate just name and salary of the employee for now, where name should have at least 6 characters alphabets only and salary must be numeric data.
The indexer property so created shall validate each property of the class for the value it holds and return appropriate error message. For our example, we only need to implement for EmpName and EmpSalary properties as under:
public string this[string columnName]
        {
            get
            {
                string errorMsg = String.Empty;
                if (columnName.Equals("EmpName"))
                {
                    if (String.IsNullOrEmpty(this.empname))
                        errorMsg = "Employee Name is a mandatory field";
                    else if (this.empname.Length < 6)
                        errorMsg = "Employee Name must contain at least 6 characters";
                }
                else if (columnName.Equals("EmpSalary"))
                {
                    int salary;
                    if (string.IsNullOrEmpty(this.empSalary))
                        errorMsg = "Salary is mandatory field";
                    else if (Int32.TryParse(this.empSalary, out salary))
                        errorMsg = "Salary must only contain numbers";
                }
                else
                    errorMsg = String.Empty;

                return errorMsg;
            }
        }
That’s it from the view model aspect, now moving towards our XAML section, WPF provides ready properties to be set for controls which internally talk with these indexers and validate data entered. We need to set 3 properties in XAML file, namely ValidatesOnDataErrors, ValidatesOnExceptions & NotifyOnValidationError to True. Like below. I have also made the binding mode as Twoway here, just to notify my validation code that there’s some changes being made on the UI front end.
<TextBox x:Name="txtEmpName" Text="{Binding Path=EmpName,
    Mode=TwoWay, ValidatesOnDataErrors=True, ValidatesOnExceptions=True,
    NotifyOnValidationError=True}" Width="250" Height="30"
    Margin="188,14,65,267" />
As soon as you run your application, you’ll find that the two controls we have validated is highlighted red. Like below:
To actually display what error is being generated, we can have various ways of doing this either as error text underneath the control or show it as tooltip, the code below demonstrates how to show it as tooltip. Add the following XAML section to your Window’s resources section. Where we are targeting all Textboxes and setting their tooltip to error message we generated in that indexer property earlier. All this action will take place only when there are validation errors.
<Window.Resources>
        <Style TargetType="TextBox">
            <Style.Triggers>
                <Trigger Property="Validation.HasError" Value="true">
                    <Setter Property="ToolTip"
          Value="{Binding RelativeSource={x:Static RelativeSource.Self},
Path=(Validation.Errors)[0].ErrorContent}"/>
                </Trigger>
            </Style.Triggers>
        </Style>
    </Window.Resources>
Now after this when you hover over any control which is causing validation error, it would show like this:
Hope this helps in implementing validation for your WPF application. There are several other links which shall help you understanding deep into how IDataErrorInfo interface works and how we can implement validation framework using attributes like we do in modern web technologies, for example MVC.
This member has not yet provided a Biography. Assume it's interesting and varied, and probably something to do with programming.


 General
  News
News  Suggestion
  Question
  Bug
Bug  Answer
  Joke
Joke  Praise
  Rant
Rant  Admin
Admin 


