Visit the Ultimate Toolbox main page for an overview and configuration guide to the Ultimate Toolbox library.
Source code and project files for this sample can be found in the samples\gui\ExtendedEditControls directory of the sample projects download.
Contents
The Ultimate Toolbox provides several extended edit controls that can be easily implemented.
COXEdit is a CEdit derived class that extends the functionality of the standard edit control.
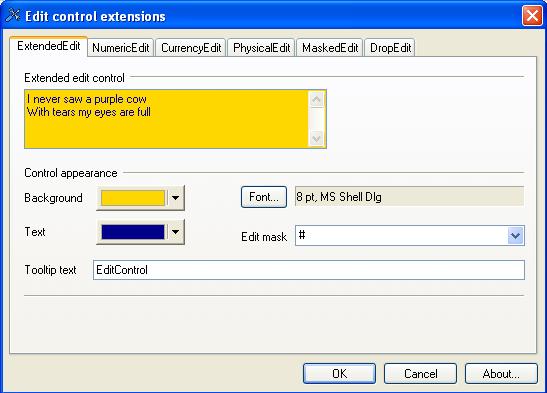
COXEdit allows you to easily set/change the following features:
- text color
- background color
- tooltip text
- mask that defines literals (uneditable symbols)
Using the Class
It's really easy to use the COXEdit class. You just work with it as with the standard CEdit class plus you can call the following functions in order to exploit the new features:
SetTextColor()GetTextColor()SetBkColor()GetBkColor()SetToolTipText()GetToolTipText()SetMask()GetMask()
Refer to the class function reference for details on all public functions.
The most interesting new feature is the ability to set a mask of literals to the control. The mask should be specified as "LeftLiterals#RightLiterals" where '#' stands for editable contents (input data) and 'LeftLiterals' defines the non-editable text that will be displayed to the left from editable text, and 'RightLiterals' defines the text that will be displayed to the right from the editable text. For example, you can define a mask as "Phone:#".
Note: If you have to use the '#' symbol as a literal then you have to use '##' instead.
In order to retrieve only the data that was typed in, you can use the following function:
Also, the COXEdit control internally provides support for two different edit modes: insert (the default) and overtype. When the user presses the 'Ins' key the editing modes are switched. Programmatically, you can change edit mode using the SetInsertMode() function. In order to retrieve the flag that specifies the current edit mode, you can use the GetInsertMode() function.
In the library, a number of special derivations of the COXEdit control are provided: COXNumericEdit, COXCurrencyEdit, and <a class=""code-string"" href=""%3Cspan"">"UltimateToolbox_PhysEdit.aspx">COXPhysicalEdit</a> (angle, length, temperature and time edit controls).

COXNumericEdit is a COXEdit derived class that was designed specifically to support the editing of numeric data. While all COXEdit features are available in the COXNumericEdit class, there are a lot of additional features introduced in this class that primarily have to do with numeric data editing and displaying rules.
The following features are available:
- setting a maximum number of decimal digits that might be typed in (indefinite number is one of the options)
- symbol that represent decimal separator
- number of fractional digits displayed (value of zero means there is no fractional part)
- number of decimal digits divided in groups
- symbol that represent group separator
- flag that specifies if leading zero must be displayed or not
- text color for negative value
- format of numeric data for positive value
- format of numeric data for negative value
Initially COXNumericEdit control retrieves default locale data for above described settings, but all of them can be changed at runtime using public functions defined in COXNumericEdit class (refer to the class function reference for further details).
Also note that the format for positive and negative values must be defined as "Literals1.1Literals", where "1.1" stands for numeric value and "Literals" could consist of any symbol(s). For example, if format "(1.1)" had been specified for negative value then value -5.26 would have been displayed as "(5.26)"
COXCurrencyEdit is a COXNumericEdit derived class that was designed specifically to support editing of currency data. Currency is numeric data but it is also required to display the currency name in the control. So the COXCurrencyEdit class merely adds the following two functions with which you can set or retrieve currency name:
SetCurrencyName()GetCurrencyName()
By default we use the current default locale to get currency name.
Note that the format for positive and negative values for COXCurrencyEdit must include the placeholder for currency name as one of the literals. We use '$' symbol as universal currency placeholder. For example, if format "1.1$" had been specified for positive value using SetPositiveFormat() function then value 5.26 would have been displayed as "5.26$".
COXDropEdit is a template class that provides the functionality of adding dropdown button to any edit control. Dropdown button is displayed on the right or left side of the edit box and takes all height of the control window. The width of the dropdown button can be set programmatically (by default we use the width of the current width of the scroll bar).
The dropdown button is clickable and combination of 'pressed down' and 'unpressed' events would generate 'dropdown' event that can be handled by a programmer. By default, COXDropEdit class allows you to display associated menu (see below how to associate a menu with COXDropEdit).
At any time you can hide or show the dropdown button. Internally, the dropdown button resides in the non-client area so this class can be safely used with most of customized edit controls. For example, you can use it with our extended controls (COXEdit, COXNumericEdit, COXCurrencyEdit, COXMaskedEdit) without any problems. In fact, we've updated our COXPhysicalEdit class to be derived from COXDropEdit in order to provide the functionality of changing the base unit by clicking on the dropdown button and choosing the unit from the popup menu.
Using the Class
A programmer would normally use the COXDropEdit class as a base class. Let's go through the steps of creating a simple edit control that will display a popup menu as the result of clicking on the dropdown button. After the user chooses an item in the menu the text in the edit box will be updated correspondingly.
- Derive your own class from
COXDropEdit using any existing edit class as the base one:
class CMenuEdit: public COXDropEdit<CEdit>
In this case we've declared the class using the standard CEdit as the base class.
- Declare the following protected virtual function in the class that will be called every time the dropdown button is clicked:
virtual void OnDropButton();
In our case we would use the default implementation of this function as long as we are going to display the menu (this functionality provided by COXDropEdit by default). But, generally, you can put any functionality you please here: e.g. a display popup window or dialog.
void CMenuEdit::OnDropButton()
{
    COXDropEdit<CEdit>::OnDropButton();
}
- Declare the following protected member for the popup menu that will be displayed when the dropdown button is clicked:
CMenu m_menu;
In order to associate a menu with COXDropEdit object you have to call the following COXDropEdit function:
AssociateMenu();
and the pointer to the associated menu can be retrieved using this function:
GetAssociatedMenu();
- So we need to create popup menu and associate it with the object. We suggest you can do that in the following
COXDropEdit protected virtual function that should be overridden in CMenuEdit class:
virtual BOOL Initialize();
This function is called right after creation or subclassing of a previously existing control. Primarily it was designed in order to provide a programmer with the functionality that can be used in order to safely initialize the control. This function must return TRUE if the control has been successfully initialized or FALSE otherwise. In your implementation you must call the parent implementation first of all.
BOOL CMenuEdit::Initialize()
{
    if(!COXDropEdit<CEdit>::Initialize())
        return FALSE;

    if(!m_menu.CreatePopupMenu())
        return FALSE;
    for(int nIndex=1; nIndex<=10; nIndex++)
    {
        CString sMenuText;
        sMenuText.Format(_T("Item %d"),nIndex);
        m_menu.AppendMenu(MF_STRING,nIndex,sMenuText);
    }
    AssociateMenu(&m_menu);

    return TRUE;
}
- In this example we'll display the popup menu as a result of dropdown event. In order to handle the process of choosing the menu item we have to provide a
WM_COMMAND handler for the class using the ON_COMMAND_RANGE() or ON_COMMAND() macro. For this simple example our actions are not going to depend on the chosen item so we would define our handler as follows:
afx_msg void OnMenuSelect(UINT nID);
. . . . . . . . . . . . . . . . . .
BEGIN_MESSAGE_MAP(CMenuEdit, CEdit)
ON_COMMAND_RANGE(1,10,OnMenuSelect)
END_MESSAGE_MAP()
. . . . . . . . . . . . . . . . . .
void CMenuEdit::OnMenuSelect(UINT nID)
{
CString sItem;
m_menu.GetMenuString(nID,sItem,MF_BYCOMMAND);
CString sText;
sText.Format(_T("<%s> has been picked"),sItem);
SetWindowText(sText);
}
- We've gone through all the major steps that should be taken in order to implement a
COXDropEdit derived object. Below you will find information about some useful COXDropEdit functions that you might want to use in your applications:
- the following two protected virtual functions can be overridden in order to customize the appearance of the dropdown button:
virtual CRect DrawButtonFrame(CDC* pDC, CRect rect, BOOL bPressed);virtual void DrawButtonImage(CDC* pDC, CRect rect, BOOL bPressed);
- the following functions can be used in order to set/retrieve the width of the dropdown button:
SetButtonWidth();GetButtonWidth();
- these functions can be used in order to show/hide the dropdown button and to retrieve the flag that specifies the visibility of the dropdown button:
void ShowButton();BOOL IsButtonVisible();
As we mentioned before we use COXDropEdit derivation with our COXPhysicalEdit class. Also, we designed and implemented a number of COXDropEdit derived classes with predefined functionality. These classes are: COXBrowseColorEdit (edit control with color picker using our COXColorPickerCtrl), COXBrowseDirEdit (edit control with Directory Picker using our COXFolderPicker), COXBrowseDirEdit16 (edit control with Directory Picker using our COXDirectoryDialog), COXBrowseFileEdit (edit control with File Picker using standard CFileDialog).
You'll find a full class reference for COXDropEdit and the other classes mentioned here in the Graphical User Interface | Edit Controls section of the compiled HTML documentation.
You might also want to examine the phsyical unit edit controls that are specialized for input of specific measurements and conversions.
Initial CodeProject release August 2007.
In January 2005, David Cunningham and Chris Maunder created TheUltimateToolbox.com, a new group dedicated to the continued development, support and growth of Dundas Software’s award winning line of MFC, C++ and ActiveX control products.
Ultimate Grid for MFC, Ultimate Toolbox for MFC, and Ultimate TCP/IP have been stalwarts of C++/MFC development for a decade. Thousands of developers have used these products to speed their time to market, improve the quality of their finished products, and enhance the reliability and flexibility of their software.


 General
  News
News  Suggestion
  Question
  Bug
Bug  Answer
  Joke
Joke  Praise
  Rant
Rant  Admin
Admin 


