
Drilldown Hierarchical Data Using GridView and JQuery
4.18/5 (3 votes)
How to drilldown hierarchical data using GridView control
Introduction
In our day to day work, we need to display hierarchical data to user and allow user to drilldown data for detail information. In my earlier topic “Drilldown Hierarchical Data Using MVC and JQuery”, I showed how to drilldown data for MVC application. However, there are still need to display hierarchal data in ASP.NET Web Form based application.
In this topic, I will walk you through how to create a drill down tabular data using GridView control for ASP .NET Web Form application. Please, note that I am concentrating on the functionality instead of making it nice. In this demonstration, I am going to use Student object for student information. Student object will contain Course object for course description.
1.0 Create ASP.NET Web Application
Using Visual Studio 2010, create a new ASP.NET Web Application. By default, Visual Studio creates several files for the application. In this demo we are going to display Student information in StudentView.aspx page. When user click on a Student record, we will load data for the Course and insert it into the StudentView.aspx under the selected record. To display Course data, we will need to create a separate page CourseView.aspx. You will find the detail of loading the CourseView.aspx into the StudentView.aspx in later sections.
Add a new “Web Form using Master Page” and name it StudentView.aspx. As the CourseView.aspx will be inserted into the StudentView.aspx page, we don’t need to display any information from Site.Master page. Hence add a new “Web Form” and name it CourseView.aspx.
Right click on the StudentView.aspx page and from the context menu select “Set as Start Page”.
2.0 Add JQuery scripts to project
Open Site.Master and add the following JQuery references inside the Head section.
     <script type="text/javascript" src="Scripts/jquery-1.8.2.min.js"></script>
     <script type="text/javascript" src="Scripts/jquery-ui-1.8.24.min.js"></script>
By default, ASP.NET adds older version of JQuery libraries into the project. You will need the new version into the Scripts folder of the application and add those files into the project. You can find those files from www.JQuery.com or from the attached demo application.
3.0 Create Data Model (Student and Course)
From the Solution Explorer, right click on the Project and add a new folder. Name the folder Model. Under the Model folder add a Class and name it Student. Now, the Model folder should have the Student.cs class. Similarly, create another class and name it Course.
Open Student.cs and add fields.
namespace DrillDownDemo.Model
{
    public class Student
    {
        public int ID { get; set; }
        public String FirstName { get; set; }
        public String LastName { get; set; }
        public String Address { get; set; }
        public String email { get; set; }
        public String Department { get; set; }
        public List<Course> Courses = new List<Course>();
    }
}
Open Course.cs and add fields
namespace DrillDownDemo.Model
{
    public class Course
    {
        public String CourseName { get; set; }
        public String SemesterName { get; set; }
    }
}
4.0 Data for Students and Courses
For this demo application, we are going to use static data. Create new folder and name it Data. Under the Data folder, add a class StudentData. This static class will have a list of student objects and each student object will have list of course objects. Open StudentData.cs file and add following data.
public static List<Model.Student> Students = new List<Model.Student>()
            {
                new Model.Student
                { ID = 1, FirstName = "Jhon", LastName = "Smith",
                            Courses = new List<Model.Course>()
                            {
                                new Model.Course { ID = 1, CourseName = "CS 101",
							SemesterName = "Winter 2010"},
                                new Model.Course { ID = 2, CourseName = "MATH 102",
							SemesterName = "Fall 2010"},
                                new Model.Course { ID = 3, CourseName = "ENG 103",
							SemesterName = "Winter 2011"},
                                new Model.Course { ID = 4, CourseName = "EE 104",
							SemesterName = "Fall 2012"}
                            }
                },
                new Model.Student
                { ID = 2, FirstName = "Jorge", LastName = "Garcia",
                            Courses = new List<Model.Course>()
                            {
                                new Model.Course { ID = 5, CourseName = "CS 205",
							SemesterName = "Winter 2010"},
                                new Model.Course { ID = 6, CourseName = "MATH 206",
							SemesterName = "Fall 2010"},
                                new Model.Course { ID = 7, CourseName = "ENG 207",
							SemesterName = "Winter 2011"},
                                new Model.Course { ID = 8, CourseName = "EE 208",
							SemesterName = "Fall 2012"}
                            }
                },
                new Model.Student
                { ID = 3, FirstName = "Gorge", LastName = "Klene",
                            Courses = new List<Model.Course>()
                            {
                                new Model.Course { ID = 9, CourseName = "CS 301",
							SemesterName = "Winter 2010"},
                                new Model.Course { ID = 10, CourseName = "MATH 302",
							SemesterName = "Fall 2010"},
                                new Model.Course { ID = 11, CourseName = "ENG 303",
							SemesterName = "Winter 2011"},
                                new Model.Course { ID = 12, CourseName = "EE 304",
							SemesterName = "Fall 2012"}
                            }
                }
};
Also this static class, needs two methods. GetStudentData method will return list of Students and GetCourseData method will return the list of Course for a particular student.
public List<Model.Student> GetStudentData()
{
	return Students;
}
public List<Model.Course> GetCourseData(Int32 studentID)
{
	List<Model.Course> c = Students.Find(p => p.ID == studentID).Courses;

	return c;
}
5.0 Modify Pages
5.1 Modify StudentView.aspx
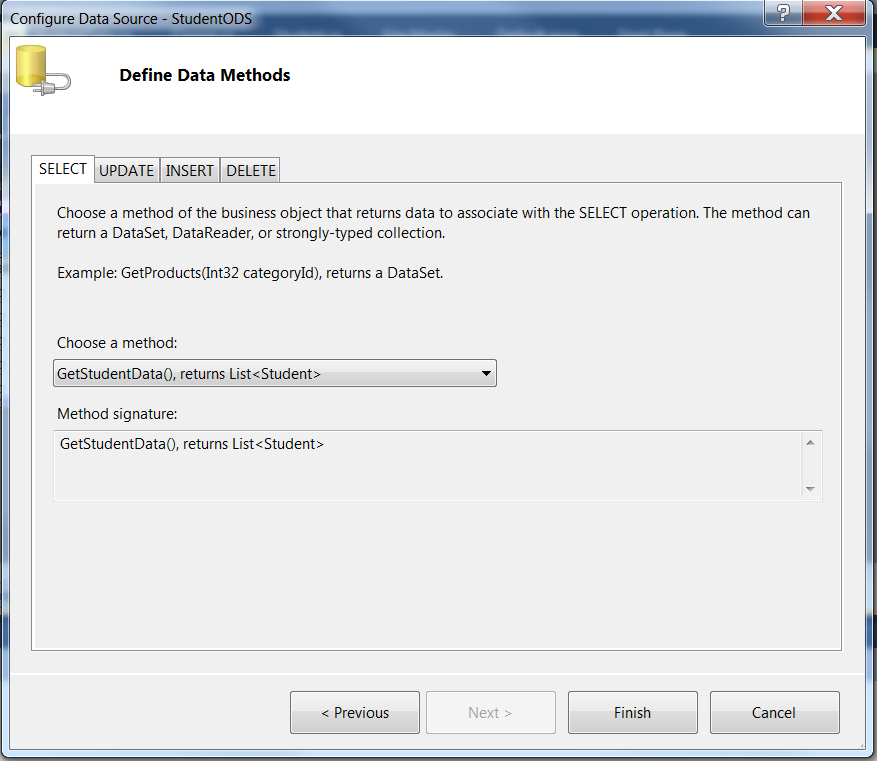
Open StudentView.aspx in Design mode. From the Toolbox, drag “ObjectDataSource” and drop into the page. Set the ID of the ObjectDataSeource1 to a meaningful one. For example, StudentODS. Now you need to configure the StudentODS so that it can retrieve data for Students. Click on the context menu of the StudentODS and select “Configure Data Source…” Configuration wizard will open. From the “Choose your business object” dropdown list, select “DrilldownDemo.Data.StudentData”. If you don’t find it in the list, then do a build of the application, which will compile the project and the StudentData object will be available in the list.

Click on the Next button. Select “GetStudentData” method from the “Choose a method” dropdown list for the Select option (tab). And click on the Finish button.
Now drag and drop the GridView from the Toolbox. Select StudentODS for the Data Source of the GridView. Give a meaningful name to the GridView. For example, StudentGridView.
Either using Design or Source mode of the StudentView.aspx page, add a TemplateField as a first column of the StudentGridView. For the ItemTemplate of the TemplateFiled, add two hyperlink as following code
<asp:TemplateField>
	<ItemTemplate>
		<a href="#" class="collapse expand-btn">
			<img src="Images/Plus.gif" alt="+"/>
		</a>
              	<a href="#" class="expand collapse-btn">
			<img src="Images/Minus.gif" alt="-" />
		</a>
	</ItemTemplate>
</asp:TemplateField>
First hyperlink shows the “+” image (Expand) so that user can click on this and see Course information. Other one collapses the Course information.
There are two classes in each class attribute of those hyperlinks. For example, ‘+’ (Expand) link has “collapse” and “expand-btn”. These two classes will be used to control the drill down. We don’t need to define those as a style (css file). These will be used by JQuery method to find the proper Student row to display or hide the content and also for handling click event. More detail will be described in the JQuery section.
5.2 Modify CourseView.aspx
Open CourseView.aspx in Design mode. From the Toolbox, drag and drop a Panel. Name the Panel CoursePanel. Set the Height property of the Panel to 100px. Set the ScrollBars property of the Panel to Auto. This will allow to setup horizontal and/or vertical scroll bar depending on the number of records of course.
From the Toolbox, drag “ObjectDataSource” and drop into the page. Set the ID of the ObjectDataSeource1 to a meaningful one. For example, CourseODS. Now you need to configure the CourseODS so that it can retrieve data for Courses. Click on the context menu of the CourseODS and select “Configure Data Source…” Configuration wizard will open. From the “Choose your business object” dropdown list, select “DrilldownDemo.Data.CourseData”. If you don’t find it in the list, then please do a build of the application, which will compile the project and the CourseData object will be available in the list.
Click on the Next button. Select “GetCourseData” method from the “Choose a method” dropdown list for the Select option (tab).
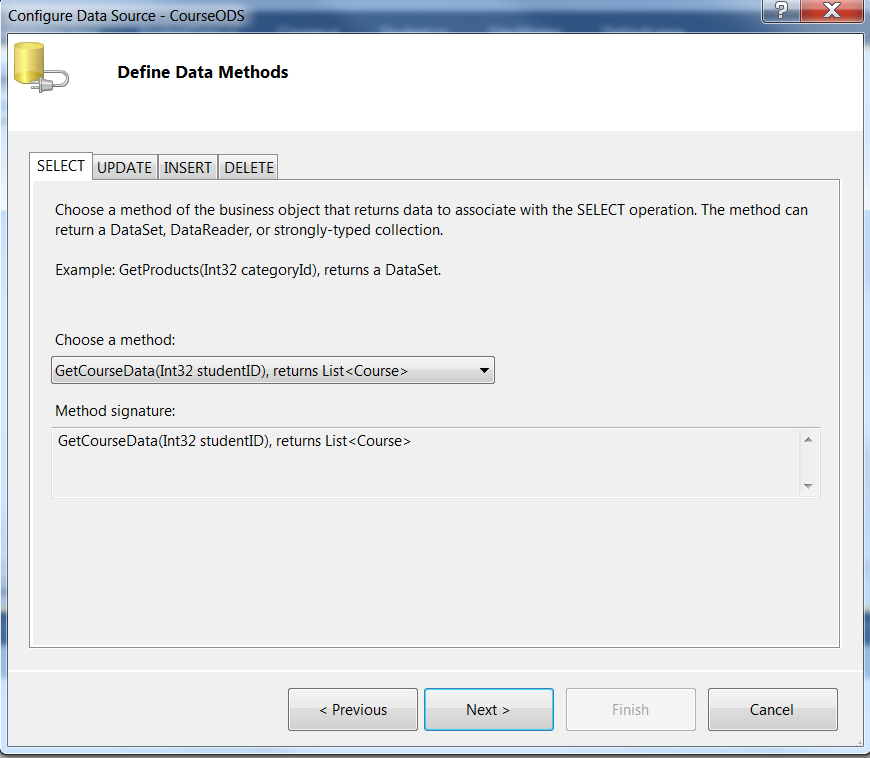
Click on the Next button to setup the parameter. From the “Parameter Source”, select QueryString and in the QueryStringField enter ID. Then click on the Finish button.

Now drag and drop the GridView from the Toolbox. Select CourseODS for the Data Source of the GridView. Give a meaningful name to the GridView. For example, CourseGridView.
5.3 Adding JQuery Methods
We are going to use JQuery to control the Drilldown by loading CourseView.aspx Information into StudenView.aspx. Open StudenView.aspx in Source mode. After end of GridView tag, add a <script> section as following
<script type="text/javascript">
        $(function () {
            	// Default - hide the '-' (Collapse) from Student
            	// Information's Action column
            	$('.expand').hide();

            	$('.expand-btn').on("click", function () {

		// Find the row, where user clicked
                var tr = $(this).parents('tr:first');

                // Find the number of column in the table and
                // then subtract 1, because course will be displayed
                // from 2nd column
  		var noOftd = tr.find("td").length - 1;

    		// Insert a row after the selected row
                // and add a div, which will be the place
                // holder for CourseView.
                tr.after("<tr>" +
                                "<td/>" +
                                "<td colspan='" +
                                        noOftd +
                                        "'> " +
                                        "<div id='courseDiv'>" +
                                        "This is a place holder for child" +
                                        "</div> " +
                               "<td/>" +
                          "</tr>");

		// toggle to display either Expand or Collapse
                // text in the Student Row
                tr.find('.expand, .collapse').toggle();

		// Find the value of selected row's StudentID
                var id = tr.find("td:first").next().html();

		// Call CourseView.aspx with Student ID
                // and use Load function of JQuery to refresh the div.
                // We do not need to load Header information from
  		// CourseView.aspx page. In other words, we only
  		// need to load the data which is under the CoursePanel
                // of CourseView.aspx. Hence, in the load method,
  		// we need to use ID of the Panel "CoursePanel"
                // as a the 2nd parameter
                tr.next().find("#courseDiv").load("CourseView.aspx?id=" + id,
							"#CoursePanel");

            });

            $('.collapse-btn').on("click", function () {
                var tr = $(this).parents('tr:first');

		// toggle to display either Expand or Collapse
                // text in the Student Row
                tr.find('.expand, .collapse').toggle();

		// toggle to display table row with Course information
                tr.next().toggle();
            });

        });
    </script>
The first statement $('.expand').hide(); find all of the tags in the document which has class attribute “expand” and hide them. This will hide the ‘-‘ (Collapse) image from Student record. Because, if you look back at the StudentView’s code, you can see the ‘-‘ (Collapse) image action and table row in the Student table have class attribute “expand”.
Next, we need to define a function which will be activated when user click on ‘+’ (Expand) under the Action column of Student record. In this method, it finds the Student row of the clicked Action (Expand or Collapse image). Under that row, we need to insert a row which will contain the Course information. So, we first find the total number of columns for the existing table. In this demo, we don’t want to show the course information under the action column, so we subtract 1 from the total number of columns in the table.
Next, we insert a row using JQuery’s “after” function. Then we toggle the Expand and Collapse. As we need to pass the StudentID to CourseView.aspx, in the next statement, we found the StudentID. Now, we need to call CourseView.aspx with StudentID and reload the DIV section. Hence, we used the JQuery’s Load function with CourseView.aspx parameter. From the CourseView.aspx, we need to only load data which is under the CoursePanel. So, we pass the Panel ID (CoursePanel) to the Load method as a second parameter.
Next, we need to define a function which will be activated when user click on ‘-‘ (Collapse) image under the Action column of Student record. In this method, it finds the Student row of the clicked Action (Collapse image) and toggles the Action text.
6.0 Conclusion
JQuery makes easy to implement Drilldown hierarchical data using GridView.