
From a Few Lines of Code to Building a Whole Functional Website
5.00/5 (12 votes)
Full guide to create a website
I just want to share with you my experience of how I built and managed my Flask project which is a lyrics finder web app. I tried to focus on code readability and best practices.
This is my first post, so any constructive criticism and feedback is welcome.
Introduction
Flask is a micro web framework written in Python. The reason it's called so is that it is not a full-fat framework loaded with a bunch of tools nor is it a single Python library. It's kind of between this and that. To get familiar with Flask, I recommend checking out their website.
I tried to be as simple and minimalistic as I could so everybody could follow along. In case you have any difficulties or errors in your code, you can always refer to the GitHub repository and check your code.
Please notice, this is not a Python or HTML tutorial, however, this is a practical guide that will show you how to integrate different technologies and libraries into a finished project. I believe the true way of learning is by building projects and applying your skills. I encourage you to experiment with the code and play with it so you know what's really happening. Enough talking and let's go.
Prerequisites
You need to know the following technologies in order to follow up.
- Python
- HTML, CSS, JS
Make sure you have Python installed on your system. You can install it here.
Implementation
In order to start a new project, launch your terminal and make a new directory, then change the directory. This is where we will make our project.
mkdir lyrics_finder
cd lyrics_finder
After that, make a new virtual environment using:
python -m venv .venv
Activate the virtual environment:
. .venv/Scripts/activate
Make a new directory called src that will contain our source code, then change the directory:
mkdir src
cd src
Requirements
To install the requirements, download this file and put it in your current directory requirements.txt. With that said, install the required packages using the command:
pip install -r requirements.txt
To start, create a new file:
touch main.py
Open your editor of choice and open the previous file (main.py). Write down the following code:
from flask import Flask

app = Flask(__name__)

@app.route("/")
def index():
    return 'Hey there, it seems to work!'

if __name__ == "__main__":
    app.run(debug=True)
The following command will start the web server:
python main.py
And... Viola, you have built your very first server. The following message should appear:

The first line will import the Flask function that will initialize your web app, after that, we make our main index function and return the above message. Notice how we used the @app decorator to make it handle HTTP requests without that, this function will do nothing if you open the webpage.
But... we want to do more than printing a simple message, right? Let's try to render an HTML file.
Create a new directory (templates) inside src and create a new file inside of it called base.html:
You can use your editor to do that or just copy and paste this command:
mkdir templates
cd templates
touch base.html
cd ..
Copy and paste the base html5 code:
<!DOCTYPE html>
<html lang="en">
  <head>
    <meta charset="UTF-8" />
    <meta name="viewport" content="width=device-width, initial-scale=1.0" />
    <title>Lyrics Finder</title>
  </head>
  <body>
    {% block content %} {% endblock %}
  </body>
</html>
The block content and endblock tags will contain the code that we will write later on so we won't have to write the code over and over again. Now create a file inside templates folder called index.html (not to be confused with the index function in main.py). In this file, we will write our first rendered content.
{% extends 'base.html' %} {% block content %}
<header class="section">
  <h1>Lyrics Finder</h1>
  <h2 class="title-second">Find your favorite song lyrics with no hassle.</h2>
</header>

{% endblock %}
The extends tag will let us bring the code from base.html to our page making the code more concise. Inside both block tags are our content. To actually render the HTML code, we need to update the server code (main.py).
from flask import Flask, render_template

app = Flask(__name__)

@app.route("/")
def index():
    return render_template('index.html')

if __name__ == "__main__":
    app.run(debug=True)
Run the server by:
python main.py
You should see the basic header of the website. You may have noticed that we included some classes, so let's add a CSS style sheet. To make the website more pleasing to the user, we will create a CSS stylesheet. Inside the src directory, make a folder named static and a new file style.css (make sure you are in src):
mkdir static
cd static
touch style.css
cd ..
Copy and paste the following code inside style.css:
body {
    background-image: linear-gradient(to right, black, darkblue);
    color: lightblue;
    padding: 10px;
}

.title-second {
    color: gray;
    margin-top: -15px;
}

.section {
    width: 100%;
    margin-bottom: 5vh;
    display: flex;
    flex-direction: column;
    align-items: center;
    justify-content: center;
}

.search {
    display: flex;
    align-items: center;
    justify-content: center;
    margin-top: -10px;
    width: 100%;
}

.query-bar-input {
    width: 30%;
    min-width: 400px;
    margin: 15px;
}

.lyrics {
    text-align: center;
    font-size: x-large;
    white-space: pre-line;
}

.hot-tracks {
    display: flex;
    width: 80%;
    overflow: auto;
}

.hot-track {
    display: block;
    margin: 8px;
}

.hot-track-title {
    margin-top: -2px;
}

.hot-track-artist {
    margin-top: -2px;
}

.cover-image {
    width: 170px;
    height: 170px;
}

button {
    background-color: blue;
    color: white;
    border-radius: 20px;
    padding-inline: 20px;
    padding-block: 10px;
    font-size: large;
    border: 0;
}

button:hover {
    filter: brightness(150%);
    cursor: pointer;
}

input {
    padding: 8px;
    border-radius: 20px;
    font-size: large;
    outline: none;
}
To see the changes, update base.html so the file contains the CSS stylesheet.
<!DOCTYPE html>
<html lang="en">
  <head>
    <meta charset="UTF-8" />
    <meta name="viewport" content="width=device-width, initial-scale=1.0" />
    <title>Lyrics Finder</title>
    <link rel="shortcut icon" href="{{ url_for('static', filename='favicon.ico') }}">
    <link rel="stylesheet" href="../static/style.css" />
  </head>
  <body>
    {% block content %} {% endblock %}

    <script src="../static/script.js"></script>
  </body>
</html>
After that, we need to adjust main.py to render the favicon which is the small icon above that represents the website. Update the code:
from flask import Flask, send_from_directory, render_template

app = Flask(__name__)

#   Rendering the favicon of the website using send_from_directory
@app.route('/favicon.ico')
def favicon():
    return send_from_directory(os.path.join(app.root_path, 'static'),
                               'favicon.ico')

@app.route("/")
def index():
    return render_template('index.html')

if __name__ == "__main__":
    app.run(debug=True)
The send_from_directory pretty much explains itself. You give it the directory and filename, then send it to the client side. Now download the favicon from here and place it in the static directory.
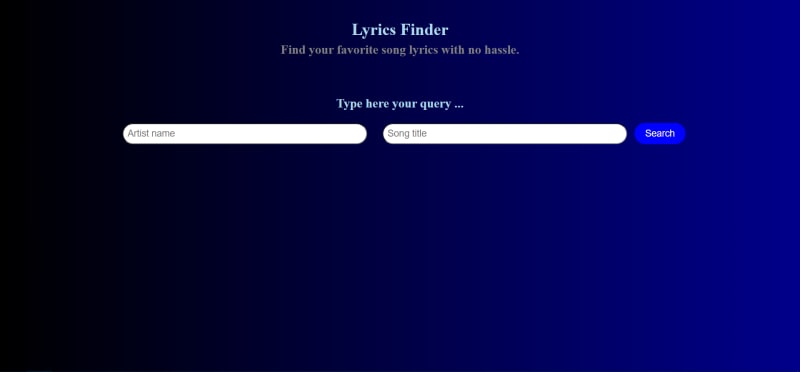
Update the HTML code in index.html so we can make a query to the server. We need two inputs (artist name and song name):
{% extends 'base.html' %} {% block content %}
<header class="section">
  <h1>Lyrics Finder</h1>
  <h2 class="title-second">Find your favorite song lyrics with no hassle.</h2>
</header>

<div class="section">
  <h2 class="form-label">Type here your query ...</h2>
  <form class="search" action="{{ url_for("index")}}" method="post">
      <input name="artist-input" id="artist-input"
       class="form-text query-bar-input" type="text" placeholder="Artist name" />
      <input name="song-input" id="song-input"
       class="form-text query-bar-input" type="text" placeholder="Song title" />
      <button type="submit" id="search-btn" class="btn btn-primary">Search</button>
  </form>
</div>
{% endblock %}
Of course, to render the changes, we need to update main.py. But before that, we need to add a function that will get the required lyrics using Beautiful Soup. I recommend that you get your hands dirty with it or maybe just do a quick start guide. Make a new file inside src called helper_funcs.py and write down the following code:
from urllib.request import urlopen
from bs4 import BeautifulSoup

#   This function gets the artist name and song title as input and
#   returns the corresponding lyrics as output using Beautiful soup
#   otherwise it will print the error message and thus will return an empty string.
def get_lyrics(artist, song):
    try:
        artist = f'{artist.replace(" ", "").lower()}'
        song = f'{song.replace(" ", "").lower()}'
        url = f"https://www.azlyrics.com/lyrics/{artist}/{song}.html"
        page = urlopen(url)
        html = page.read().decode("utf-8")
        soup = BeautifulSoup(html, "html.parser")
        main = soup.find(class_="col-xs-12 col-lg-8 text-center")
        divs = main.find_all("div")
        results = [(len(div.text), div.text.strip()) for div in divs]
        lyrics = max(results, key=lambda x: x[0])[1]
        return lyrics
    except Exception as e:
        print(e)
        return ""
The reason that artist and song variables are formatted in this way is that the website will not respond with valid lyrics so we need to make sure that they are all lowercase and there are no spaces between them.
After that, update the main.py to make use of that function and get the lyrics.
from flask import Flask, request, send_from_directory, render_template
from helper_funcs import *
import os

app = Flask(__name__)

#   Rendering the favicon of the website using send_from_directory
@app.route('/favicon.ico')
def favicon():
    return send_from_directory(os.path.join(app.root_path, 'static'),
                               'favicon.ico')

#   Implementation of basic routing using the functions above.
@app.route("/", methods=["GET", "POST"])
def index():
    #   If the HTTP request method is Post then try to get the lyrics
    #   and render its template,
    #   otherwise return an error html page.
    if request.method == "POST":
        lyrics = get_lyrics(
            request.form["artist-input"], request.form["song-input"])
        if lyrics:
            return render_template(
                "lyrics.html",
                lyrics=lyrics,
                artist=request.form["artist-input"],
                title=request.form["song-input"],
            )
        else:
            return render_template("error.html")
    #   If the HTTP request method is not Post then get the hot tracks
    #   and render index html page
    else:
        return render_template("index.html")

if __name__ == "__main__":
    app.run(debug=True)
With the server updated, we need to render the content in HTML so the end-user can actually see them. Make a new file inside templates called lyrics.html. Copy and paste the following code:
{% extends 'base.html' %} {% block content %}
<div class="section">
  <h1>{{title}} by {{artist}}</h1>
  <br />
  <br />
  <pre class="lyrics">
      {{lyrics}}
    </pre
  >
</div>
{% endblock %}
You should get the following result:
Now try to enter the artist and the song name to start searching.
You should get the result on a separate web page (lyrics.html).
If you notice, the input form will generate an error if you have a typo. To fix the issue, create an error.html file inside the templates folder with the following content:
{% extends 'base.html' %} {% block content %}
<h1>An error has occurred!</h1>
<h2>Please check your query for misspelling or try again later ...</h2>
{% endblock %}
Error handling is a good way to avoid crashes and enhance the user experience.
To make the website more interesting, I've managed to create a section for trending tracks that we can interact with as well as get the corresponding lyrics. To render the trending tracks, go to helper_funcs.py and add the following code:
#   The function below fetches the top 100 tracks from Billboard.com with the
#   artist name, song title and cover image.
def get_hot_tracks():
    try:
        url = "https://www.billboard.com/charts/hot-100/"
        page = urlopen(url)
        html = page.read().decode("utf-8")
        soup = BeautifulSoup(html, "html.parser")
        top100 = soup.select(".o-chart-results-list-row-container")
        covers = [div.find("img")["data-lazy-src"] for div in top100]
        titles = [
            div.select("#title-of-a-story")[0]
            .decode_contents()
            .replace("\n", "")
            .replace("\t", "")
            for div in top100
        ]
        artists = [
            div.find_all("span")[1]
            .decode_contents()
            .replace("\n", "")
            .replace("\t", "")
            for div in top100
        ]
        hot_tracks = [
            {"cover": covers[i], "title": titles[i], "artist": artists[i]}
            for i in range(100)
        ]
        return hot_tracks
    except Exception as e:
        print(e)
        return []
Update index.html so the end-user can see the results:
{% extends 'base.html' %} {% block content %}
<header class="section">
  <h1>Lyrics Finder</h1>
  <h2 class="title-second">Find your favorite song lyrics with no hassle.</h2>
</header>

<div class="section">
  <h2 class="form-label">Type here your query ...</h2>
  <form class="search" action="{{ url_for("index")}}" method="post">
      <input name="artist-input" id="artist-input"
       class="form-text query-bar-input" type="text" placeholder="Artist name" />
      <input name="song-input" id="song-input"
       class="form-text query-bar-input" type="text" placeholder="Song title" />
      <button type="submit" id="search-btn" class="btn btn-primary">Search</button>
  </form>
</div>

<div class="section">
  <h1>Hot Tracks</h1>
  <div class="hot-tracks">
      {% for hot_track in hot_tracks %}
      <div class="hot-track" onclick="searchHotTrack(event)">
          <img class="cover-image" src={{hot_track.cover}} />
          <h3 class="hot-track-title">{{hot_track.title}}</h3>
          <h4 class="hot-track-artist">{{hot_track.artist}}</h4>
      </div>
      {% endfor %}
  </div>
</div>
{% endblock %}
Don't forget to update main.py to call the function and return the results. The final code of index function should be as follows:
#   Implementation of basic routing using the functions above.
@app.route("/", methods=["GET", "POST"])
def index():
    #   If the HTTP request method is Post then try to get the lyrics
    #   and render its template,
    #   otherwise return an error html page.
    if request.method == "POST":
        lyrics = get_lyrics(
            request.form["artist-input"], request.form["song-input"])
        if lyrics:
            return render_template(
                "lyrics.html",
                lyrics=lyrics,
                artist=request.form["artist-input"],
                title=request.form["song-input"],
            )
        else:
            return render_template("error.html")
    #   If the HTTP request method is not Post then get the hot tracks
    #   and render index html page
    else:
        hot_tracks = get_hot_tracks()
        return render_template("index.html", hot_tracks=hot_tracks)
Almost finished, we need to add some JavaScript to add interactivity so when the user clicks on a track, it will show the lyrics of it. Create a new file script.js inside static directory and fill in the code:
//  This function will fetch the song and artist name, and then will submit them
//  to the form in order to get the lyrics
const searchHotTrack = async (e) => {
    const artist_input = document.getElementById('artist-input')
    const song_input = document.getElementById('song-input')
    const search_btn = document.getElementById('search-btn')

    song_input.value = e.target.nextElementSibling.innerText
    artist_input.value = e.target.nextElementSibling.nextElementSibling.innerText

    search_btn.click()
}
Wrapping Up
There you have it! A complete website that you can use to get your favorite lyrics. I hope you have learned something new. If you have any suggestions, or want a follow-up tutorial, let me know in the comments.
Feel free to ask any questions in the comments section below. And thank you for your time.
My Github profile: https://prouserr.github.io/
History
- 12th October, 2023: Initial version