This is part 2 of the GFX IoT graphics library series. Using this code, you can create bitmaps using any pixel binary layout you specify. In addition to getting and setting individual pixels, you can fill, clear, and blt portions of a bitmap.
Introduction
Update: Many bugfixes. You really should update your code.
In the previous article in the series, I went over the device agnostic pixel, which uses some fancy C++ features at compile time in order to provide an efficient and extremely flexible pixel whose channels and resolution is completely defined by you, gentle reader. You can jump to the next article here.
By itself, these aren't incredibly useful, especially since a bitmap is not necessarily simply an array of pixels.
What we need is a way to represent a rectangular area of pixels in memory. This is not as simple as it sounds. In some cases, you may have a 1-bit pixel, an 18-pixel, or a 7-bit pixel! Since these aren't byte aligned, you can't simply store them in an array, but rather we need to store them as a continuous stream of bits with no padding.
This code provides exactly that. In addition to accessors for reading and writing individual pixels, the bitmap provides a way to blt regions to another bitmap, and fill, or clear regions of the bitmap.
Note: These are in-memory bitmaps, not images. Images would be things like a JPEG or a PNG. They are potentially compressed and have extra data embedded in them. They also aren't necessarily in memory. There is no image template class yet, but it will be provided in a future instalment.
Building this Mess
This code was tested with clang 11 and gcc 10 using -std=c++17
The latest version of MSVC does not want to compile this code. Frankly, I don't care, as nothing I've encountered cross compiles with MSVC anyway, and the primary purpose of this code is for IoT devices that can't be readily targeted with MSVC. There's nothing Linux specific in this code, and I believe it's simply standards compliant C++, but it's possible that I am using some features specific to gcc and clang without realizing it.
Using this Mess
One thing I've come to realize when writing a graphics library is dependencies tend to snowball. What I mean is, if you factor different areas of functionality into different headers, you quickly end up in a situation where everything high level depends on everything at the lower levels. It's unfortunate, and raises the question of why separate the header files in the first place if they're all cross-dependent. The main reason is simply to make the code slightly easier to navigate.
In this case, the bitmap<> needs not only the pixel<>, but also data structures that represent positioning and size information for the various operations. We'll cover the position and size things first.
Positioning
Essentially, what we need are ways to represent 2D points, ways to represent 2D sizes, and ways to represent rectangles. The core graphics code relies mainly on 16-bit unsigned renditions of these elements but you can specify any numeric types (either signed integer, unsigned integer or floating point) that you need when you instantiate them. Typically, we'll use point16, size16, and rect16, which use 16-bit unsigned integers, simply because that's what the graphics code generally expects. There are certain cases where a graphics method may take a signed variant of one of these elements, either spoint16, ssize16, or srect16.
Point
The point<> template class has two data members, x and y which simply indicate the location of a point on a 2D cartesian plane. The template takes a numeric type.
Size
The size<> template class also has two data members, in this case width and height which indicate the size of a 2D region. This is very similar to point<> but having a separate data structure with more appropriately named fields clarifies intent.
Rect
The rect<> template class has four data members and several methods. We need to spend some time with it.
First, there are x1, y1, x2 and y2 fields. Each rect<> is defined by these two points, indicating a typically diagonal line whose bounding rectangle is the rectangle. Note that there is no guarantee that the first point is to the upper left of the last point.
In addition to these accessor fields, there are several methods for performing various operations on a rect<>:
left() - indicates the leftmost position of the rectangletop() - indicates the topmost position of the rectangleright() - indicates the rightmost position of the rectanglebottom() - indicates the bottommost position of the rectanglelocation() - indicates the upper left position of the rectangledimensions() - indicates the dimensions of the rectangleintersects() - indicates whether a point or a rectangle intersects with this rectangleinflate() - returns a rectangle whose bounds increase or decrease by the specified x and y amounts. The rectangle is anchored on the center, and the effective width and height increases or decreases by twice the value of x or y.normalize() - returns a copy of the rectangle whose first point is the top left and whose last point is the bottom right.crop() - returns a copy of the rectangle, cropped by the specified bounding rectangle.split() - splits a rectangle by another rectangle, returning up to out_count or 4 (whichever is less) rectangles that represent the new rectangles with the passed in rectangle excluded. First, any space above top() is returned, all the way from left() to right() if there is any. Next any space directly to the left() of the passed in rectangle is returned, again if such space is present. After that, any space directly to the right() is returned, if present. Finally, any space left below the bottom() is returned if there is any.
Bitmaps
A bitmap controls a supplied memory buffer and provides a view over that buffer that allows you to blt, fill, clear, and read and write individual pixels. You are responsible for managing your own memory. The bitmap takes a buffer and simply uses it. It does not handle allocation or deletion. This is for maximum flexibility, particularly since many devices need to use specially allocated memory for DMA transfers of bitmaps. Again, you manage your memory so it can work however it needs to.
To instantiate a bitmap<> template class, you must pass it a pixel<> template class instantiation as its single template argument. See the previous article for information on how to use pixels.
Once you've established your bitmap type, you can go about creating bitmaps with it. Any time you do, you are going to need a buffer big enough to hold all the pixels it contains. Computing this is a little bit tricky and based primarily on the size of each pixel, in bits, but the static method sizeof_buffer() will calculate it for you, in bytes. You can pass the returned value as an array dimension specifier, or of course to your favorite memory allocation routine. The routine takes a width and a height that collectively indicates the size of the bitmap.
Next, you should create your buffer however you need to and pass that buffer's pointer in along with the size you passed to the previous routine.
There you go. Now you have a bitmap. You can use operator[] to get or set individual pixels. It takes a point16 and returns an accessor that can be used to get or set the pixel value at the indicated location. Because it returns an accessor in some cases you may need to explicitly cast to your bitmap type's ::pixel_type to get the pixel.
In addition to the above, the bitmap provides some basic operations:
dimensions() - returns the size of the bitmapbounds() - convenience method to return a bounding rectangle at (0,0) with dimensions() as its size.size_pixels() - returns the count of pixels in the bitmapsize_bytes() - returns the size of the bitmap, in bytesbegin() - returns a byte pointer to the beginning of the bufferend() - returns a byte pointer to just past the end of the bufferclear() - clears the memory represented by the specified bounding rectangle. This typically sets the pixels to black.fill() - fills the memory represented by the specified bounding rectangle with the specified pixel. Note that this is a more robust alternative to clear() if you want guarantee that the pixels are set to black. That may not be the case that zeroed memory is black for certain color models, in which case this method is correct, but also slower.blt() - copies the specified rectangular area of the bitmap to the specified point of the destination bitmap. The source rectangle and result are cropped if necessary to fit within their respective buffers.
All of this is well and good, but how about an example? We can do that, but complicating things is the fact that we don't have a display driver of any kind so far. What we're going to do is roll our own primitive version that simply provides 4 color "grayscale" using a table of ASCII characters ( .%#) and renders the bitmaps that way.
Let's start with the code, and then I'll endeavor to explain it:
#define HTCW_LITTLE_ENDIAN
#include <stdio.h>
#include "include/gfx_bitmap.hpp"
using namespace gfx;
template <typename BitmapType>
void dump_bitmap(const BitmapType& bmp) {
static const char *col_table = " .%#";
using gsc2 = pixel<channel_traits<channel_name::L,2>>;
for(int y = 0;y<bmp.dimensions().height;++y) {
for(int x = 0;x<bmp.dimensions().width;++x) {
const typename BitmapType::pixel_type px = bmp[point16(x,y)];
char sz[2];
sz[1]=0;
const auto px2 = px.template convert<gsc2>();
size_t i =px2.template channel<0>();
sz[0] = col_table[i];
printf("%s",sz);
}
printf("\r\n");
}
}
int main() {
using bgr888 = pixel<
channel_traits<channel_name::B,8>,
channel_traits<channel_name::G,8>,
channel_traits<channel_name::R,8>
>;
using rgb565 = pixel<
channel_traits< channel_name::R,5>,
channel_traits<channel_name::G,6>,
channel_traits<channel_name::B,5>
>;
using gsc8 = pixel<
channel_traits<channel_name::L,8>
>;
using mono1 = pixel<
channel_traits<channel_name::L,1>
>;
using gsc2 = pixel<
channel_traits<channel_name::L,2>
>;
using gsc4 = pixel<
channel_traits<channel_name::L,4>
>;
using rgb888 = pixel<
channel_traits<channel_name::R,8>,
channel_traits<channel_name::G,8>,
channel_traits<channel_name::B,8>
>;
using rgb666 = pixel<
channel_traits<channel_name::R,6>,
channel_traits<channel_name::G,6>,
channel_traits<channel_name::B,6>
>;
using rgb232 = pixel<
channel_traits<channel_name::R,2>,
channel_traits<channel_name::G,3>,
channel_traits<channel_name::B,2>
>;
using rgb333 = pixel<
channel_traits<channel_name::R,3>,
channel_traits<channel_name::G,3>,
channel_traits<channel_name::B,3>
>;
using rgb101210 = pixel<
channel_traits<channel_name::R,10>,
channel_traits<channel_name::G,12>,
channel_traits<channel_name::B,10>
>;
using rgb212221 = pixel<
channel_traits<channel_name::R,21>,
channel_traits<channel_name::G,22>,
channel_traits<channel_name::B,21>
>;
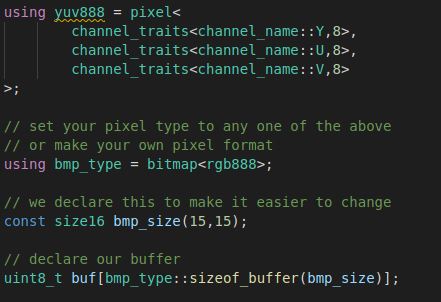
using yuv888 = pixel<
channel_traits<channel_name::Y,8>,
channel_traits<channel_name::U,8>,
channel_traits<channel_name::V,8>
>;
using bmp_type = bitmap<rgb888>;
const size16 bmp_size(15,15);
uint8_t buf[bmp_type::sizeof_buffer(bmp_size)];
bmp_type bmp(bmp_size,buf);
bool col = false;
for(int y=0;y<bmp.dimensions().height;++y) {
for(int x=0;x<bmp.dimensions().width;++x) {
if(x==0||y==0||x==bmp.bounds().right()||y==bmp.bounds().bottom()) {
bmp[point16(x,y)]=color<typename bmp_type::pixel_type>::white;
} else {
bmp[point16(x,y)]=col?
color<typename bmp_type::pixel_type>::dark_blue:
color<typename bmp_type::pixel_type>::purple;
}
col = !col;
}
}
dump_bitmap(bmp);
printf("\r\n");
rect16 r = bmp.bounds().inflate(-3,-3);
bmp.clear(r);
bmp.fill(r.inflate(-1,-1),color<bmp_type::pixel_type>::medium_aquamarine);
dump_bitmap(bmp);
printf("\r\n");
const size16 bmp2_size(bmp_size.width*2,bmp_size.height*2);
uint8_t buf2[bmp_type::sizeof_buffer(bmp2_size)];
bmp_type bmp2(bmp2_size,buf2);
bmp2.clear(bmp2.bounds());
bmp.blt(rect16(point16(8,8),size16(7,7)),bmp2,point16(0,0));
bmp.blt(rect16(point16(0,8),size16(7,7)),bmp2,point16(22,0));
bmp.blt(bmp.bounds(),bmp2,point16(7,7));
bmp.blt(rect16(point16(8,0),size16(7,7)),bmp2,point16(0,22));
bmp.blt(rect16(point16(0,0),size16(7,7)),bmp2,point16(22,22));
dump_bitmap(bmp2);
return 0;
}
The first thing we do is define our endianness. Since this code is primarily for cross compiling to IoT platforms, you pretty much always need this, but almost all machines are little endian. Note that I have yet to test this with a big endian architecture. I'm pretty sure the little ARM Cortex-M I just got can do big endian but the toolchain is a mess and I have to wade through it all before I can test it.
The next thing we do is include our gfx_bitmap.hpp header and use the gfx namespace.
You'll see there's a helper routine that simply goes through the bitmap top to bottom, and left to right, converting each pixel into a 2-bit (4 color) grayscale that it then uses as an index into an ASCII "color" table which is printed to the console character by character.
In main(), there is a battery of pixel definitions. These are provided just to give you some stuff to try. Note that converting between color models is sometimes but not always lossy so when going from RGB to Y'UV and vice versa for example, your colors may change slightly and hence change your output dramatically since the colors are very roughly approximated with ASCII.
After that we declare a bitmap type with whatever pixel type we want in it. Then we create a size16 to hold our bmp_size and a buffer whose size we compute as described previously.
Next, as described in the comments, we create a patterned bitmap pixel by pixel, working from top to bottom and left to right.
Now we dump it to the console.
Following that, we do a little bit of rectangle manipulation so we can clear a square out of the center of the bitmap. After deflating the rectangle once more, we fill the inner square with a solid color.
Then we dump that one to the console.
Finally, we create a second bitmap that has four times the area of the initial bitmap and then execute a series of blt() calls that create an alternating tile effect over the bitmap we just created.
As our last act, we dump it to the console.
Hopefully, that clears up how to use bitmaps.
What's Next
Now that we've covered some low level graphics I/O, we've got an opportunity to explore the draw class next which provides basic drawing services over selected portions of a bitmap. We will also cover fonts.
History
- 16th April, 2021 - Initial submission
- 17th April, 2021 - Update 1, bugfixes
Just a shiny lil monster. Casts spells in C++. Mostly harmless.


