The good news first: You can get a Verisign Authenticode code signing certificate for $99 (at least for the first year). Just check out https://sysdev.microsoft.com/ for details.
The bad news: Actually getting the certificate and using it is not so easy. Here are some tips.
Getting the Certificate
I only tried this with my company, and I heard it is a lot easier for companies than for individuals.
Make sure to have had a valid telephone number on your website for some time. Verisign uses a firm called Dun & Bradstreet to get information about your company. D&B apparently collects data from websites, so having the right phone number up on the web site really helps a lot.
After you have submitted the order on Verisign’s website you need to wait. A representative of Verisign will call you on your “official company number” (see above) in the next two or three days. If they cannot reach you there you will get an e-mail with instructions on how to contact them. The best way is to contact Verisign support via chat and let them know when you can be reached at your “official company number”. Once that phone call is over (they just ask you to confirm the company name and address) you get an e-mail with a link to download the certificate.
Now, if you are a modern netizen living in the year 2012 you might have tried using Chrome or Firefox to order the certificate. Forget it! IE only!
Open the link you got in Verisign’s e-mail in IE and your new Authenticode certificate will be imported into your personal certificate store.
Now what?
Using the Certificate
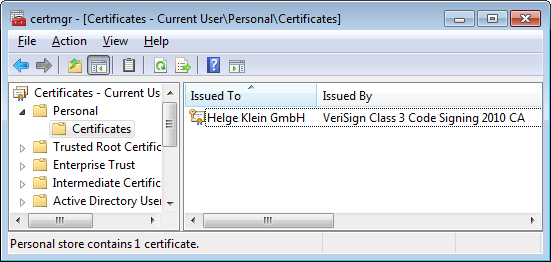
Open Certmgr.msc and navigate to Personal -> Certificates. You should see you new certificate there:
The first thing you should do is to back it up – the only copy you currently have is in the certificate store of the computer you used to buy the certificate. It does not help you much there anyway – you need a .PFX file to sign your files.
Right-click the certificate and select “All Tasks -> Export”. Make sure to select “Yes, export the private key”:

Check the export properties to include all certificates in the certification path and to export all extended properties:
Choose a good, strong password!
Then select where to store the resulting .PFX-File and you are done. Take good care of this file – anyone in possession of it and the password you selected can sign files in your name.
Intermediate Certificates
In order to use your new certificate for signing you need to do one more thing: In the e-mail you got from Verisign they ask you to install two intermediate certificates. Do take that seriously, or your files will not be signed properly!
Unfortunately Verisign only provides the two intermediate certificates in text format without any instructions what to do:
As so often, the answer is simple (once you know it). Copy each certificate’s text into a new text file and save it with the extension .CER. Then, in Explorer, double-click the .CER file and use the wizard that pops up to install it.
Now you are ready to sign your executables.
Signing Code
Put Signtool.exe and your certificate in a separate folder next to your project folders. Add something like the following as post-build step:
"$(ProjectDir)..\Signing\signtool.exe" sign /f "$(ProjectDir)..\Signing\MyCertificate.pfx" /p PasswordForCertificate /d "Name of product" /du "URL of product" /t "http://timestamp.verisign.com/scripts/timestamp.dll" "$(TargetPath)"
Helge Klein is an independent consultant and developer. As a consultant, he has worked in Windows and Citrix projects for various larger German corporations. As a developer, he architected sepago's user profile management product sepagoPROFILE whose successor is now available as Citrix Profile Management. In 2009 Helge received the Citrix Technology Professional (CTP) Award, in 2011 he was nominated a Microsoft Most Valuable Professional (MVP).
Helge's professional interests are focused on Microsoft server technologies, various Citrix products and programming in several languages. He publishes his knowledge in English in his blog at
http://helgeklein.com/blog. Helge can also be found on Twitter as
@HelgeKlein. He has presented on many occasions, e.g. Citrix TechEdge Munich 2009, ice Lingen (2009 and 2011), PubForum (2010 and 2011), Microsoft TechDay Online 2010, Citrix Synergy 2011 and 2012.
Helge is the author of
SetACL, a powerful tool for managing Windows permissions from the command line or from scripts and programs. SetACL is open source and has been downloaded more than 500,000 times. SetACL's modern cousin
SetACL Studio comes with an intuitive graphical user interface and is available for a small fee. Another popular tool,
Delprof2, automates the deletion of user profiles.
Helge lives in Cologne, Germany.


 General
  News
News  Suggestion
  Question
  Bug
Bug  Answer
  Joke
Joke  Praise
  Rant
Rant  Admin
Admin 


