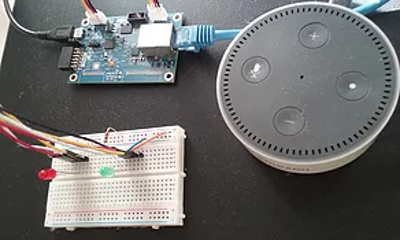
In this tutorial, you’ll learn how to use Alexa to easily create two way communication with the Renesas AE-CLOUD1 Kit. The Renesas AE-CLOUD1 Kit includes the S5D9 board. You will be able to read the current temperature and pressure, turn on and off or blink the three built-in LEDs on the board, and even turn on and off or blink the two external LEDs that are connected to the two Grove connectors on the board. After completing this tutorial, you’ll be able to extend the functionality by yourself.
Note: This tutorial was originally published by Michael Li, Learn IoT community member. His Creative Engineering blog is here. Micheal has kindly given me permission to repost his tutorial.
Hardware Requirements
- Renesas AE-CLOUD1 Kit
- Amazon Echo Dot
- Grove connector cables
- Green and Red LEDs
Learning Prerequisites
- S5D9 HowTo: Renesas Cloud-Driven GPIO with External LEDs
- ALEXA DUST SENSOR TUTORIAL
- USING ALEXA WITH THE RENESAS IOT SANDBOX
Project Goals
Use Alexa to have two way communication with the S5D9 board.
- Read the current temperature and pressure
- Turn on / off or blink the three built-in LEDs on the board
- Turn on / off or blink the two external LEDs that are connected to the two grove connectors on the board
Video Demo (With External LEDs)
Use Amazon Alexa to turn on/off built-in LEDs on the Renesas S5D9 board
Video Demo (With Built-in LEDs)
Use Amazon Alexa to turn on/off the GPIO LED on the Renesas S5D9 board
Section A: Creating New Alexa Skills. (Amazon)
Step 1: Login (https://developer.amazon.com2).

Step 2: Select Alexa.
Step 3: Select Alexa skills.
Step 4: Click “Add A New Skill.”
Step 5: Fill in the fields with red highlight box for the skill information section.
The invocation Name is used when you want the S5D9 board to respond to a request like “Alexa, ask medium one. [your request]”. The name does not need to be “medium one.” It can be “Mary” or whatever you like to be more personal.
Step 6: Fill in for the interaction model section. This is an important section how you want the users interact with Alexa.
In this tutorial, there are three basic commands: get the value of the sensors, enable/disable an LED and blink an LED for a number of times. So, three intents are constructed to perform the commands.
The above file can be downloaded from github with the following link. The name of the file is called intent_schema_3.py. Two other text files (custom_slot_type.txt and sample_utterances.txt) are available. These files make it easy for you to copy and paste the exact information into the fields.
The sample utterances are constructed to give a friendly English-like request while the { } fields are extracted by Alexa and passed to your python code on the cloud. Your python code uses these fields to perform a task and send an appropriate response back to Alexa.
For example, “Alexa, ask Medium One. What is the current temperature?” The key field is temperature that tells your code what is needed to retrieve. Your code can send a message with the current value of the temperature back to Alexa who will dictate the message to the users.
Section B: Linking Alexa and Renesas IoT Sandbox
Section B1: Creating new Data Stream (Rnesas IoT Sandbox)
Step 7b: Select your S5D9 project.
Step 8: Select Config --> Data Streams. Click “Create new stream.”
Step 9: Enter the name of the new stream. Click “Save.”
Step 10: Select Manage OAuth Client. Click “Add new client.”
Step 11: Fill in the top two fields. Click + to open the permission fields.
Step 12: Select “Alexa_requests.” Enable both read and write permission. Don’t click “Save.”
Section B2: Alexa Configuration (Amazon)
Step 1: Fill in the information. Use the correct data stream name that was created in the Renesas IoT sandbox project.
Section B3: Complete Data Stream Configuration (Renesas IoT sandbox)
Step 1: Copy the Redriect URLs from Alexa configuration to your Renesas IoT sandbox project.
Section B4: Complete Alexa configuration (Amazon)
Step 2: Copy the Client ID and Client Secret from Renesas IoT Sandbox Project to Alexa Configuration.
Section C: Create Workflow for receiving and processing Alexa’s request (Renesas IoT Sandbox)
Two workflows will be created to get the Alexa’s requests. But, only one of these two workflows should be activated. Both workflow constructions are identical except of the Python code.
Step 1a: Create Work flow for built-in LEDs.
Step 1b: Copy the code in the request_sensor_data_and_builtin_led_control_with_Alexa_2.py file (Download it from GitHub7.)
Step 2: Create Work flow for external GPIO LEDs.
Step 2b: Copy the code in the external_GPIO_led_control_with_Alexa_6.py file (Download it from GitHub7.)
Section D: Done. Test the setup with a sample request. (Amazon)
Step 1: Power up the S5D9 board and the Amazon Echo Dot. Wait for the Amazon Echo Dot to speak to you that it is ready.
Step 2: Enter a valid request. If the setup is correct, the service response will match the expectation.
Step 3: Perform the real test by speaking to the Amazon Echo Dot. Say “Alexa, ask Medium One. What is the current temperature?” Alexa should respond back to you with “The most recent temperature is 28 degrees.”
Step 4: To test the control of the GPIO LEDs, deactivate the internal LED workfow and activate GPIO LED workflow as shown below.
Congratulations, you’ve successfully connected up your Amazon Echo Dot to the AE-CLOUD1! Now you can modify workflows to respond to different Alexa commands.
Next Steps
This project can be modified to work with WiFi with the addition of the GT-202 module.
Tips for WiFi setup are in the link below:
https://renesasrulz.com/iot/f/iot-sandbox-forum/9733/5-helpful-ae-cloud1-setup-tips


