Introduction
This tip is about the spring security and how to create a custom JSP page to login with.
Background
To understand the spring security configuration, first of all, I make a brief description of the spring MVC files.
The Spring MVC framework needs the following files to do work successfully:
- Web.xml: The main files in each Java web application server. In these files, we need to specify the spring security filters, the spring context reference and the spring security reference.
- To do that, we put
springSecurityFilterChain. This filter checked to see if the Security context is in the session and if it is, it retrieves it for the rest of the filters. If it is not, then it creates one and passes it along.
<!--
<filter>
<filter-name>springSecurityFilterChain</filter-name>
<filter-class>org.springframework.web.filter.DelegatingFilterProxy</filter-class>
<filter>
<filter-mapping>
<filter-name>springSecurityFilterChain</filter-name>
<url-pattern>/*</url-pattern>
<filter-mapping>
- Reference to spring´s files:
<context-param>
      <filter-name>springSecurityFilterChain</filter-name>
      <filter-class>org.springframework.web.filter.DelegatingFilterProxy</filter-class>
<filter>
<filter-mapping>
      <filter-name>springSecurityFilterChain</filter-name>
      <url-pattern>/*</url-pattern>
<filter-mapping>
- Spring context file (In the example: mvc-dispatcher-servlet.xml): Contains the context of spring execution.
- Spring security configuration file (In the example springsecurity-servlet.xml): In this file, we define the settings of Spring security, such as the roles of user, custom login forms, logout redirection, etc.
How To Do
In this tip, I explain how Spring security works, and I will show you how to create a custom login form using spring security abilities.
1. The first thing we have to do, is create a Spring security file
In this file, we set up settings:
- Intercept URL: We indicate the URL in the controller class which is needed to protect the access.
<intercept-url pattern="/access/welcomeAdministrator" access="ROLE_ADMIN_TOOL" />
The param access determines the role which the user has set to allow to enter in the URL.
- With
form-login label, we indicate the URL in controller to access a JSP with the custom form to login:
<form-login
  login-page="/access/loginAdminView"
  default-target-url="/access/newRegister"
  authentication-failure-url="/access/loginAdminView?error" />
In login-page entry, we indicate the URL to mapping in controller that shows the custom login form.
If authentication is successful, we will redirect to default-target-url. In the example, /access/newRegister.
Otherwise, authectication-failure-url.
2. Next, we create the controller class
The class AdminController contains the Administrator login logic.
The loginAdminView method returns LoginAdmin.jsp page to show the custom form.
@RequestMapping(value="/loginAdminView", method = RequestMethod.GET)
public String loginAdminView(@RequestParam(value = "error", required = false) String error,
  @RequestParam(value = "logout", required = false) String logout,
  ModelMap model) {

  //return the jsp page to login administrator
  if (error != null) {
      model.put("error", "Invalid username and password!");
  }
  if (logout != null) {
      model.put("msg", "You've been logged out successfully.");
  }
  return "LoginAdmin";
}
The welcome method returns the main view of administrator login. This method has got protected access. It is specified in spring security file.
Only user login as administrator could access to it.
private static final String ADMIN_VIEW = "adminToolViews/administratorView";

@RequestMapping(value="/welcomeAdministrator", method = RequestMethod.GET)
public String welcome(ModelMap model) {//Miramos si ya se esta logeado
  updateModelLabsList(model);
  model.addAttribute("registerTab",true);
  return ADMIN_VIEW;
}
3. Finally, we create the JSP page to render the custom dialog
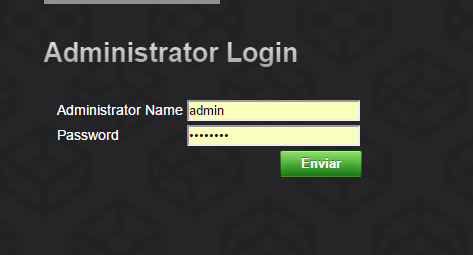
The first JSP page that we create is login page. This page is called LoginAdmin.jsp. We use jstl (Java Standard Tag Library) to render it.
This page creates a custom form to login administrator user using Spring security.
In the next HTML code, we show you the dialog form and how we submit values to spring security:
<div id="loginForm" class="form-action show">
  <form method="post" action="<c:url value='../j_spring_security_check' />">
       <table>
               <tr>
                <td><label for="username">Administrator Name</label></td>
                <td><input type="text" name="j_username"/></td>
              </tr>
              <tr>
                <td><label for="password">Password</label></td>
                <td><input type="password" name="j_password"/></td>
              </tr>
              <tr>
                <td colspan="3"> <input text="Log in"
                type="submit" class="btn"></input> </td>
              </tr>
       </table>
       <input type="hidden" name="${_csrf.parameterName}"value="${_csrf.token}" />
  </form>
How It Works
In the below diagram, we can see the actions that take place when a URL is inserted in the browser.
When we introduce /access/welcomeAdministrator in the browser, spring security determinates that this URL is under security protection and redirects us to /access/loginAdminView.

In the method loginAdminView of controller action class, we give back loginAdmin.jsp.
In this page, we check administrator name and password using a form with action:
action="<c:url value='../j_spring_security_check' />".
Using the Code
The provided code is a Maven project that can be imported in Eclipse.
The project structure is how I show it in the next picture:
Below the webapp folder, we find the Spring configuration files and the JSP pages using in the example projects.
In the package es.examle.web.gui.controller, we find the administratorController that manages the login.
This member has not yet provided a Biography. Assume it's interesting and varied, and probably something to do with programming.


 General
  News
News  Suggestion
  Question
  Bug
Bug  Answer
  Joke
Joke  Praise
  Rant
Rant  Admin
Admin 


