I share my experience in building Diligent Engine on Windows 10 with Visual Studio 2019. Hope it will save some time for anyone to pick it up.
Introduction
We have a comprehensive introduction on Diligent Engine by EgorYusov from here. I am really interested in this rendering engine and plan to get more hands-on knowledge about it.
Step 1, 2, 3 are requirements. As showed in the project website, we need to have them before we build the whole solution.
Lessons Learned: initially I plan to skip Step 3 & 4. I try to download zipped file directly,then use CMake to build Visual Studio 2019 solution. But after unzipped the downloaded file, I found many folders are empty. Also I tried to use Git Desktop and give it up for learning curve. Thus current roadmap emerges in this post.
Step 1: Install Python Interpreter
Install Python interpreter. You can either install it from Microsoft Store or download it directly from Python website.
Step 2: Install CMake
Install CMake tool on your machine.
Step 3: Install Git Package
Install Git on your machine. You can download it from here.
Step 4: Clone the Repository of Diligent Engine
To get the repository and all submodules, we can build a DOS command file clone.cmd to contain the following command:
git clone --recursive https://github.com/DiligentGraphics/DiligentEngine.git
The detail is to use Notepad to create a text file such as clone.txt, put the above command into this file. Then change the file extension from .txt to .cmd.
Create a folder named as Diligent in C drive such as its name is: C:\Diligent.
Put this command file clone.cmd into this C:\Diligent folder. The folder structure is as below:
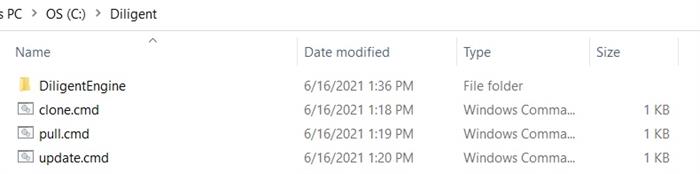
Use Windows key + r to start command line console. Change directory to C:\Diligent folder. Issue command clone.cmd and press enter/return key. Git command start to clone the repository to local folder C:\Diligent.
After a few minutes, the process will finish and some audit file lines are as below:

Step 5: Build Diligent Engine Visual Studio 2019 Solution
After successfully downloading the source code into the specified folder such as C:\Diligent, the next step is to build Diligent Engine source code. We will build it on Windows 10 using Visual Studio 2019.
From GitHub's build and run instructions, we see it needs to use CMake. Now I wrap this CMake script into a DOS command named as build.cmd with this command:
cmake -S . -B ./build/Win64 -G "Visual Studio 16 2019" -A x64
I put this build.cmd inside DiligentEngine folder where CMakeLists.txt file is located.
As usual, press Windows key + r to start command line console. Change directory to C:\Diligent\DiligentEngine folder and run this build.cmd command.
This command build.cmd will generate Visual Studio 2019 64-bit solution and project files in build/Win64 folder. After build.cmd finishes, we will see these files under build/win64 folder:
Step 6: Compile Visual Studio 2019 Solution
Find the DiligentEngine.sln and open it in Visual Studio 2019. The Diligent Engine solution is loaded into VS2019, and the folder structure is as below:
From Menu Build-> Build Solution/F6, click this menu command and the compiling process will begin. After few minutes (depends on your computers), we will see the compilation finishes as below:
After we successfully build this solution, then press F5 button, default start up project is GLTF viewer and it will pop up the dialog box as below:
Up to now, everything goes very well. Diligent Engine team did a very good job!
Points of Interest
My next step is to take a deep dive on this rendering engine.
Reference
History
- 17th June, 2021: Initialized this file
turns good thoughts into actions...


