Embedding native Windows and Linux control into an Avalonia application is important if one needs to port a native application to multiplatform Avalonia or if one does not have some complex Avalonia controls that had been built natively. I also present the best architecture for using native views within Avalonia via an IoC container and dynamic loading. Finally, the article describes how to make a native window run by a different process into a visual part of an Avalonia application.
Introduction
Note that both the article and the samples code have been updated to work with latest version of Avalonia - 11.0.6
What is Avalonia?
Avalonia is a great multiplatform open source UI framework for developing
- Desktop solutions that will run across Windows, Mac and Linux
- Web applications to run in Browser (via WebAssembly)
- Mobile applications for Android, iOS and Tizen.
Avalonia is much more powerful, cleaner and faster than UNO Platform - its only competitor in multiplatform XAML/C# world.
To learn more about Avalonia, please check the documentation on Avalonia web site and also check my other Avalonia articles on the codeproject.com starting with Multiplatform UI Coding with AvaloniaUI in Easy Samples. Part 1 - AvaloniaUI Building Blocks.
What is Embedding Native Views/Controls/Applications into Avalonia and Why Do We Need It?
If Avalonia application for some reason lacks some complex Visuals (Controls or Views) perhaps custom to a specific company while those visuals are available, say on Windows as WPF controls, one can embed those WPF visuals into an Avalonia application for running on Windows. Of course, they'll work only for the platforms for which such visuals are available. On other platforms without visual implementations, the developers have an option to e.g. provide a message something like "The view is not available yet for Linux."
The following scenarios require hosting native Visuals by Avalonia:
- When an existing single platform application (e.g., WPF application) is moved to multiplatform Avalonia gradually.
In such case, one does not have to wait for every view and every control to be ported to Avalonia in order to present the results to the client. You can start by porting Avalonia shell and some most important views and the rest of the views can be ported gradually one by one. The views that have not been ported yet will only work on windows and on the rest of the platforms, they can display e.g. a "Work in Progress" message.
- Sometimes, the views have to be native because making them multiplatform would take too much time. In that case, the hosting techniques allow displaying a proper native view for each platform, e.g., running the application on Windows will display a WPF view while running it on Linux would display a similar native Linux view.
- Amazingly enough, Avalonia can host native Windows created by other processes, for example, if one runs several WPF processes, each one of which controls a single WPF window, we can display all those windows within a single Avalonia application. In a sense, Avalonia can unite multiple native applications visually as a single Avalonia application. My last sample will show how to achieve that.
Platforms used for the Samples in this Article
Because of WSL2, it became very easy to test and debug Linux on Windows 10 and 11. Correspondingly, most of the samples here are built and tested on Windows 11 and Linux (Ubuntu 20.04). Unfortunately, I do not have the ability to easily test my code on Mac, so this article does not contain any Mac samples.
To review running Avalonia applications using WSL, please take a look at Running and Debugging Multiplatform .NET (.NET Core, .NET5 and .NET6) GUI and Console Applications on Windows Subsystem for Linux (WSL) article.
Avalonia, .NET and Visual Studio Versions used for the Samples
For this article, I used Avalonia 11 preview 4, .NET 6.0 and Visual Studio 17.4.0 Preview 5.0. Hopefully soon, Avalonia will become a full version 11 and then, time permitting, I'll port the samples to it.
The main reason I used Avalonia 11 preview 4 is because there are some profound changes between that branch and the latest stable branch 0.10.18 and I want the samples to be easy to convert to the coming Avalonia 11 version.
A Problem I Encountered with Visual Studio 17.4.0 Preview 5.0
Since we are dealing with multiple targets (Windows and Linux), I had to modify the main project file from single to multiple targets and have some projects and package dependencies conditional on the current target. Such modifications to the file were not always taking effect immediately - but sometimes, I had to restart Visual Studio. Please keep it in mind if you are reworking the samples from this article.
Article Organization
- First, I show simple samples of Avalonia window hosting Windows and Linux simple native views.
- Then, I provide some architectural advice on arranging the code into separate projects, re-using the common functionality via multiplatform View Models, and using an IoC container to make the main project's code almost platform independent.
- Finally, I provide a sample showing how to embed a native WPF window running within its own process into an Avalonia application. At this point, I do not have a similar sample for Linux, but plan to add it sometime in the future.
The Samples
Sample Location
All the samples are located under NP.Ava.Demos/HostingDemos folder within NP.Avalonia.Demos repository.
Simple Windows and Linux Samples
Simple WinForms Sample
Running the Sample
The first sample shows how to embed a WinForm into Avalonia. The sample is located under
HostingWinFormsDemo/HostingWinFormsDemo/HostingWinFormsDemo.sln
solution.
Open the solution, make the main project HostingWinFormsDemo to be the start-up project, compile and run it. Here is what you'll see:
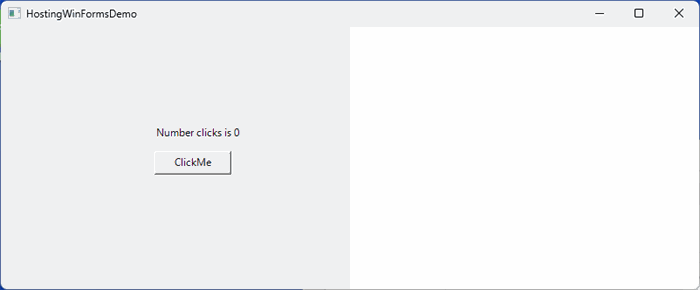
Every time you click the ClickMe button, the number of clicks increases above the button.
Note that the embedded winform occupies only vertical left half of the window. This is to show that it is up to the developers where to place it and how much space to assign to it - it does not have to occupy the whole window. In fact, two or more parts of an Avalonia window can be occupied by different native embedded controls.
Source Code
Take a look at MyWinFormsControl project which defines the WinForms control. It consists of MyControl class that defines the visual control and ClickCounterViewModel class that defines the non-visual view model. (Yes, we are using the View-ViewModel pattern even when coding WinForms).
ClickCounterViewModel class contains two properties:
NumberClicks - specifying the number of times that the button had been clickedNumberClicksStr - the resulting string to display
Both properties are notifiable, meaning they are firing INotifyPropertyChanged.PropertyChanged property when change.
There is also a very simple method:
public void IncreaseNumberClicks()
{
    NumberClicks++;
}
which increments the number of clicks.
The MyControl specifies a button MyButton and a label ClickCounter placed above the button.
There is also an instance of the ClickCounterViewModel object defined within the control:
public partial class MyControl: UserControl
{
ClickCounterViewModel _viewModel = new ClickCounterViewModel();
...
}
Here is the full code of the simple control with comments:
public partial class MyControl: UserControl
{
ClickCounterViewModel _viewModel = new ClickCounterViewModel();
public MyControl()
{
InitializeComponent();
MyButton.Click += MyButton_Click!;
SetLabel();
_viewModel.PropertyChanged += _viewModel_PropertyChanged!;
}
private void _viewModel_PropertyChanged(object sender, PropertyChangedEventArgs e)
{
if (e.PropertyName == nameof(ClickCounterViewModel.NumberClicksStr))
{
SetLabel();
}
}
private void SetLabel()
{
this.ClickCounter.Text = _viewModel.NumberClicksStr;
}
private void MyButton_Click(object sender, EventArgs e)
{
_viewModel.IncreaseNumberClicks();
}
}
Now take a look at the main project HostingWinFormsDemo. The most interesting class here is EmbedSample:
public class EmbedSample : NativeControlHost
{
protected override IPlatformHandle CreateNativeControlCore(IPlatformHandle parent)
{
if (RuntimeInformation.IsOSPlatform(OSPlatform.Windows))
{
MyControl myControl = new MyControl();
return new PlatformHandle(myControl.Handle, "Hndl");
}
return base.CreateNativeControlCore(parent);
}
protected override void DestroyNativeControlCore(IPlatformHandle control)
{
if (RuntimeInformation.IsOSPlatform(OSPlatform.Windows))
{
WinApi.DestroyWindow(control.Handle);
return;
}
base.DestroyNativeControlCore(control);
}
}
EmbedSample is an Avalonia control, that derives from NativeControlHost and overrides its CreateNativeControlCore(...) method to create the native control and return the native handle to it (in our case, it is win32 handle to the native win-forms control).
It also contains an override of method DestroyNativeControlCore(...) to be called to clear the native handle (in our case, win32 handle) when the control is destroyed.
The EmbedSample control is connected to the window's visual tree by the code within MainWindow's constructor:
public MainWindow()
{
InitializeComponent();
EmbedSample embedSample = new EmbedSample();
embedSample.HorizontalAlignment = HorizontalAlignment.Stretch;
embedSample.VerticalAlignment = VerticalAlignment.Stretch;
MyContentControl.Content = new EmbedSample();
}
Note that we set vertical and horizontal alignments of embedSample control to Stretch, because otherwise the control will not fill the extra space when the window is resized.
The Avalonia XAML code is located within MainWindow.xaml file:
<Window xmlns="https://github.com/avaloniaui"
        xmlns:x="http://schemas.microsoft.com/winfx/2006/xaml"
        x:Class="HostingWindowsProcessDemo.MainWindow"
        Width="800"
        Height="300"
        Title="HostingWindowsProcessDemo">
    <Grid ColumnDefinitions="*,*">
         <ContentControl x:Name="WpfAppPlacementControl"/>
    </Grid>
</Window>
ContentControl will occupy the left half of the Window's Grid panel.
There is also static unsafe class WinApi that imports the win32 DestroyWindow(...) method into the C# making it available for the rest of the functionality:
public static unsafe class WinApi
{
    [DllImport("user32.dll", SetLastError = true)]
    public static extern bool DestroyWindow(IntPtr hwnd);
}
This method WinApi.DestroyWindow(IntPtr hwnd) is used within EmbedSample.DestronNativeControlCore(...) override to clean up the native handle:
protected override void DestroyNativeControlCore(IPlatformHandle control)
{
if (RuntimeInformation.IsOSPlatform(OSPlatform.Windows))
{
WinApi.DestroyWindow(control.Handle);
return;
}
base.DestroyNativeControlCore(control);
}
Take a look at the XML code of the main project file HostingWinFormsDemo.csproj. There are several important points to remember about it:
- Property
TargetFramework of the project is set to net6.0-windows (not to multiplatform NET6.0). This means that the resulting code will only work for windows. - There is a
UseWindowsForms property set to true: <UseWindowsForms>true</UseWindowsForms>. This will automatically add WinForms libraries to the project. - Property
AllowUnsafeBlocks is also set to true: <AllowUnsafeBlocks>true</AllowUnsafeBlocks>. This will allow unsafe class WinApi that imports the windows code for use within the project.
Finally, notice the app.manifest file. It has an important line:
<supportedOS Id="{8e0f7a12-bfb3-4fe8-b9a5-48fd50a15a9a}" />
Without this line uncommented, the embedding will not work on Windows 10 and 11.
Important Notes on Architecture
In order to simplify the explanations related directly to embedding the native code, the sample above was built to contain some well known architectural problems described in this subsection.
For a sample close to perfect from the architecture point of view, please take a look at the Multi Target Sample for Windows and Linux with Architecture close to Optimal section below.
Note that for the sake of simplicity and clarity of the example, we placed the View Model class ClickCounterViewModel into the same project as the WinForms control. In general, when working on a real project, it should be avoided. All the View Models should be placed in their own purely non-visual multiplatform .NET projects. This will avoid multiple problems of mixing visual and non-visual code and also will allow us to e.g. re-use the same view models for different platforms.
Another important thing is that the main project HostingWinFormsDemo has a single target framework net6.0-windows (so that it will only run on Windows). When we use native controls on various platforms, the main project is usually written to have multiple target frameworks - instead of <TargetFramework>, <TagetFrameworks> element is used within the project file, e.g.
<TargetFrameworks>net6.0;net6.0-windows</TargetFrameworks>
The EmbedSample control in the sample directly creates the WinForms control MyControl - see the following code:
if (RuntimeInformation.IsOSPlatform(OSPlatform.Windows))
{
MyControl myControl = new MyControl();
return new PlatformHandle(myControl.Handle, "Hndl");
}
In fact, we should replace EmbedSample control with something more generic, that does not depend on a particular embedded visual implementation.
The main project HostingWinFormsDemo directly depends on the winforms MyWinFormsControl project containing essentially a view for the demo. Usually, for the purpose of the separation of concerns, it is better to utilize dynamic loading and IoC containers for loading the views and sometimes also for loading the view models so that the shell and the views could be developed, debugged and tested independently.
Simple WPF Sample
Our next sample demonstrates embedding a simple WPF control into Avalonia.
The solution is HostingWpfControlDemo/HostingWpfControlDemo/HostingWpfControlDemo.sln.
Set HostingWpfControlDemo as the startup project for the solution, compile and run the sample, here is what you'll see:

And its behavior is exactly the same as that of the Winforms app above - it displays the number of button clicks above the button.
When describing the code and the architecture of the project, we'll emphasize the differences for the WinForms sample in order to avoid repetitions.
The WPF view is built within WpfControl project with the help of MyWpfControl view and ClickCounterViewModel View Model classes.
MyWpfControl.xaml file uses bindings and behaviors (coming from Microsoft.Xaml.Behaviors.Wpf package reference) to bind the TextBlock's Text and the button's Click action to the corresponding property and method defined on the view model.
<UserControl x:Class="WpfControl.MyWpfUserControl"
xmlns="http://schemas.microsoft.com/winfx/2006/xaml/presentation"
xmlns:x="http://schemas.microsoft.com/winfx/2006/xaml"
xmlns:i="http://schemas.microsoft.com/xaml/behaviors">
<Grid Background="LightGray">
<StackPanel HorizontalAlignment="Center"
VerticalAlignment="Center">
<TextBlock Text="{Binding Path=NumberClicksStr}"
HorizontalAlignment="Center"
Margin="20"/>
<Button HorizontalAlignment="Center"
Padding="10,5"
Content="ClickMe">
<i:Interaction.Triggers>
<i:EventTrigger EventName="Click">
<i:CallMethodAction TargetObject="{Binding}"
MethodName="IncreaseNumberClicks" />
</i:EventTrigger>
</i:Interaction.Triggers>
</Button>
</StackPanel>
</Grid>
</UserControl>
The view's DataContext property is assigned to an object of ClickCounterViewModel type within the MyWpfUserControl.xaml.cs code behind file (within the view's constructor):
public partial class MyWpfUserControl : UserControl
{
    public MyWpfUserControl()
    {
        InitializeComponent();

        DataContext = new ClickCounterViewModel();
    }
}
The main change from the previous sample within the main project - HostWpfControlDemo, is the content of EmbedSample. WPF controls are not win32 objects and they do not have a win32 handle. Because of that, we place the WPF controls within WinForms' ElementHost control (which has a win32 handle). Here is the resulting code of the CreateNativeControlCore(...) method:
protected override IPlatformHandle CreateNativeControlCore(IPlatformHandle parent)
{
if (RuntimeInformation.IsOSPlatform(OSPlatform.Windows))
{
MyWpfUserControl myControl = new MyWpfUserControl();
ElementHost elementHost = new ElementHost();
elementHost.Child = myControl;
return new PlatformHandle(elementHost.Handle, "Hndl");
}
return base.CreateNativeControlCore(parent);
}
Correspondingly, the main csproj file has both flags UseWindowsForms and UseWPF set to true:
<UseWindowsForms>true</UseWindowsForms>
<UseWPF>true</UseWPF>
Simple Linux Sample
The primitive Linux Sample is located within HostingLinuxControlDemo\HostingLinuxControlDemo\HostingLinuxControlDemo.sln solution. Using Microsoft's WSL, one can run and debug it on Windows 10 and 11. Placeholder describes how to do it in detail. On Windows 11, you still have to install VcSrv from sourceforge.com, configure and start it in the same manner in which it is described in the article.
Make HostLinuxControlDemo project - your startup project within the solution.
After that, switch your Debug target to WSL:
Open up the launchSettings.json file and change the value of its WSL/environmentVariable/DISPLAY under WSL2 to match your machine's IP address, as it is described in Running and Debugging Multiplatform .NET (.NET Core, .NET5 and .NET6) GUI and Console Applications on Windows Subsystem for Linux (WSL).
Build and run the application. The following application will start:
Clicking on the button will increase the click count displayed above the button.
Our View Model - ClickCounterViewModel is exactly the same as in the previous samples.
The LinuxView itself is built using GtkSharp - a C# object oriented wrapper around Linux gtk functionality. The code is pretty simple and I will not explain it in detail, since we are mostly concerned about embedding.
There are two interesting files within our main project: EmbedSample.cs and GtkApi.cs.
GtkApi class imports two Linux methods that we need:
public static class GtkApi
{
private const string GdkName = "libgdk-3.so.0";
private const string GtkName = "libgtk-3.so.0";
[DllImport(GdkName)]
public static extern IntPtr gdk_x11_window_get_xid(IntPtr window);
[DllImport(GtkName)]
public static extern void gtk_widget_destroy(IntPtr gtkWidget);
}
These two methods are used by our EmbedSample class. gdk_x11_window_get_xid is used to return X11 handle to the window that we need to use for embedding the Linux view, while gtk_widget_destroy - destroys the Linux window at the end.
Here is the EmbedSample code:
public class EmbedSample : NativeControlHost
{
private IntPtr? WidgetHandleToDestroy { get; set; }
protected override IPlatformHandle CreateNativeControlCore(IPlatformHandle parent)
{
if (RuntimeInformation.IsOSPlatform(OSPlatform.Linux))
{
return GtkInteropHelper.RunOnGlibThread(() =>
{
LinuxView linuxView = new LinuxView();
WidgetHandleToDestroy = linuxView.Handle;
IntPtr xid = GtkApi.gdk_x11_window_get_xid(linuxView.Window.Handle);
return new PlatformHandle(xid, "Xid");
}).Result;
}
return base.CreateNativeControlCore(parent);
}
protected override void DestroyNativeControlCore(IPlatformHandle control)
{
if (RuntimeInformation.IsOSPlatform(OSPlatform.Linux))
{
GtkInteropHelper.RunOnGlibThread(() =>
{
if (WidgetHandleToDestroy != null)
{
GtkApi.gtk_widget_destroy(WidgetHandleToDestroy.Value);
WidgetHandleToDestroy = null;
}
return 0;
}).Wait();
return;
}
base.DestroyNativeControlCore(control);
}
}
Note that all the interactions with Linux are conducted within a special thread that Avalonia's Avalonia.X11.Interop.GtkInterlopHelper.RunOnGlibThread(...) method gives us access to.
Also note that the TargetFramework for both projects is net6.0 (not net6.0-windows as it was in the previous samples).
Multi Target Sample for Windows and Linux
The code for this sample is located under HostingNativeDemo/HostingNativeDemo/HostingNativeDemo.sln solution.
The purpose of this demo is to show how one can combine Linux and WPF views in the same solution. The main solution is correspondingly multi-target - it uses net6.0 for Linux and net6.0-windows for windows.
The sample is created in a most straightforward way - its architecture is not optimized. In the next subsection, we shall present a demo working in the same fashion, but with better architecture, better separation of concerns and less of platform specific code.
First of all, compile and run the main solution for Windows. In order to do it, first choose the target to be "HostingNativeDemo" and the framework net6.0-windows:
Make HostingNativeDemo to be the startup project and rebuild it, then run it. You will see a familiar picture:
Now switch to Linux by choosing WSL target and net6.0 framework:
Rebuild the main project. Also start the VcSrv server and set DISPLAY variable to your current IP address within Properties/launchSettings.json file as described in Running and Debugging Multiplatform .NET (.NET Core, .NET5 and .NET6) GUI and Console Applications on Windows Subsystem for Linux (WSL).
Run the project and you will have a Linux window with Linux text and button:
Now look at the code. There are four projects in the solution:
HostingNativeDemo - the main projectWpfControl - project that hosts the WPF control (view)LinuxView - project that hosts Linux ViewViewModels - project hosting the View Model for both WPF and Linux projects
The only new thing that we have for the native WPF and native Linux projects is that unlike in previous subsections, the View Model (already familiar to us ClickCoutnerViewModel) is factored out in its own platform agnostic project so that it can be re-used both for Windows and Linux. All the platform specific code is exactly the same as in the previously considered WPF and Linux samples.
The new code that needs to be explained is only within the main project.
Take a look at HostingNativeDemo.csproj project file. You can see that it has a lot of statements conditional on whether the framework is net6.0 or net6.0-windows, e.g.
<PropertyGroup Condition=" '$(TargetFramework)' == 'net6.0-windows' " >
    <UseWindowsForms>true</UseWindowsForms>
    <UseWPF>true</UseWPF>
</PropertyGroup>
Also:
<PackageReference Condition=" '$(TargetFramework)' != 'net6.0-windows'
 " Include="GtkSharp" Version="3.24.24.38" />
and:
<ProjectReference Condition=" '$(TargetFramework)' != 'net6.0-windows'
 " Include="..\LinuxControl\LinuxControl.csproj" />
<ProjectReference Condition=" '$(TargetFramework)' == 'net6.0-windows'
 " Include="..\WpfControl\WpfControl.csproj" />
The purpose of all those conditional statements is to choose dependencies required for Windows (when target framework is net6.0-windows) and for Linux (when target framework is net6.0).
Files WinApi.cs and GtkApi.cs contain functionality similar to the same named files in the previous Windows and Linux samples, only their content is wrapped within preprocessor conditions to only show when compiled for Window or for Linux. Here is the content of WinApi.cs file (it shows only when compiled for Windows):
namespace HostingNativeDemo
{
#if WINDOWS
public static unsafe class WinApi
{
[DllImport("user32.dll", SetLastError = true)]
public static unsafe extern bool DestroyWindow(IntPtr hwnd);
}
#endif
}
And here is the content of GtkApi.cs file (to show only when compiled for Linux):
namespace HostingNativeDemo
{
#if !WINDOWS
public static unsafe class GtkApi
{
private const string GdkName = "libgdk-3.so.0";
private const string GtkName = "libgtk-3.so.0";
[DllImport(GdkName)]
public static extern IntPtr gdk_x11_window_get_xid(IntPtr window);
[DllImport(GtkName)]
public static extern void gtk_widget_destroy(IntPtr gtkWidget);
}
#endif
}
The other important changes are in the file EmbedSample.cs. It has preprocessor conditions all over. Basically, the preprocessor conditions ensure that it works exactly like EmbedSample class in WPF sample under Windows and in Linux sample under Linux:
#if WINDOWS
using System.Windows.Forms.Integration;
using ViewModels;
using WpfControl;
#else
using LinuxControl;
using Avalonia.X11.Interop;
#endif
...
public class EmbedSample : NativeControlHost
{
#if !WINDOWS
private IntPtr? WidgetHandleToDestroy { get; set; }
#endif
protected override IPlatformHandle CreateNativeControlCore(IPlatformHandle parent)
{
#if WINDOWS
if (RuntimeInformation.IsOSPlatform(OSPlatform.Windows))
{
MyWpfUserControl control = new MyWpfUserControl();
control.DataContext = new ClickCounterViewModel();
ElementHost host = new ElementHost{ Child = control };
return new PlatformHandle(host.Handle, "Ctrl");
}
#else
if (RuntimeInformation.IsOSPlatform(OSPlatform.Linux))
{
return GtkInteropHelper.RunOnGlibThread(() =>
{
LinuxView linuxView = new LinuxView();
WidgetHandleToDestroy = linuxView.Handle;
IntPtr xid = GtkApi.gdk_x11_window_get_xid(linuxView.Window.Handle);
return new PlatformHandle(xid, "Xid");
}).Result;
}
#endif
return base.CreateNativeControlCore(parent);
}
protected override void DestroyNativeControlCore(IPlatformHandle control)
{
#if WINDOWS
if (RuntimeInformation.IsOSPlatform(OSPlatform.Windows))
{
WinApi.DestroyWindow(control.Handle);
return;
}
#else
if (RuntimeInformation.IsOSPlatform(OSPlatform.Linux))
{
GtkInteropHelper.RunOnGlibThread(() =>
{
if (WidgetHandleToDestroy != null)
{
GtkApi.gtk_widget_destroy(WidgetHandleToDestroy.Value);
WidgetHandleToDestroy = null;
}
return 0;
}).Wait();
return;
}
#endif
base.DestroyNativeControlCore(control);
}
}
Multi Target Sample for Windows and Linux with Architecture Close to Optimal
Introduction to Architecture with Shell and Views
The purpose of the previous sample (same as other samples above) was to highlight the functionality related to Avalonia hosting Windows and Linux native controls (views). We sacrificed the architecture to achieve clarity when it comes to embedding.
In this sample, we shall achieve the same goal as in the previous sample (application with Windows and Linux targets), but optimizing its architecture the way it should be in a real project. In particular:
- Our main project (imitating a Shell) will not depend on the native views. Instead the main project shall load the native views dynamically using an IoC container.
- Instead of control specific
EmbedSample (remember it essentially creates the native control), we shell use classes NativeEmbeddingControl and HandleBuilder that will be completely view agnostic and re-usable for different native views. - We assume that our native views are given to us in some projects that are used by some other applications and should not be modified. Correspondingly, to adapt their functionality to our IoC container and Dynamic Loading, we create two very simple adapter projects - one for Linux and another for Windows native projects.
- The View Model is factored out in its own non-visual multiplatform project (this was already done in the previous sample).
- The main project that imitates the Shell has almost no target framework conditional code. 99% of such code is located within re-usable
PolyFills project.
Sample's Code Structure Overview
The sample is located under HostingNativeWithIoCDemo/HostingNativeWithIoCDemo/HostingNativeWithIoCDemo.sln solution. The startup project is HostingNativeWithIoCDemo.csproj.
Here are all the projects and solution folders as they appear within the Solution Explorer:
Here are the explanations for all the projects and folders (for simplicity, I exclude reference to multiplatform Avalonia projects).
-
HostingNativeWithIoCDemo is the startup project imitating the Shell. It depends on the re-usable projects from the Core folder. It also references my very simple, yet powerful IoC package NP.IoCy. All the simple calls to IoCy will be explained below. Most importantly for the separation of concerns, it has no dependencies on the platform specific views. In general, the Shell should not have any knowledge of the views or view models (platforms specific or not).
Its net6.0-windows target is dependent on Microsoft.Xaml.Behavior.Wpf package (which I use instead of ICommand to call a View Model method on button click). I needed it because IoCy assembly resolver still cannot resolve nuget packages from a dynamically loaded project automatically without it being loaded first into the Shell. This functionality is coming soon into IoCy and then the shell will be completely target agnostic. - Core folder contains two (potentially) re-usable visual projects:
PolyFills - project that contains almost all of the platform dependent code.Visuals - project containing re-usuable NativeEmbeddingControl. This project depends on PolyFills project.
- NativeControls folder contains two projects with native views:
LinuxControls containing LinuxView classWpfControls containing MyWpfUserControl class
Both native classes are exactly the same as Linux and WPF native controls (views) described in the previous samples. ViewModels project contains the View Model (already familiar to us from previous samples ClickCounterViewModel) re-used for both platforms. The project is 100% non-visual and multiplatform (and therefore 100% re-usable for each of the platforms).-
NativeAdapters folder contains the IoCy adapters for the native controls. The purpose of the adapters is to adapt the native visual to an IoC container. The native views/controls are often assumed to be non-modifiable because they might be used for different projects. Potentially, the team who incorporates the views into the shell might not even have the source code for them and consume them only as nuget packages.
Both projects depend on a tiny but useful NP.Utilities package that provides the attributes for IoCy (they do not need the whole IoCy, only the attributes). Also, both projects depend on PolyFills project (to allow them to create the PlatformHandle object).
LinuxAdapters project contains the adapter (a factory method with IoCy attributes) for the LinuxView class. It references LinuxControls project.WindowsAdapters project contains the adapter for the MyWpfUserControl class. It references WpfControls project.
The details for the Adapters' code will be given below.
The diagram below shows the project dependencies. Arrows on the diagram point from a referenceD project to a project that references it. The source code projects have a bold frame while nuget packages have a thinner frame:
Notes on Building and Running the Sample
There is no direct dependency between the startup project and native controls (together with their adapters). Because of that, you have to build (or better re-build) NativeAdapters folder separately from the startup project HostingNativeWithIoCDemo. The post build events for each of the adapter projects will copy their release (DLL and PDF) files into the directory of the same name as the Adapter project under:
<main-proj-output-folder>\Plugins\Views
Assuming that the root-folder is the folder containing the HostingNativeWithIoCDemo.sln solution file (the same folder contains also HostingNativeWithIoCDemo.csproj project file), the LinuxAdapters project's release content will be copied to the newly created
<root-folder>\bin\Debug\net6.0\Plugins\Views\LinuxAdapters
folder, while the WindowsAdapters release content will be copied to:
<root-folder>\bin\Debug\net6.0-windows\Plugins\Views\WindowsAdapters
folder. Make sure that those folders are populated and up to date before trying to run the startup project.
Aside for the above note, running this project should be exactly the same (for both Windows and Linux) as running the project in the previous sample - Multi Target Sample for Window and Linux. Do not forget to run VcSrv and update DISPLAY variable within Properties/launchSettings.json file for Linux environment.
The resulting application will show exactly the same layout and behavior as in the previous sample.
Gory Details about the Code
The native controls and the View Model have exactly the same code as in the previous samples. So, we shall concentrate primarily on the following two topics:
IoCy related code for storing, creating, dynamically loading and consuming the Views as Container created, Dependency Injected, Dynamically Loaded objects.- Re-usable code for creating and destroying
IPlatformHandle objects to be embedded as native objects within Avalonia visual trees.
IoCy Related Code
Take a look at WindowsControlsIoCFactory class under NativeAdapters/WindowsAdapters project. The plurality of the project name (WindowsAdapters, not WindowsAdapter, hints that more than a single windows native control (or view) adapter can be placed there (though here we are using only one). Here is the code:
[HasRegisterMethods]
public static class WindowsControlsIoCFactory
{
[RegisterMethod(typeof(IPlatformHandle), resolutionKey: "ThePlatformHandle")]
public static IPlatformHandle? CreateView()
{
MyWpfUserControl control = new MyWpfUserControl();
control.DataContext = new ViewModels.ClickCounterViewModel();
return HandleBuilder.BuildHandle(control);
}
}
The attributes [HasRegisterMethods] and [RegisterMethod(...)] come from the reference to NP.DependencyInjection package.
[HasRegisterMethods] class attribute means that the class has some IoCy factory methods in it used for creating Container objects. This will make it easier to search for such classes within an injected assembly (DLL) - instead of checking every method within every public class, we first check the public classes and only search for factory methods within the classes marked by [HasRegisterMethods] attribute.
Now take a look at the RegisterMethod(...) attribute of CreateView() method returning IPlatformHandle? object:
[RegisterMethod(typeof(IPlatformHandle), resolutionKey: "ThePlatformHandle")]
public static IPlatformHandle? CreateView()
{
   ...
}
The first argument to the attribute - typeof(IPlatformHandle) makes the container verify that the object is indeed of that type.
The argument resolutionKey can be any object that (together with the type attribute) uniquely identifies the IoC object creation cell within the container. It is better (but not necessary) to use a name or enumeration value unique across all the container objects (not only the objects of the same creation type). We call our object "ClickCounterView".
Note that there is another important parameter that we are not using - isSingleton - by setting it to true, you can create a singleton object. We do not need it (since anyways each view is used only once within the visual tree and cannot be used in two different places within a visual tree).
Now take a look at LinuxControlsIoCFactory within NativeAdapters/LinuxAdapters project:
[HasRegisterMethods]
public static class LinuxControlsIoCFactory
{
[RegisterMethod(typeof(IPlatformHandle), resolutionKey: "ClickCounterView")]
public static IPlatformHandle? CreateView()
{
return HandleBuilder.BuildObjAndHandle(() => new LinuxView());
}
}
The code is very similar, only we call return HandleBuilder.BuildObjAndHandle(() => new LinuxView()); to create and return IPlatformHandle object for LinuxView. The reason we use a different method, is because the LinuxView() constructor as well as all related manipulations need to be done within a special Avalonia thread provided by GtkInteropHelper.RunOnGlibThread(...). HandleBuilder.BuildObjAndHandle(...) ensures that all LinuxView related manipulations are done within that thread.
Now I shall describe how the IoCy container is injected with the assemblies containing the views and how the View objects are retrieved by the main project.
Take a look at App.axaml.cs file under HostingNativeWithIoCDemo project. We define the IoCContainer as a static property and the Assembly injection and container creation is done within its OnFrameworkInitializationCompleted() method:
public partial class App : Application
{
...
public static IDependencyInjectionContainer Container { get; }
public override void OnFrameworkInitializationCompleted()
{
var containerBuilder = new ContainerBuilder();
containerBuilder.InjectPluginsFromSubFolders($"Plugins{Path.DirectorySeparatorChar}Views");
Container = containerBuilder.Build();
...
}
}
Note that we are injecting the code from all the subfolders within "Plugins/Views" folder under the main project's executable directory. This is where the PostBuild events copy all the Native Adaptor release files.
The code that creates the handle and builds the Visual Tree using the handle is within MainWindow.axaml.cs file as part of MainWindow() constructor:
public MainWindow()
{
InitializeComponent();
NativeEmbeddingControl embedSample = new NativeEmbeddingControl();
IPlatformHandle? platformHandle =
App.Container.Resolve<IPlatformHandle?>("ClickCounterView");
embedSample.Handle = platformHandle;
MyContentControl.Content = embedSample;
}
Re-usable Code for Creating and Destroying IPlatformHandle Objects
This code is located within two projects, PolyFills and Visuals under Core folder.
Visuals project contains only one control - NativeEmbeddingControl that inherits from Avalonia's NativeControlHost. It has an Avalonia StyledProperty Handle (similar to WPF's DependencyProperty). It also overrides two NativeControlHost's methods: CreateNativeControlCore(...) and DestroyNativeControlCore(...):
public class NativeEmbeddingControl : NativeControlHost
{
...
protected override IPlatformHandle CreateNativeControlCore(IPlatformHandle? parent)
{
if (Handle != null)
{
return Handle;
}
return base.CreateNativeControlCore(parent!);
}
protected override void DestroyNativeControlCore(IPlatformHandle? handle)
{
handle.DestroyHandle();
}
}
PolyFill project absorbs the complexity of choosing between Windows and Linux implementations. Its classes WinApi and GtkApi import the native Windows and Linux methods needed for creating and destroying the native IPlatformHandle objects. They are exactly the same as the same named classes of the previous samples.
The most complex class is HandleBuilder. It is all peppered with the preprocessor #if, #else and #endif directions. It contains implementations for building (and destroying) IPlatformHandle objects out of WinForm, WPF or GtkSharp controls.
Most of HandleBuilder code is the same as that of the previous samples. The only difference is ControlWrapper class created only for Linux. It implements INativeControlHostDestroyableControlHandle which is IPlatformHandle interface + Destroy() method. The reason for that is that in case of a Linux widget, the returned IPlatformHandle interface needs to have X11 window handle, while when destroying the window, the gtk_widget_destroy(...) should be called on the Gtk handle of the window. Because of that, we have to keep two handles - the Gtk window handle and X11 window handle. In the examples above, we added private IntPtr? WidgetHandleToDestroy { get; set; } to EmbedSample class as the second handle. Here, we want to keep our NativeEmbeddingControl nice, clean and platform independent; so instead, we created a more involved IPlatformHandle object of ControlWrapper type that keeps those two handles and destroys the correct one when needed (similar to how it was done in Avalonia samples).
Displaying Windows Native Applications running as Native Processes in Avalonia
The most interesting example was left for last. Open HostingWindowsProcessDemo/HostingWindowsProcessDemo/HostingWindowsProcessDemo.sln solution. It contains two projects - main project HostingWindowsProcessDemo and another project WpfApp. The interesting part is that WpfApp is a standalone WPF application, not a DLL. You can make it the startup project and run it without main project. It will show the already familiar Click Counter View:
Now make HostingWindowsProcessDemo project to be the startup project within the solution. Rebuild WpfApp project; its Post Build event will copy it under:
<HostingWindowsProcessDemo-localtion>/bin/Debug/net6.0-windows/AppsToHost/WpfApp
folder.
Now build and run HostingWindowsProcessDemo project. It will start its own MainWindow, then it will also start WpfApp application and place WpfApp's window into the left half of its main Window:
A separate application instance WpfApp.exe still running in a separate process visually became part of the main window!!!
The code to achieve it is concentrated within two files of HostingWindowsProcessDemo project - MainWindow.axaml.cs and EmbeddedProcessWindow.cs files.
MainWindow.axaml.cs file defines the following functionality:
public partial class MainWindow : Window
{
public const string WpfAppProcessPath = @"AppsToHost\WpfApp\WpfApp.exe";
public MainWindow()
{
InitializeComponent();
this.Opened += MainWindow_Opened;
}
private async void MainWindow_Opened(object? sender, System.EventArgs e)
{
var wpfAppEmbeddedProcessWindow =
new EmbeddedProcessWindow(WpfAppProcessPath);
await wpfAppEmbeddedProcessWindow.StartProcess();
WpfAppPlacementControl.Content = wpfAppEmbeddedProcessWindow;
}
}
Here is the code for EmbeddedProcessWindow class:
public class EmbeddedProcessWindow : NativeControlHost
{
public string ProcessPath;
private Process _p;
public IntPtr ProcessWindowHandle { get; private set; }
public EmbeddedProcessWindow(string processPath)
{
ProcessPath = processPath;
}
public async Task StartProcess()
{
Process p = Process.Start(ProcessPath);
_p = p;
_p.Exited += _p_Exited;
while (true)
{
await Task.Delay(200);
if (p.MainWindowHandle != (IntPtr)0)
break;
}
ProcessWindowHandle = p.MainWindowHandle;
}
protected override void OnAttachedToVisualTree(VisualTreeAttachmentEventArgs e)
{
WinApi.SetParent(ProcessWindowHandle,
((Window) e.Root).PlatformImpl.Handle.Handle);
long style = WinApi.GetWindowLongPtr(ProcessWindowHandle, -16);
style &= ~0x00010000;
style &= ~0x00800000;
style &= ~0x80000000;
style &= ~0x00400000;
style &= ~0x00080000;
style &= ~0x00020000;
style &= ~0x00040000;
style |= 0x40000000;
HandleRef handleRef =
new HandleRef(null, ProcessWindowHandle);
WinApi.SetWindowLongPtr(handleRef, -16, (IntPtr)style);
base.OnAttachedToVisualTree(e);
}
protected override IPlatformHandle CreateNativeControlCore(IPlatformHandle parent)
{
if (RuntimeInformation.IsOSPlatform(OSPlatform.Windows))
{
return new PlatformHandle(ProcessWindowHandle, "ProcWinHandle");
}
else
{
return base.CreateNativeControlCore(parent);
}
}
private void _p_Exited(object? sender, System.EventArgs e)
{
}
}
EmbeddedProcessWindow inherits from NativeControlHost. It receives the path to the executable in its constructor:
public string ProcessPath { get; }

...

public EmbeddedProcessWindow(string processPath)
{
    ProcessPath = processPath;
}
Then within its async void StartProcess(), it waits until Process'es MainWindowHandle property receives the Handle of the main window of the process (becomes non-zero) and assigns it to ProcessWindowHandle property:
public async Task StartProcess()
{
Process p = Process.Start(ProcessPath);
_p = p;
_p.Exited += _p_Exited;
while (true)
{
await Task.Delay(200);
if (p.MainWindowHandle != (IntPtr)0)
break;
}
ProcessWindowHandle = p.MainWindowHandle;
}
Then after the EmbeddedProcessWindow control is attached to the visual tree of the main window, it modifies its window style (to remove window frame and buttons, to make the window - a child window, etc.) and sets its parent to the main window by calling WinApi.SetParent(...) method:
protected override void OnAttachedToVisualTree(VisualTreeAttachmentEventArgs e)
{
long style = WinApi.GetWindowLongPtr(ProcessWindowHandle, -16);
style &= ~0x00010000;
style &= ~0x00800000;
style &= ~0x80000000;
style &= ~0x00400000;
style &= ~0x00080000;
style &= ~0x00020000;
style &= ~0x00040000;
style |= 0x40000000;
HandleRef handleRef =
new HandleRef(null, ProcessWindowHandle);
WinApi.SetWindowLongPtr(handleRef, -16, (IntPtr)style);
WinApi.SetParent(ProcessWindowHandle,
((Window)e.Root).PlatformImpl.Handle.Handle);
base.OnAttachedToVisualTree(e);
}
Finally, the override of NativeControlHost.CreateNativeControlCore(...) will return the new PlatformHandle(ProcessWindowHandle, "ProcWinHandle"); (ProcessWindowHandle had been set before within OnAttachedToVisualTree(...)):
protected override IPlatformHandle CreateNativeControlCore(IPlatformHandle parent)
{
if (RuntimeInformation.IsOSPlatform(OSPlatform.Windows))
{
return new PlatformHandle(ProcessWindowHandle, "ProcWinHandle");
}
else
{
return base.CreateNativeControlCore(parent);
}
}
Conclusion
In this article, I provided simple and detailed examples of Avalonia applications embedding Windows and Linux Views/Controls. It started with simple applications demonstrating how to embed WinForms, WPF and GtkSharp applications.
Then I provided two samples demonstrating how to make the same application embed a WPF control on Windows and a similar Linux control on Linux. The first sample was very straightforward to highlight the native embedding features, while the second sample demonstrated embedding native views with near optimal architecture (the views and the main project being independent and the views are being created by an IoC container).
The final sample demonstrates how to embed a window from a different WPF process into an Avalonia application. This last sample was only built for Windows (10 and 11) because I have a problem figuring out how to get a window X11 ID from a process handle on Linux. Time permitting I'll figure it out and then I'll add another section describing how to embed a native Linux window from a different process.
Acknowledgement
A hat tip to Nikita Tsukanov from the Avalonia team for some help with Linux samples.
History
- 28th November, 2022: Initial version
- Upgraded samples and the article to Avalonia 11.0.6


 General
  News
News  Suggestion
  Question
  Bug
Bug  Answer
  Joke
Joke  Praise
  Rant
Rant  Admin
Admin 


