Here we explain the structure of the simple face database for face identification, then develop the Python code of the utilities to add faces to a face database, and give the references to download faces for creating the database. Finally, we explain how to launch the utility code for extracting faces from images and video.
Introduction
Face recognition is one area of Artificial Intelligence (AI) where deep learning (DL) has had great success over the past decade. The best face recognition systems can recognize people in images and video with the same precision humans can – or even better. The two main base stages of face recognition are person verification and identification.
In the first (current) half of this article series, we will:
- Discuss the existing AI face detection methods and develop a program to run a pretrained DNN model
- Consider face alignment and implement some alignment algorithms using face landmarks
- Run the face detection DNN on a Raspberry Pi device, explore its performance, and consider possible ways to run it faster, as well as to detect faces in real time
- Create a simple face database and fill it with faces extracted from images or videos
We assume that you are familiar with DNN, Python, Keras, and TensorFlow. You are welcome to download this project code ...
Having completed the previous article, we now have a good working DNN model for face detection, which can be run together with the face alignment algorithm on a PC to find faces in video streams. Can we use this AI model on a resource-constrained edge device? In this article, we’ll test our facial detection application on a Raspberry Pi and share ideas on running it in real time mode.
Installing Components on Raspberry Pi
We’ll test our application on a Raspberry Pi 3B device, 1GB RA<, with the Raspbian 32-bit OS. First, we need to install the MTCNN library on the device. This can be done as follows:
$ pip install mtcnn
When we ran the above command, it produced the following output:
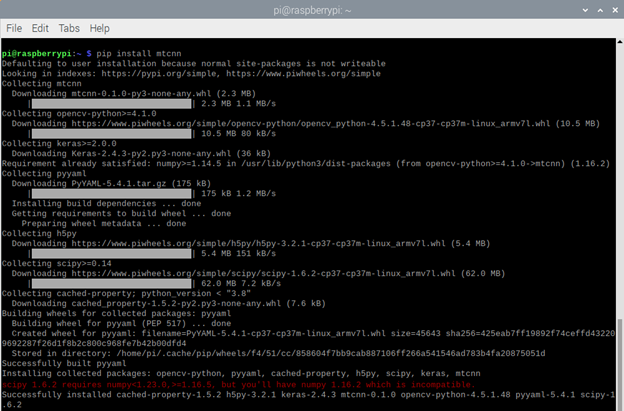
You can see that we also have to install the NumPy package 1.16.5 or later. The MTCNN library uses the Keras framework, so we need to install the TensorFlow backend 2.0.0 or later. Here are the installation commands:
$ sudo apt-get update
$ sudo apt-get upgrade
$ sudo pip uninstall tensorflow
$ sudo pip3 uninstall tensorflow
$ sudo apt-get install gfortran
$ sudo apt-get install libhdf5-dev libc-ares-dev libeigen3-dev
$ sudo apt-get install libatlas-base-dev libopenblas-dev libblas-dev
$ sudo apt-get install openmpi-bin libopenmpi-dev
$ sudo apt-get install liblapack-dev cython
$ sudo pip3 install keras_applications==1.0.8 --no-deps
$ sudo pip3 install keras_preprocessing==1.1.0 --no-deps
$ sudo pip3 install -U --user six wheel mock
$ sudo -H pip3 install pybind11
$ sudo -H pip3 install h5py==2.10.0
$ sudo -H pip3 install --upgrade setuptools
$ pip install gdown
$ sudo cp ~/.local/bin/gdown /usr/local/bin/gdown
$ gdown https://drive.google.com/uc?id=11mujzVaFqa7R1_lB7q0kVPW22Ol51MPg
$ sudo -H pip3 install tensorflow-2.2.0-cp37-cp37m-linux_armv7l.whl
$ sudo reboot
Following the instructions, we installed the latest TensorFlow version.

Running Detector on Raspberry Pi
Now we can run our face detector on Raspberry Pi against a video file. The code is the same as on PC. We only need to set up the appropriate folders according to the device’s environment:
d = MTCNN_Detector(60, 0.95)
vd = VideoFD(d)
v_file = r"/home/pi/Desktop/PI_FR/video/5_2.mp4"

save_path = r"/home/pi/Desktop/PI_FR/detect"
(f_count, fps) = vd.detect(v_file, save_path, True, False)

print("Face detections: "+str(f_count))
print("FPS: "+str(fps))
Here is the video produced by the experiment we ran on the Raspberry Pi 3 device.
As you can see, the detector works on the edge device with low memory and CPU. The MTCNN detector successfully finds faces in the video, with acceptable confidence. But… the processing rate is very low. The detection is limited to 0.4 FPS. This means that we’ll need about 2.5 seconds to process a single video frame.
Performance Considerations
Is 0.4 FPS enough for a face recognition system? It depends on how and where we are going to use this software. If we need to recognize people who move very quickly, the answer is probably no because we won’t have enough time to detect all faces. If, however, a person’s face is in the camera’s view for at least five seconds, chances are good that we’ll detect the face. In five seconds, we can process two frames - so we have two tries for every face.
Assuming that our system will work in the "five-second" conditions, We still need to turn it into a real-time mode - to have it process a video stream from a live camera. Have a look at this approach to running the AI model in real time. The idea is simple: run the AI model in a separate thread and, while it is processing, skip video frames. This approach is very much applicable to our system because we don’t need to recognize a face at the moment the camera catches it. Instead, we send it to the central processing server for identification.
We can suggest yet another method for increasing the processing speed. The MTCNN model’s speed directly depends on the size of a video frame. We can use a motion detector to select regions of interest in a frame. As the motion regions are smaller than the entire frame, the processing time will decrease. Here is one realization of a motion detector on Raspberry Pi.
Obviously, we can also use an edge device with higher performance. For example, why not use Raspberry Pi 4?
Next Steps
In this article, we showed you that our MTCNN detector can run on edge devices. In all subsequent experiments, we’ll test the algorithm on video files while assuming that the same results can be achieved in near the real-time mode.
In the next article, we’ll explain how to create a simple database for face recognition. Stay tuned!


 General
  News
News  Suggestion
  Question
  Bug
Bug  Answer
  Joke
Joke  Praise
  Rant
Rant  Admin
Admin 


