Introduction
This article will talk about how we can add / delete Table rows dynamically using jQuery in ASP.NET. We will discuss probable issue we may face while binding events with the controls created dynamically using jQuery.
Let’s consider that there is a simple HTML table with three columns containing a TextBox control, a button – Plus, another button – Minus. We want to add functionalities so that user can enter multiple Names as desired. Once user clicks on the Plus button, a new row will be appended to the table. If user clicks Minus button, the entire row should get deleted.
Background
First, we will start with a simple example which may not sound very realistic problem. But later on, we will add more functionality to make the example more meaningful!
Note: In this article, our focus is to add / delete row dynamically to/from an existing HTML table. We’ll not cover how we can retain data during postback.
Using the Code
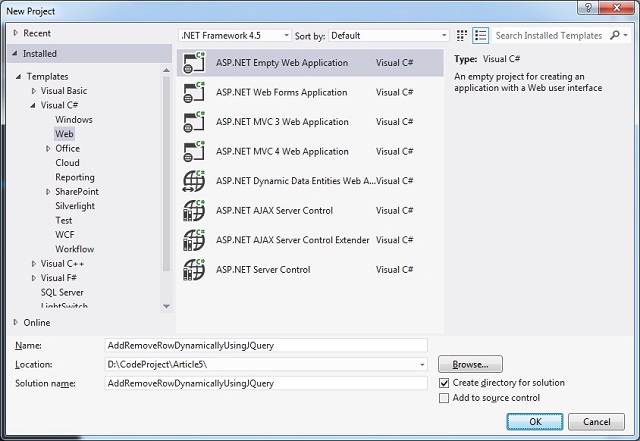
Let’s start by creating a New Project > select ASP.NET Empty Web Application > enter a suitable name, say AddRemoveRowDynamicallyUsingJQuery > click OK:
Step 1: Adding jQuery Reference
To play with jQuery, first we have to add reference to a jQuery library. Reference can be added in two different ways.
- Add reference from a CDN (Content Delivery Network), like Google, Microsoft, etc.
There are two versions (i.e. Production version, Development version) of jQuery available for downloading. Both versions can be downloaded from jQuery.com.
The jQuery library is a single JavaScript file, and you reference it with the HTML <script> tag and it should be inside the <head> section as shown below:
<head>
<script type="text/javascript" src="jquery-1.11.1.min.js"></script>
</head>
Note: If you don't want to download and host jQuery yourself, you can include it from a CDN (Content Delivery Network). Both Google and Microsoft host jQuery. To use jQuery from Google or Microsoft, use one of the followings:
Google CDN
<script src="http://ajax.googleapis.com/ajax/libs/jquery/1.11.1/jquery.min.js"></script>
Microsoft CDN
<script src="http://ajax.aspnetcdn.com/ajax/jQuery/jquery-1.11.1.min.js"></script>
Step 2: Adding HTML Changes
Let’s add a simple HTML table with three columns. Here we will add a TextBox control in the first column. Add an HTML button control for Add functionality in the second column. Add another HTML button for Delete functionality in the third column.
<table id="Table1" cellspacing="3">
    <tr>
        <td>Name:
            <asp:TextBox ID="FU1" runat="server"></asp:TextBox>
        </td>
        <td>
            <input type="button" class="BtnPlus" value="+" />
        </td>
        <td>
            <input type="button" class="BtnMinus" value="-" />
        </td>
    </tr>
</table>
If you have noticed that we have used different selectors for our HTML controls. The #id Selector will be used for the table control since we have a single table with a unique id=”Table1”. We will use The .class Selector to find the button controls as there would be multiple buttons while new rows will be added dynamically:
- class=”
BtnPlus” – In the Plus button - class=”
BtnMinus” – In the Minus button
Note: jQuery selectors are used to "find" (or select) HTML elements based on their id, classes, types, attributes, values of attributes and much more. If you are not familiar with jQuery selectors, please visit the below link:
Step 3: Adding jQuery Changes
We’re done with the HTML changes. We will start writing jQuery code to handle add functionality first. It’s best practice to write jQuery code inside a document ready event, so let’s write the base for our jQuery code as follows:
<script type="text/javascript">
    $(document).ready(function () {

    });
</script>
In the HTML markup, the table has already a row added. As per our requirement, we will provide functionality to add more rows dynamically to the table.
Let’s add below code to create row dynamically to the existing table:
$(document).ready(function () {
    function addRow() {
        var html = '<tr>' +
                    '<td>Name: <input type="text" id="txtName"></td>' +
                    '<td><input type="button" class="BtnPlus" value="+" /></td>' +
                    '<td><input type="button" class="BtnMinus" value="-" /></td>' +
                    '</tr>'
        $(html).appendTo($("#Table1"))
    };
    $(".BtnPlus").click(addRow);
});
Code Explanation
First, we are creating a string object with the HTML markup to create an entire row element. Then we will append this row to the existing table control.
Note: If you have noticed that we added <asp:TextBox> control in Step 2: Adding HTML changes. But here we're adding <input type="text"> control. The intention is to make a point that ultimately both are same and going to be rendered as <input type="text"> control only.
$(html).appendTo($("#Table1"));
This line will actually append the new row to the existing HTML table – “Table1”.
$(".BtnPlus").click(addRow);
Here the selector “.BtnPlus” will help to bind click event with all controls which has class=”BtnPlus”. Once the Plus button is clicked, addRow() function will be triggered.
Let’s execute the project and see how it’s working. Build the project by pressing [CTRL] + [SHIFT] + b or just press [F5] to run the project.

Click on Plus button (+) and see how it’s adding new row to the table. So now we are able to create controls dynamically using jQuery. As expected, if we click Plus button of any row, a new row should be added. In this case, if we click Plus button in the first row, it’s working as expected. But, the Plus buttons in newly added rows are not working.
This is an issue which happens as the click event handler is bounded only to those elements that exist on the page at the time our code made the call to .click() event. It does not work for the controls created dynamically, since they were added to the page at a later stage.
Let’s resolve this issue by using Event Delegation to register the click event handler to the dynamically created buttons:
$("#Table1").on("click", ".BtnPlus", addRow);
In this delegated-events approach, we are selecting the button controls through Table control. The delegated events have the advantage that they can process events from descendant elements that are added to the document at a later time. We can use delegated events to bind the click event to dynamically created elements.
Check once again and this time all Plus buttons should work as expected:
We will move on to add row delete functionality. Write the following jQuery code to delete row from a table:
function deleteRow() {
    var par = $(this).parent().parent();
    par.remove();
};
$("#Table1").on("click", ".BtnMinus", deleteRow);
Code Explanation
var par = $(this).parent().parent();
This code will help to select the Row i.e. <tr> element. The below image will help how the code is actually selecting the row element:
$("#Table1").on("click", ".BtnMinus", deleteRow);
In this line, we are using the same Delegated-Event approach that we used earlier to bind addRow function.
We are done with all the changes to fulfill our primary requirement. Let’s run the application and check that everything should work fine.
- Plus button (+) – click to add new row
- Minus button (-) – click to delete row
Wait, have you guys noticed in deleteRow(), it's a little clumsy and indirect to call $(this).parent().parent(). What if we add more layers later (e.g., <TBODY> around rows or <DIV> around the buttons)?
Let's use $(this).closest('TR') to select the <TR> tag. Thanks to @Brian-A-Stephens for this suggestion. :thumbsup:
Step 4: Adding More Functionality
The time has come to make this example more meaningful. You might have seen in many websites which actually allow users to upload files. We will modify this example to allow user to upload files. User will be able to upload one or more files as desired.
Let’s modify the HTML markup to replace TextBox control with FileUpload control:
<table id="Table1" cellspacing="3">
    <tr class="rowstyle">
        <td>Select File:
            <asp:FileUpload ID="fileUpload1" runat="server" />
        </td>
        <td>
            <input type="button" class="BtnPlus" value="+" />
        </td>
        <td>
            <input type="button" class="BtnMinus" value="-" />
        </td>
    </tr>
</table>
<asp:Button ID="btnUploadFile" runat="server" Text="Upload" />
An <asp:Button> control is added to make a postback so that the selected files can be uploaded to the server.
Similarly we have to tweak our jQuery code as well to work with the HTML markup changes. Let’s modify the jQuery code as highlighted below:
<script type="text/javascript">
    $(document).ready(function () {
        var ID = 2;
        function addRow() {
            var html =
                '<tr>' +
                '<td>File: <input type="file" name="fileUpload' + ID + '" /></td>' +
                '<td><input type="button" class="BtnPlus" value="+" /></td>' +
                '<td><input type="button" class="BtnMinus" value="-" /></td>' +
                '</tr>'
            $(html).appendTo($("#Table1"))
            ID++;
        };
        $("#Table1").on("click", ".BtnPlus", addRow);
        function deleteRow() {
            var par = $(this).parent().parent();
            par.remove();
        };
        $("#Table1").on("click", ".BtnMinus", deleteRow);
    });
</script>
Code Explanation
var ID = 2;
This variable is used to create unique ID for FileUpload control which will be created dynamically. Note that the variable is initialized with value 2 as we already have a FileUpload control created with ID="fileUpload1".
File: <input type="file" name="fileUpload' + ID + '" />
<asp:FileUpload> control actually renders as <input type=file”> control in HTML markup hence changed the input type as “file”. We are also using ID variable to create a unique ID for this control.
ID++;
To increment the counter variable.
Step 5: Adding a HttpHandler
Now the final part, we are going to write a simple generic HttpHandler that will accept any posted file. We can implement restrictions on file types/size but for this example, we will keep it simple and will not include any restrictions of file types/size user can upload.
Let’s add a New Item > select Generic Handler > give a name – FileUploadHandler.ashx > click Add button:
This will add a FileUploadHandler.ashx file with a code behind file – FileUploadHandler.ashx.cs
Please note that FileUploadHandler is already implemented IHttpHandler interface. Let’s modify the ProcessRequest() method to handle files upload:
using System;
using System.Configuration;
using System.IO;
using System.Web;
namespace AddRemoveRowDynamicallyUsingJQuery
{
public class FileUploadHandler : IHttpHandler
{
public void ProcessRequest(HttpContext context)
{
try
{
context.Response.ContentType = "text/plain";
string tempPath = ConfigurationManager.AppSettings["FolderPath"];
string pathSave = context.Server.MapPath(tempPath);
if (!Directory.Exists(pathSave))
{
try
{
Directory.CreateDirectory(pathSave);
}
catch { }
}
for (int i = 0; i < context.Request.Files.Count; i++)
{
HttpPostedFile objHttpPostedFile = (HttpPostedFile)context.Request.Files[i];
string fileName = objHttpPostedFile.FileName;
int index = fileName.LastIndexOf("\\");
fileName = fileName.Substring(index, fileName.Length - index);
objHttpPostedFile.SaveAs(string.Concat(pathSave, fileName));
if (i == context.Request.Files.Count - 1)
{
   context.Response.Write("Files uploaded successfully!");
}
}
}
catch (Exception ex)
{
context.Response.Write("Error: " + ex.Message);
}
}
public bool IsReusable
{
get
{
return false;
}
}
}
}
Code Explanation
string tempPath = ConfigurationManager.AppSettings["FolderPath"];
This line will get the folder path from AppSettings in web.config file. The folder path will be used to keep uploaded files.
string pathSave = context.Server.MapPath(tempPath);
This line will get the physical folder path.
if (!Directory.Exists(pathSave))
This check will ensure whether the folder does exist.
Directory.CreateDirectory(pathSave);
This line will actually create a folder with the given name. Please note Directory class is present in System.IO namespace.
for (int i = 0; i < context.Request.Files.Count; i++)
HttpFileCollection object holds all the files selected for upload. Let’s loop through all the files available in HttpFileCollection object.
HttpPostedFile objHttpPostedFile = (HttpPostedFile)context.Request.Files[i];
This line is fetching one File at a time from HttpFileCollection object and creating a HttpPostedFile object which will be used to save it in the server.
string fileName = objHttpPostedFile.FileName;
This line will get the selected File Name with complete folder path.
int index = fileName.LastIndexOf("\\");
fileName = fileName.Substring(index, fileName.Length - index);
These lines will get only the file name without the folder path.
objHttpPostedFile.SaveAs(string.Concat(pathSave, fileName));
This line will save the file in the server.
if (i == context.Request.Files.Count - 1)
{
context.Response.Write("Files uploaded successfully!");
}
Once all the files are saved/uploaded, we will display a nice message - "Files uploaded successfully!" on the UI.
Step 6: Making web.config Changes
We already added code in HttpHandler to get the folder name (where we want to keep uploaded files) from <appSettings> in web.config file. Let’s add the setting in web.config file as shown below:
<appSettings>
    <add key="FolderPath" value="\App_Data"/>
</appSettings>
Final configuration setting is required to keep application know about the HttpHandler:
<system.webServer>
    <handlers>
        <add verb="POST" path="*.*"
             name="FileUploadHandler"
             type="AddRemoveRowDynamicallyUsingJQuery.FileUploadHandler, AddRemoveRowDynamicallyUsingJQuery"/>
    </handlers>
</system.webServer>
Execute the application > select multiple files to upload > click Upload button. All the selected files should be saved to the App_Folder.
That’s it. :) Please post your comments or suggestions about this post, I would really appreciate it. Thanks for reading.
Happy coding. :)
Points of Interest
If you are not familiar with jQuery, then I would recommend to visit the following link:
To know more about HttpHandler, you may visit a wonderful article written by Rahul Rajat Singh:
History
- 6th June, 2014: Initial version
I'm Debabrata Das, also known as DD. I started working as a FoxPro 2.6 developer then there is a list of different technologies/languages C, C++, VB 6.0, Classic ASP, COM, DCOM, ASP.NET, ASP.NET MVC, C#, HTML, CSS, JavaScript, jQuery, SQL Server, Oracle, No-SQL, Node.Js, ReactJS, etc.
I believe in "the best way to learn is to teach". Passionate about finding a more efficient solution of any given problem.


 General
  News
News  Suggestion
  Question
  Bug
Bug  Answer
  Joke
Joke  Praise
  Rant
Rant  Admin
Admin 


