In this article we are going to create a mobile application with Azure using Visual Studio. Before you start with make sure that you have some azure credits with you. You can always create new azure free account where you can claim for some free credits Azure free trial . Please be noted that you can get only limited azure credits with the free account. But to get started, that is more than enough. Now we will go and create our application. I hope you will like this.
Download the source code
You can always download the source code here.
Azure Mobile App With Visual StudioBackground
We all know what Azure is. If you are really new to Azure, I strongly recommend you to have a look at here .To get started, please make sure that you have installed Visual Studio in your machine. You can always download visual studio from here.
Setting Azure Portal
Login to your Azure portal from Azure Portal. Once you logged in, you can see a dashboard and a menu as follows.

Microsoft Azure Portal Menu
Now click on New -> Web+Mobile -> Mobile App.
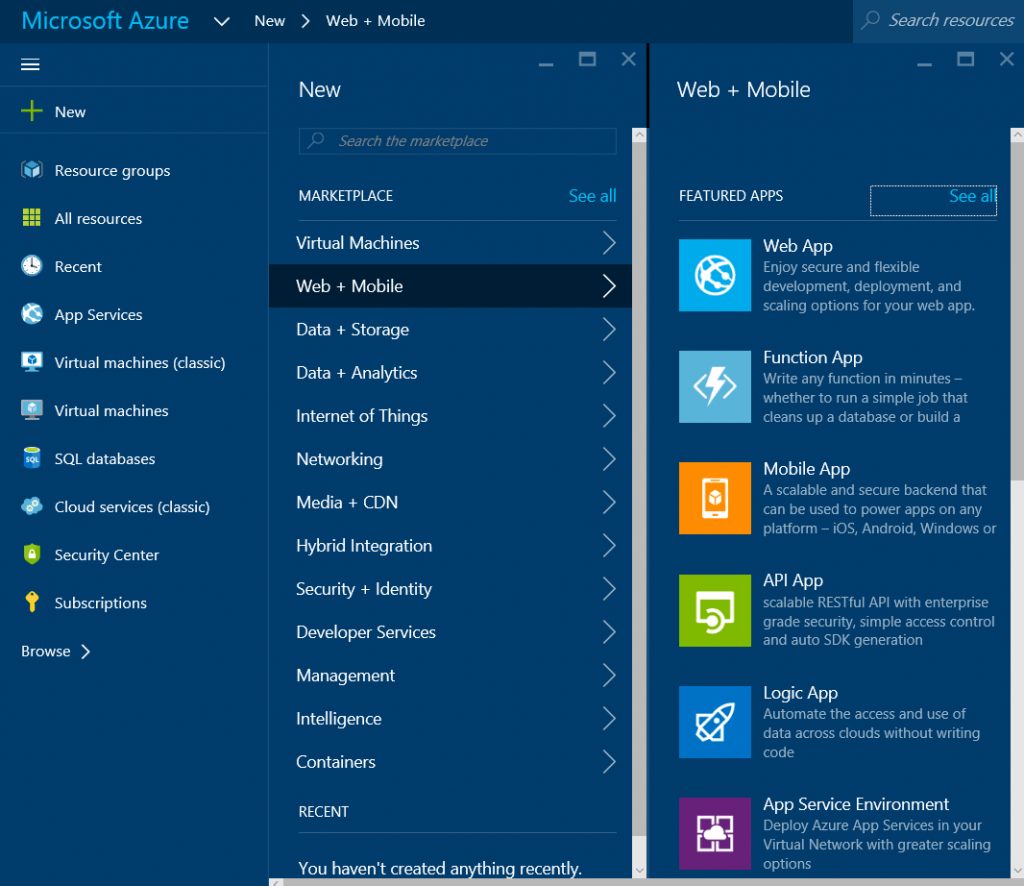
Web Mobile Category In Azure Portal
Now name your mobile application. Select your subscription, it will be automatically selected if you have only one subscription. Please select the subscription accordingly if you have multiple subscriptions. Select or create new resource group. You may be thinking what is this resource group, and what are all the benefits for using it. According to Microsoft, a resource group is a collection of resources so that you can use those accordingly. A resource can be included only in one resource group and it is possible to link the resources in other resource group. Please be noted that you can’t edit and rename your resource group name. Only option you are allowed is to move your resources to your new resource group. Please see Move resources to a new resource group in azure if you need to move your resources.
Now select your service plan or location as per your need. Now click on that link. You can see all the service plans you have used so far, you can select those if you want or you can create a new one.

Available App Service Plan In Azure
To create a new one, please click the ‘Create new’ option.
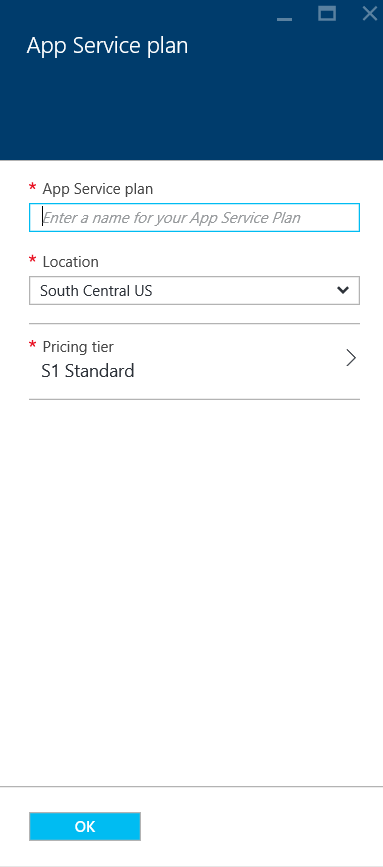
New App Service Plan In Azure
Now select your app service plan, location, pricing tier. When you select the pricing tier, please be cautious because Azure charge you according to your use. Select it according your use.
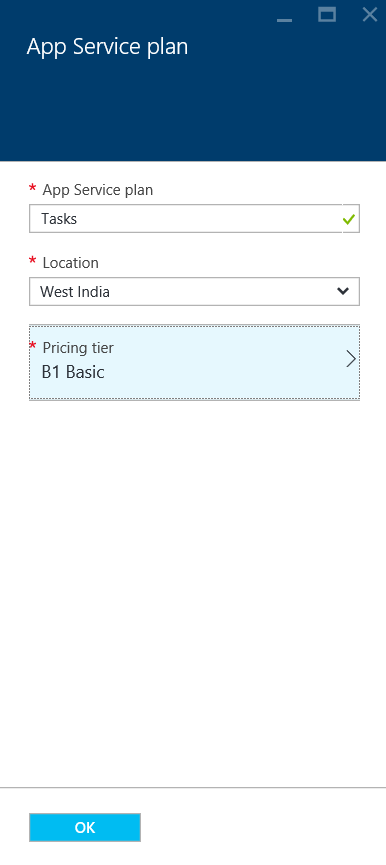
App Service Pricing Tier
Now this is how you Mobile App service set up looks like. You can always pin your mobile app to your dashboard.
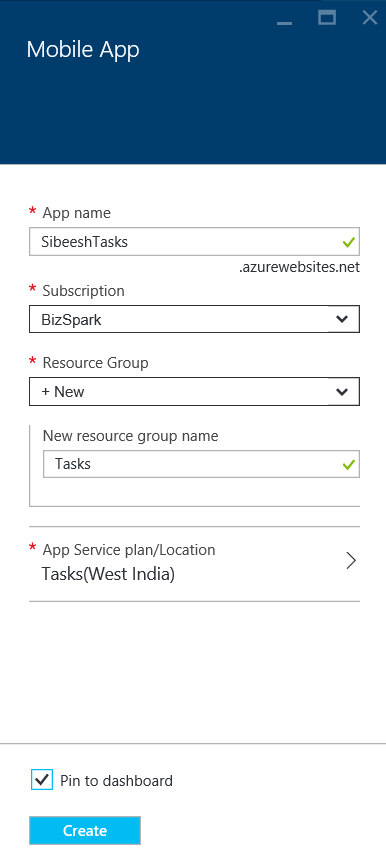
Mobie App Service
Once this is done, you will get a notification that your mobile app deployment is succeeded if nothing goes wrong and you can see the app in your dashboard. Now click on the settings of your mobile application and then quick start.
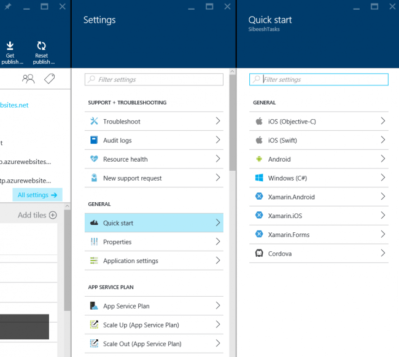
Quick Start Option In Azure Mobile App
Select Windows(C#) from it. Now you will be asked to complete three actions.
Connect a databaseCreate a table APIConfigure your client applicationConnect a database
Click on connect a database ( We will create a database first). Click Add and add a data connection as follows.
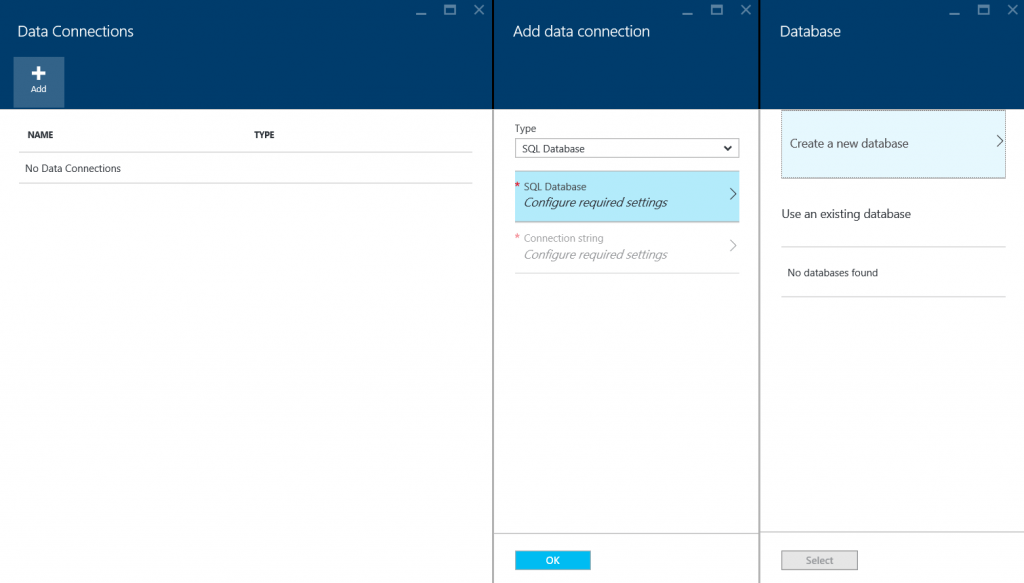
Data Connections In Azure Mobile App
Now give your database name and pricing tier. For now I am going to select the pricing tier as Basic. You can see 5 DTUs are available for Basic tier. According to Microsoft, The Database Transaction Unit (DTU) is the unit of measure in SQL Database that represents the relative power of databases based on a real-world measure: the database transaction. Please read more here.
Did you notice that there is a field called Collation? Basically a collation is a set of rules and regulation we set for the proper use of characters. Like the characters are much different in all the languages, we set the collation accordingly. The default collation for character data in Azure SQL database is SQL_Latin1_General_CP1_CI_AS. You can read about collation here.
Next, set your server and click OK. Once you click OK, you can see the connection strings is being set automatically for you. Creation of data connection may take few minutes. Now we will create a table API.
Create a table API
To store the data in your back end. You need a table, isn’t it? The first option you will see here is select the language for your back end actions. You can select either C# or Node JS.
There was a time, that we can do server side actions only by using server side languages like C#,Vb.Net, PhP etc. Now everything changes, we can do server side actions with few set of JavaScript, that is Node JS.
Once you select your language you can see a message as “Once you’ve downloaded your personalized server project, extract it and open in Visual Studio. Right-click the project and select “Publish” to host the code in your mobile backend. The TodoItem table will be created automatically using Entity Framework.” Now we will do as suggested.
Please open your downloaded project in Visual Studio. Right click the project file then click publish. You can see a window and finish Profile, Connection, Settings steps.
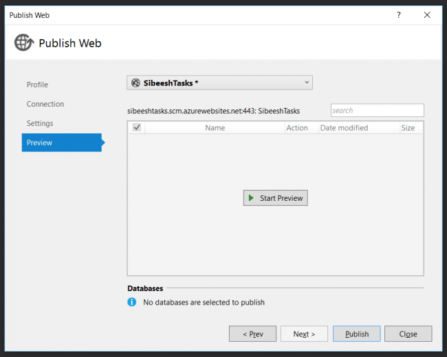
Azure Mobile App preview
Click publish once you verified the settings. It may take few minutes according to your internet bandwidth. In the meanwhile you can see all the controllers and additional files had been created for us automatically. For example below is the Values controller.
using System.Web.Http;
using System.Web.Http.Tracing;
using Microsoft.Azure.Mobile.Server;
using Microsoft.Azure.Mobile.Server.Config;
namespace SibeeshTasksService.Controllers
{
[MobileAppController]
public class ValuesController : ApiController
{
public string Get()
{
MobileAppSettingsDictionary settings = this.Configuration.GetMobileAppSettingsProvider().GetMobileAppSettings();
ITraceWriter traceWriter = this.Configuration.Services.GetTraceWriter();
string host = settings.HostName ?? "localhost";
string greeting = "Hello from " + host;
traceWriter.Info(greeting);
return greeting;
}
public string Post()
{
return "Hello World!";
}
}
}
Now the publish process is completed, you can see a message as follows.
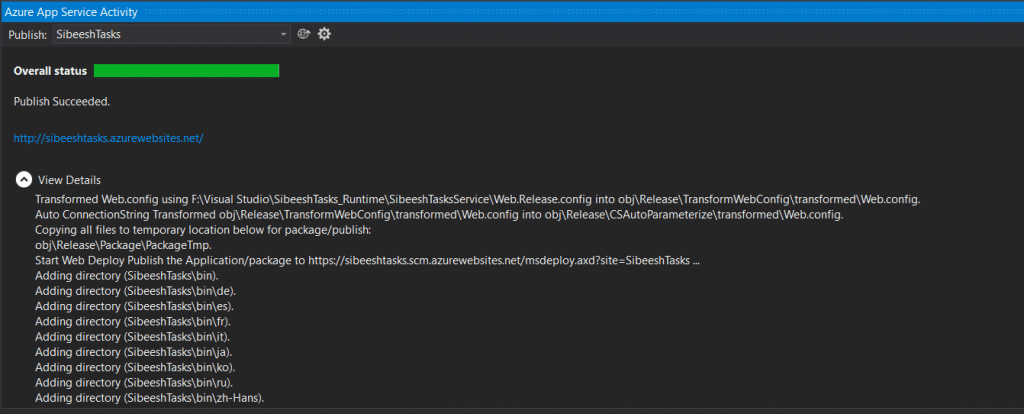
Azure App Service Publish
Now please go back to your Azure portal.
Configure your client application
It is time to configure our client application now. Download the client application by clicking the link provided. And open the project in Visual Studio. Please install the missing files if it is asked to do so.
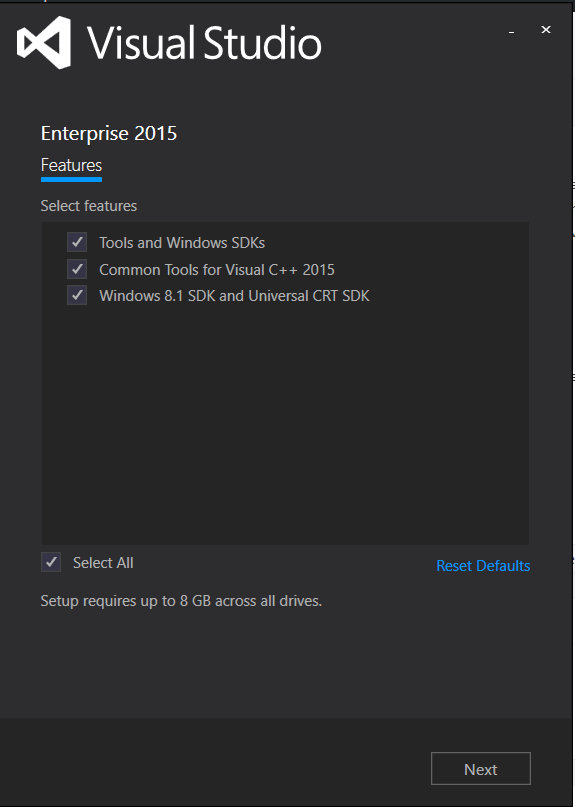
MIssing Componenets
Once the installation is done, reload your project and it will be asked to enable developer mode for windows 10. Go ahead and change that in settings.
Now please open the shared project and click on MainPage.cs file, you can see the CRUD operation actions are already created for us.
using System;
using System.Collections.Generic;
using System.Text;
using System.Threading.Tasks;
using Microsoft.WindowsAzure.MobileServices;
using Windows.UI.Popups;
using Windows.UI.Xaml;
using Windows.UI.Xaml.Controls;
using Windows.UI.Xaml.Navigation;
namespace SibeeshTasks
{
sealed partial class MainPage: Page
{
private MobileServiceCollection<TodoItem, TodoItem> items;
private IMobileServiceTable<TodoItem> todoTable = App.MobileService.GetTable<TodoItem>();
public MainPage()
{
this.InitializeComponent();
}
private async Task InsertTodoItem(TodoItem todoItem)
{
await todoTable.InsertAsync(todoItem);
items.Add(todoItem);
}
private async Task RefreshTodoItems()
{
MobileServiceInvalidOperationException exception = null;
try
{
items = await todoTable
.Where(todoItem => todoItem.Complete == false)
.ToCollectionAsync();
}
catch (MobileServiceInvalidOperationException e)
{
exception = e;
}
if (exception != null)
{
await new MessageDialog(exception.Message, "Error loading items").ShowAsync();
}
else
{
ListItems.ItemsSource = items;
this.ButtonSave.IsEnabled = true;
}
}
private async Task UpdateCheckedTodoItem(TodoItem item)
{
await todoTable.UpdateAsync(item);
items.Remove(item);
ListItems.Focus(Windows.UI.Xaml.FocusState.Unfocused);
}
private async void ButtonRefresh_Click(object sender, RoutedEventArgs e)
{
ButtonRefresh.IsEnabled = false;
await RefreshTodoItems();
ButtonRefresh.IsEnabled = true;
}
private async void ButtonSave_Click(object sender, RoutedEventArgs e)
{
var todoItem = new TodoItem { Text = TextInput.Text };
await InsertTodoItem(todoItem);
}
private async void CheckBoxComplete_Checked(object sender, RoutedEventArgs e)
{
CheckBox cb = (CheckBox)sender;
TodoItem item = cb.DataContext as TodoItem;
await UpdateCheckedTodoItem(item);
}
protected override async void OnNavigatedTo(NavigationEventArgs e)
{
await RefreshTodoItems();
}
#region Offline sync
#endregion
}
}
And following is the XAML file created for our app design.
<Page
    x:Class="SibeeshTasks.MainPage"
    IsTabStop="false"
    xmlns="http://schemas.microsoft.com/winfx/2006/xaml/presentation"
    xmlns:x="http://schemas.microsoft.com/winfx/2006/xaml"
    xmlns:local="using:SibeeshTasks"
    xmlns:d="http://schemas.microsoft.com/expression/blend/2008"
    xmlns:mc="http://schemas.openxmlformats.org/markup-compatibility/2006"
    mc:Ignorable="d">

    <Grid Background="White">

        <Grid Margin="50,50,10,10">
            <Grid.ColumnDefinitions>
                <ColumnDefinition Width="*" />
                <ColumnDefinition Width="*" />
            </Grid.ColumnDefinitions>
            <Grid.RowDefinitions>
                <RowDefinition Height="Auto" />
                <RowDefinition Height="*" />
            </Grid.RowDefinitions>

            <Grid Grid.Row="0" Grid.ColumnSpan="2" Margin="0,0,0,20">
                <StackPanel>
                    <TextBlock Foreground="#0094ff" FontFamily="Segoe UI Light" Margin="0,0,0,6">MICROSOFT AZURE MOBILE SERVICES</TextBlock>
                    <TextBlock Foreground="Gray" FontFamily="Segoe UI Light" FontSize="45" >SibeeshTasks</TextBlock>
                </StackPanel>
            </Grid>


            <Grid Grid.Row="1">
                <StackPanel>

                    <local:QuickStartTask Number="1" Title="Insert a TodoItem" Description="Enter some text below and click Save to insert a new todo item into your database" />

                    <StackPanel Orientation="Horizontal" Margin="72,0,0,0">
                        <TextBox Name="TextInput" Margin="5" MinWidth="300"></TextBox>
                        <Button Name="ButtonSave" Click="ButtonSave_Click" IsEnabled="False">Save</Button>
                    </StackPanel>

                </StackPanel>
            </Grid>

            <Grid Grid.Row="1" Grid.Column="1">
                <Grid.RowDefinitions>
                    <RowDefinition Height="Auto" />
                    <RowDefinition />
                </Grid.RowDefinitions>
                <StackPanel>
                    <local:QuickStartTask Number="2" Title="Query and Update Data" Description="Click refresh below to load the unfinished TodoItems from your database. Use the checkbox to complete and update your TodoItems" />
                    <Button Margin="72,0,0,0" Name="ButtonRefresh" Click="ButtonRefresh_Click">Refresh</Button>
                </StackPanel>

                <ListView Name="ListItems" Margin="62,10,0,0" Grid.Row="1">
                    <ListView.ItemTemplate>
                        <DataTemplate>
                            <StackPanel Orientation="Horizontal">
                                <CheckBox Name="CheckBoxComplete" IsChecked="{Binding Complete, Mode=TwoWay}" Checked="CheckBoxComplete_Checked" Content="{Binding Text}" Margin="10,5" VerticalAlignment="Center"/>
                            </StackPanel>
                        </DataTemplate>
                    </ListView.ItemTemplate>
                </ListView>

            </Grid>

        </Grid>
    </Grid>
</Page>
Now please run your project. Here I am running the app in visual studio. You can always run the same in Windows Emulator. If nothing goes wrong you can see an output as follows.
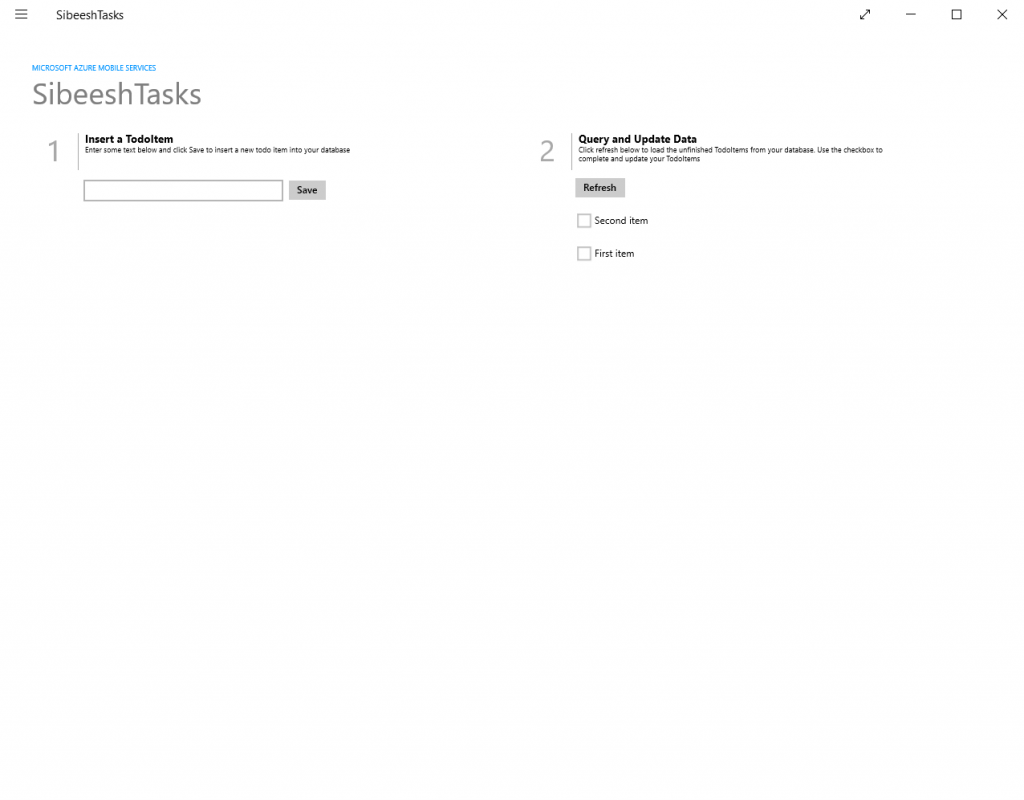
Azure Mobile App Output

Azure Mobile App Output Inserting And Reading
Just to make sure that the entries has been inserted and the data is getting from the database we can go back to our Azure portal. We all are humans, we believe things when we see. We all asks for the proof. Isn’t it? Click on SQL databases from the menu. Now you can see all the databases you have created, click on the database and get the server name, user id and password form the connection string. Once you get it, open your SQL Server Management Studio in your local machine and provide the details you took from the connection string. Now you can see the our Azure SQL database in your local SSMS.
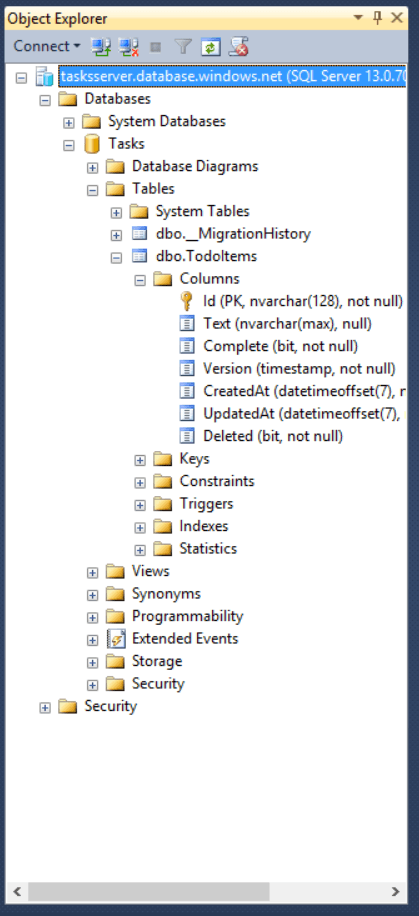
Connect Azure SQL Database Through SSMS
Now we can query our table and see the data. Right?
USE [Tasks]
GO

SELECT [Id]
      ,[Text]
      ,[Complete]
      ,[Version]
      ,[CreatedAt]
      ,[UpdatedAt]
      ,[Deleted]
  FROM [dbo].[TodoItems]
GO
I am sure you will get an result as follows.
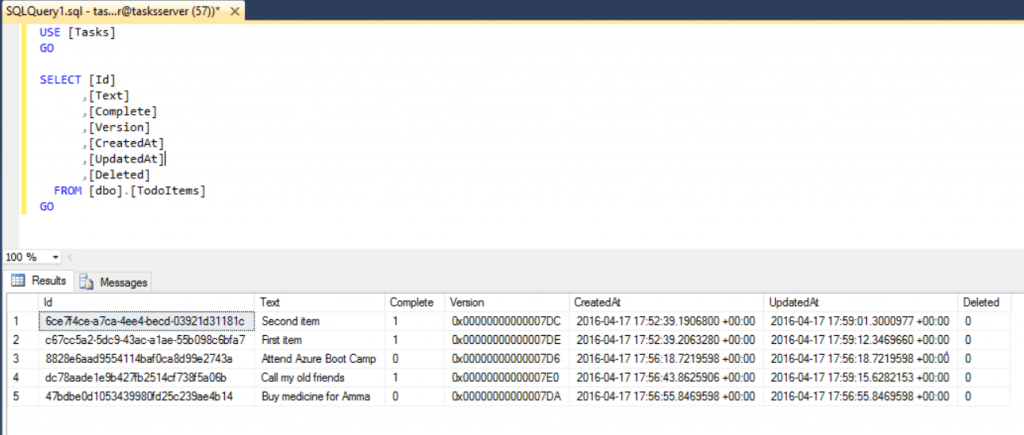
Querying Azure SQL Database In SSMS
You can always run this same application in Windows Emulator, Now we will see how we can do that.
Download Windows Emulator
Before getting started, you must install Windows Emulator in your machine. You can get the Windows 10 emulator from here. Please be noted that there are some sysytem requirements and actions to be taken care of before going to install the emulator. Basically Microsoft emulator works as a virtual machine on Hyper V. You must enable it.
Enable Hyper-V in Windows
To enable Hyper-V, go to control panel and select Programs, then click on ‘Turn windows feature on or off’ and then select all the items under Hyper-V.
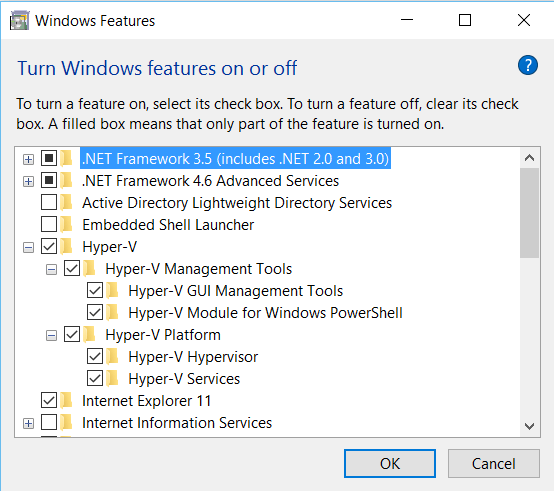
Enable Hyper V in Windows
You may need to restart your system once. There are some additional requirements too.
System Requirements
We must enable the following configurations in BIOS.
Hardware-assisted virtualizationSecond Level Address Translation (SLAT)Hardware-based Data Execution Prevention (DEP)And we need,
4GB or more RAMOS Windows 8 or higher(Pro edition or higher)To go to BIOS settings in Windows 10, Just type ‘change advanced startup options’ in the start search box. And then click on the Restart under advanced settings. There you will see the BIOS options. Once you are done these procedures, you can go ahead and install Windows Emulator. After you install the emulator you can see an option to run the app in emulator in Visual Studio.
Run app in Windows emulator
Please see the option as follows in visual studio.

Emulator option in Visual studio
Now you can run your application in emulator if everything works fine.
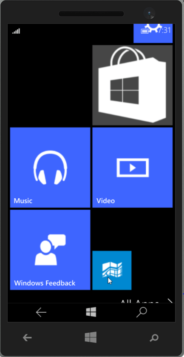
Windows emulator output
I guess we are done. Hope you enjoyed reading. I will see you soon with another article.
Conclusion
Did I miss anything that you may think which is needed? Did you try Azure yet? Have you ever created any mobile apps? Could you find this post as useful? I hope you liked this article. Please share me your valuable suggestions and feedback.
Your turn. What do you think?
A blog isn’t a blog without comments, but do try to stay on topic. If you have a question unrelated to this post, you’re better off posting it on C# Corner, Code Project, Stack Overflow, Asp.Net Forum instead of commenting here. Tweet or email me a link to your question there and I’ll definitely try to help if I can.
Kindest Regards
Sibeesh Venu


 General
  News
News  Suggestion
  Question
  Bug
Bug  Answer
  Joke
Joke  Praise
  Rant
Rant  Admin
Admin 


