Introduction
In the course of development, you always run into the problem of database versioning. More specifically, there is really no such thing, so you must worry about keeping your database up to date with the latest version of your API code. People build update scripts and use SQL Compare or other comparison tools. You end up with a monster script you run once or many smaller scripts that require knowledge of when to run. Invariably, there are some scripts that should be run exactly once, like data insertions or field removals. In other words, it is a mess. Many people have many solutions but most of them boil down to developing a process. For example, a development team will decide that they define a separate folder for each product version, so the scripts will be deployed at the right time. Or perhaps a file naming scheme is adopted like "v1.2.3.4.sql" or "2011-06-03.sql", where the version or date or some other identifier determines how scripts are run. In the end, this is just one big manual process that will cause pain if some person screws up the process. Well, there is an easier way.
A New Way
Using the nHydrate database installer is a great way to track database changes as they occur and version a database. Databases do not really have versions or histories per se, but you can fake it. nHydrate does this by using utilizing the metadata properties of SQL Server. There is a little used feature of SQL that allows you to associate small name/value pairs of strings to fields, tables, or an entire database. The database installer uses these values to keep versioning information. When used in conjunction with the model, you can create an API that is locked in step with a version of a database.
To create an example using this methodology, you will need nHydrate, which can be downloaded from nHydrate.CodePlex.com. After installation, you will need to add the ADO.NET generator package to your generator library. This package includes all that is needed to create an ADO.NET data access layer and a tracking database installer project. From then on, all changes are being tracked. Well, technically, your model changes are not tracked in real-time, they just appear to be. Each time you generate the database installer project, a snapshot of the model as it exists at that moment is saved. The next time you generate, the framework looks for the last backup file and compares the two models for changes like added, removed, or changed fields and entities. A different script is added to the database installer project named with a specific version. You can re-generate as many times as you wish. Each difference file is added in the proper order with a specific version number.
Now, at some point, you will either create or update a database with the database installer. When you perform this action, the framework knows which scripts to run, and just as importantly, which script to not run. If a database is created, this process is simple as all scripts are run, of course. However, when running an update, the installer checks the metadata versioning information in the database and then determines which scripts to run against the database. Only scripts with a higher version number are run against the database server. After the create/update operation is complete, the metadata version number is updated in the database, essentially versioning the database. The next time you run the installer, that will be the starting point from which to run all newly generated difference scripts. This functionality also has another benefit; you can maintain multiple databases on the same codebase and update them at different times.
I developed a code base for a website using this functionality. This code base actually ran four different websites. We had a custom resources assembly for style sheets, custom pages, configuration, etc. So the same website code and same database structure supported all sites. Now, I really had four different websites and each talked to its own database. There were times that I made changes to a website, for example, adding a new feature that needed to be pushed to one site but not necessarily to the other right away. I could deploy my site code and run the database installer to update the database to the newest version. Now I have multiple databases on different versions of the API. I can upgrade any of the databases from any previous version to the latest version completely independently.
This is of great use in development cycles. You may only deploy an application to product once per month or even longer like once per year; however, in that time, you have made tons of minor changes. The database tracking captures all of these small changes and allows you to apply them as a single patch to a database when you are ready to deploy (or test) your application.
Now that you see the background and logic of why you would want to do this, the example will be very simple. I will create a model with a Customer entity in it. I will then generate. To simulate working on my model for a while, I will make a single change and regenerate and follow this pattern a few times. Each time I do this, a new update script will be created.
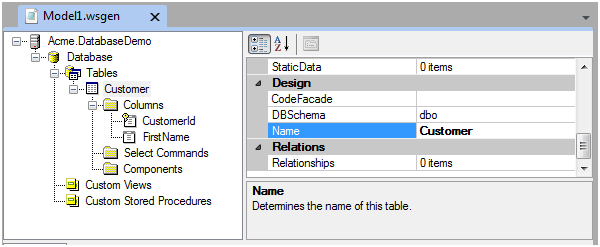
I start by opening Visual Studio .NET and creating a blank solution. I then right click on the solution in Solution Explorer and select the Add|New Item menu. In the dialog that appears, choose the model section (this is present only if you have installed nHydrate) and select the model item. This will create a new nHydrate model and prompt you with a wizard. Set the company and project properties and press the OK button. I named them "Acme" and "DatabaseDemo", respectively. I now have a blank model. I right-click on the Tables node and use the menus to create a table. I then right-click on its Columns node and add the columns. The graphic shows a starting model with a Customer table with a primary key and a first name field.
After I generate there are two new projects in my VS.NET solution. The first is the ADO.NET API and the second is the database installer project.

Now I perform the following tasks. I add another column to the Customer table in my model called "LastName" and re-generate. I then add another column called "JunkColumn" and re-generate. Now when I look at the installer project under the "Generated" folder, I see three files. Notice that scripts are named with versions. The schema is major, minor, revision, build, and generated. The first four numbers are controlled in the model user interface. You may change these at will. The last generated version is controlled by the framework. There is no way for you to set this value as it is incremented after each generation.
The first file that starts with zeros has nothing in it because it is from the initial generation. The next two have the changes we made between each generation. The file "0_0_0_0_1_GeneratedScript.sql" has the add field script for LastName.
if not exists (select * from syscolumns c inner join sysobjects o on
c.id = o.id where c.name = 'LastName' and o.name = 'Customer')
ALTER TABLE [dbo].[Customer] ADD [LastName] [VarChar] (50) NOT NULL
GO
if not exists (select * from syscolumns c inner join sysobjects o on
c.id = o.id where c.name = 'JunkColumn' and o.name = 'Customer')
ALTER TABLE [dbo].[Customer] ADD [JunkColumn] [Int] NULL
GO
Now we can run the installer and create a database that matches this schema. You can do this directly from within the VS.NET environment. Open the Properties window of the installer project and navigate to the Debug tab. In the "Start external program" box, insert the path to the .NET InstallUtil.exe application that is provided as part of the .NET Framework. Mine is at the following path: "C:\Windows\Microsoft.NET\Framework\v2.0.50727\InstallUtil.exe". In the command line arguments box, enter the name of the project assembly. Given the settings we have used above, mine was named "Acme.DatabaseDemo.Install.dll". Now you can run this project by setting it as the startup project and pressing F5, or right-clicking the project in Solution Explorer and choosing the Debug|Start new instance menu.
A dialog screen is displayed when you run this project. It allows you to create or update a database. I have chosen the tab to create a database and entered the settings I wish to use. After pressing the OK button, a database is created with the proper schema and all the Stored Procedures.
Now let us assume that this is our production database and we wish to make some changes to it. I open my model and delete JunkField from the Customer table. After I re-generate, there is yet another file created in my installer project, this time named "0_0_0_0_3_GeneratedScript.sql". Now I can see there is a remove script in it. The next time I run the database installer, this field will be removed from my database.
select 'ALTER TABLE [dbo].[Customer] DROP CONSTRAINT ' +
       [name] as 'sql' into #t from sysobjects where id IN(
       select sc.cdefault FROM dbo.sysobjects SO INNER JOIN
       dbo.syscolumns SC ON SO.id = SC.id LEFT JOIN
       dbo.syscomments SM ON SC.cdefault = SM.id WHERE SO.xtype = 'U'
and SO.NAME = 'Customer' and SC.NAME = 'JunkColumn' )
declare @sql [nvarchar] (1000)
SELECT @sql = MAX([sql]) from #t
exec (@sql)
drop table #t
if exists (select * from dbo.sysindexes where name = 'IX_CUSTOMER_JUNKCOLUMN')
ALTER TABLE [Customer] DROP CONSTRAINT [IX_CUSTOMER_JUNKCOLUMN]
if exists (select * from dbo.sysindexes where name = 'IDX_CUSTOMER_JUNKCOLUMN')
DROP INDEX [IDX_CUSTOMER_JUNKCOLUMN] ON [Customer]

if exists (select * from syscolumns c inner join sysobjects o on
   c.id = o.id where c.name = 'JunkColumn' and o.name = 'Customer')
ALTER TABLE [dbo].[Customer] DROP COLUMN [JunkColumn]
GO
I will now run the installer again, but this time I select the update tab since the database already exists.
Keep in mind there are situations where you will need to manually edit the upgrade scripts. For example, if you are adding a non-nullable field with no default to a table, or performing some custom data inserts, you will need to modify or add to the script at the proper place. This is no different than any custom coding. If a process or situation is not defined in the model, then it cannot be generated from the model. After I run this latest build, the JunkField is removed from the database.
Now on the dialog, you will notice there is a View History button. This shows the previous database versions and their associated dates. This is a complete history that enables you to view all instances of database updates.
Summary
As you can see, having your database changes tracked is not only seamless, it is much easier than using a third-party commercial tool and keeping track of what changes need to be applied at what time. Also, there is no concept of database versioning with other tools. The database installer template allows you to change your model anytime and be confident that your changes will eventually be worked into your production database. This assembly can also be run from the command line, so you can add it to your deployment scripts or batch files.
Another subtle point is that by using model driven development (domain driven design, DDD), your database is not your model. Tools like SQL Compare and other comparer tools rely on the fact that you have a golden copy of your database somewhere. Of course, you must keep track of all changes to your golden copy to ensure you have lost no changes. Using DDD, all changes are performed to a model and not to a database. The database itself is managed by the model. Since all of your design is model based, you can create any project or set of projects from this design. We have used two completely separate generator templates in this example based on the same model. This makes expanding your application framework much easier.


 General
  News
News  Suggestion
  Question
  Bug
Bug  Answer
  Joke
Joke  Praise
  Rant
Rant  Admin
Admin 


