This is a new post in a series of beginners articles on how to do things in Azure. This series will be for absolute beginners, and if you are not one of those, this will not be for you.
You can find the complete set of posts that make up this series here:
This time, we will look at how to create a new Virtual Machine using the Compute element of Microsoft Azure.
This again will be quite a screen shot heavy posting (it's only a couple of the posts that will be like this, a lot of the subsequent ones will be much more codey, which is probably a good thing as there is a new version of the Azure portal waiting in the wings that has a different look and feel).
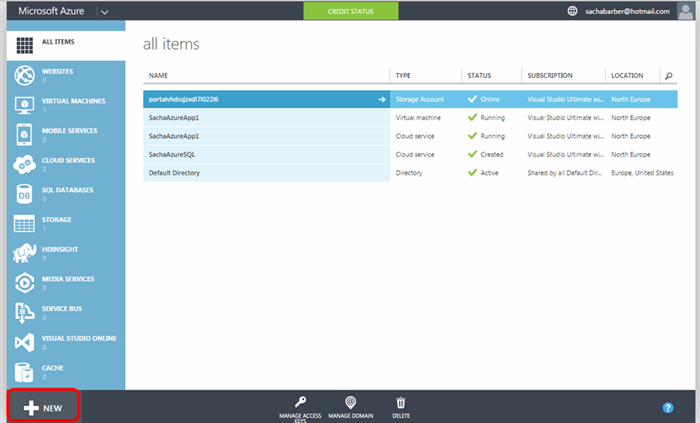
Anyway so step 1, is to open up the portal:
From there, you will want to create a new Virtual machine, this can be done by clicking on the “New” button in the Azure portal.

From here, you can choose what new thing you want to create in Azure. As this post is all about Virtual Machines, we will choose to create a Virtual Machine using the Azure compute element. This can be seen in the screen shot below. Azure comes with a whole load of pre canned images where the most common ones are shown in the list. You can also choose to examine more images, which is what we will be doing in this post. So you would use the “More images” drop down item, as shown below:

This will take you to a wizard that allows you to choose your Virtual Machine image and setup, and username/password.


Once you have completed the wizard, a new Virtual Machine should be listed in the Azure portal for you. This is as shown below, for this posts example.

You can go into the Virtual Machine and view information about it, such as its public IP address, its DNS name, etc.

More importantly is the “Connect” button. When you click that, a new Remote Desktop item will be created and downloaded for you. You can then use that to gain access to the Virtual Machine you setup.
One word of warning though is that the Status of the Virtual Machine MUST be “Running”, the status of the Virtual Machine can be seen in the screen shot above.


Here is me connected to a Virtual Machine (a standard Windows 2008 server), that I created another time.

Anyways, hope that helps someone, another step along the Azure highway.


