Introduction
This step-by-step walkthrough demonstrates how to create a library for unit testing (the "Google C++ Testing Framework") and shows how to start using it quickly and easily.
Background
If you have heard a lot of positive reviews about the usefulness of unit tests, but do not know how to start, then this article is for you. This tip gives some information about setting up a testing Google's framework, then describes how to quickly create unit test in Visual Studio 2010 (requires the use of Microsoft Visual C++ 7.1 or newer).
In the development process, testing of the software is a mandatory step. One of the main tests is the unit testing, which involves testing the fundamental elements of the software product.
It may be carried out by using the Google C++ Testing Framework (Yes, there is an alternative way to use printf). This framework can be used on different operating systems (Windows, Windows CE, Linux, Mac OS X, Symbian, etc). The Google's framework is based on the popular xUnit architecture, i.e., this architecture provides the ability to test the different units of software such as classes and methods. The main advantage of xUnit frameworks is that they provide an automated solution with no need to write the same tests many times, and no need to remember what should be the result of each test. For example, I can do a bunch of changes in my code, and then I can confirm I hadn't broken anything by running the test over it again... It saves a lot of time, effort and nerves. Of course, you can have unit tests that will do it for each nightly build.
The GTest (Google C++ Testing Framework) supports automatic test discovery, a rich set of assertions, user-defined assertions, death tests, fatal and non-fatal failures, various options for running the tests, and XML test report generation.
I hope that my short tips can help you save time and evade the pitfalls in the process of working with Gtest in Windows. You can easily tweak your environment and it may give you the ability already in a short time to create a unit-test and to test a concrete software module.
So let's start!
Using the Code
Create a Library
- You need to download the last version of "Google Test Framework" from http://code.google.com/p/googletest/downloads/list
Currently the latest stable release of "Google Test Framework" is Version 1.7.0 for Windows OS and is available for download, but over time, it may change from one version to another.
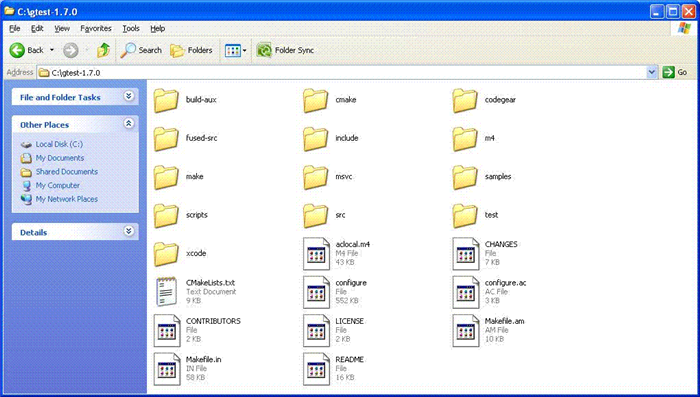
- Extract all files from the archive gtest-1.7.0.zip into C:\gtest-1.7.0\ folder or some other directory.
The unpacked archive is a repository for several files and folders:
- Go to the "~\gtest-1.7.0\msvc" folder:

The msvc\ folder contains two solutions:
- gtest.sln - uses static versions of the Microsoft runtime libraries
- gtest-md.sln - uses DLL versions of Microsoft runtime libraries
Now please pay attention to your tested project!
When building the Google library, you must check the C/C++ runtime library in the project which you are going to test. Solution selection is purely based on the project which you are going to test. In Visual Studio 2010, you can select this option using Project->Properties->Configuration Properties->C/C++->Code Generation->Runtime Library
You MUST use the same option to compile both gtest library and the test code. So, if for the Runtime Library, your project uses the Multi-threaded DLL (the /MD or the /MDd) option, then you should open the solution with suffix -md, i.e., the gtest-md.sln file.
If for the Runtime Library, your project uses the Multi-threaded (the /MT or the /MTd ) option, then you should open the gtest.sln solution.
For more information about the "/MD, /MT, /LD (Use Run-Time Library)", see here.
Now let's look at our project:
OK, for our code, we use the "Multi-threaded DLL (/MD)" configuration for Release version and "Multi-threaded Debug DLL (/MDd)" for the Debug configuration. Therefore, we will use the gtest-md.sln!
Let’s open the gtest-md.sln. When you first open the gtest-md.sln in Visual Studio 2010 (or any version later than Microsoft Visual C++ 2003), you will see the Visual Studio Conversion Wizard window.
This wizard will convert Google's project created with the previous version of Visual Studio to the current version of Visual Studio...
For the debug version of your project, you should build the GTest solution with 'Debug' configuration.
Debug configuration will build the gtestd.lib file:
For the release version of your project, you should build the GTest solution with 'Release' configuration, respectively.
Release configuration will build the gtest.lib file:
Ok, after you have successfully generated the library for the unit testing, it's necessary to incorporate it into other Console App project.
Project Setup
Suppose we want to test the hypothesis that all the methods in the CCalc class are working correctly.
So let's check out the following class:
#pragma once
class CCalc
{
public:
int Add(int i, int j)
{
int res = i + j;
return res;
}
int Sub(int i, int j)
{
int res = i - j;
return res;
}
int Mul(int i, int j)
{
int res = i + j;
return res;
}
};
As we said before, this class is part of the Win32 Console Application named 'Calc' under solution 'Calc':
- Let's create a separate project for our unit test.
Add to our solution (Calc) a new "Win32 Console Application" project with the name 'UnitTest_Cal':
- A unit test project of "Win32 Console Application" will be generated. Within the created application, there are the stdafx.cpp, targetver.h, stdafx.h files used for the console application and the UnitTest_Calc.cpp that contains the traditional
_tmain function.
You can now set up your test project to link with the Google Test library...
-
Add the library as a dependency to your linker's "Additional Dependencies" property (find that under your Project Properties->Configuration Properties->Linker->Input):
- For Release version, add the gtest.lib:
- For Debug version, add the gtestd.lib:
- Add the directories in which to search for the library (.lib) files (find that under your Project Properties->Configuration Properties->VC++ Directories->Library Directories):
- For the Release version, add path to the gtest.lib:
- For the Debug version, add path to the gtestd.lib:
- Add the directories in which to search for the include files that are referenced in the source code:
- <gtest_dir>
- <gtest_dir>\include
(Find that under your Project Properties->Configuration Properties->VC++ Directories->Include Directories.)
- For Release version:
- Add the same directories for Debug version:
- Let's open the UnitTest_Calc.cpp - the main source file in
UnitTest_Calc application. Unfortunately, immediately after creation, the program doesn’t do anything, so to make it a little more interesting, for example to test functions from our CCalc class, you need to change it. So, you can insert the following code into the UnitTest_Calc.cpp file as shown below:
#include "stdafx.h"
#include <conio.h>
#include "gtest/gtest.h"
#include "..\Calc\Calc.h"
TEST(testCalc, MyFirstTest)
{
CCalc c;
EXPECT_EQ(8, c.Add(5,3));
EXPECT_EQ(2, c.Sub(5,3));
EXPECT_EQ(15, c.Mul(5,3));
}
int _tmain(int argc, _TCHAR* argv[])
{
::testing::InitGoogleTest(&argc, argv);
return RUN_ALL_TESTS();
}
Make sure it is exactly as shown in the preceding example; otherwise the program may not compile.
Notice: The testing framework liberates us from a "housekeeping chores", and the test itself is concentrated only on the content of the test.
We should only define one isolated scope for each unit test (e.g., TEST {...} ) and add to this test any content. For example, put into EXPECT_EQ() macro the expression that you want to test (like c.Add(5,3)) and put its expected result (e.g., 8) as its second argument.
That's all! After that, the Gtest does all the work for us.
A good unit test focuses just on testing!
- Build and run the UnitTest_Calc.vcproj and we will see the following
gtest output:
As you can see, the test failed (as indicated by the red arrow). When tests fail, they should provide as much information about the problem as possible.Therefore, our cmd-window contains some information helping you better understand and diagnose failure.
Let's look closely at the following lines:
UnitTest_Calc.cpp(26): error: Value of: c.Mul(5,3)
Actual: 8
Expected: 15
Thus an error occurred here: "EXPECT_EQ(15, c.Mul(5,3))". We expected to get 15 (expected result), but we got 8 (actual result)!
Now let's go back to the code of CCalc::Mul function, to understand why this function returns an error value.
int Mul(int i, int j)
{
int res = i + j;
return res;
}
We see that instead of multiplication of two digits, the CCalc:Mul function is calculating the sum of two digits!
Thus we must do only one correction, i.e., to change the '+' operator to '*'
After that, we should reopen our unit test (UnitTest_Calc.vcproj) and restart it again...
Now we see that the test has been successfully completed.
To display the same results in the Build output window immediately after building the project, you could add the "$(TargetDir)$(TargetFileName)" string under "Post-Build Event\Command Line" (find that under your Project Properties->Configuration Properties->Build Events->Post-Build Event->Command Line):
Add this configuration for both Release and Debug versions of your test.
NOTE: Please pay attention, when you use the macros in 'Build Events', always put quotes around them. e.g.:"$(TargetPath)". They usually expand out to a path in Document and Settings and don't have quotes around them by default. Passing that value to many DOS-based applications will result in using spaces as filename separation delimiters, and thus, leads to "File not found" error (the most common cause of compilation errors)
Congratulations for a job well done!
gtest-gbar
The gtest-gbar project is an independent addition for Gtest. This tool helps to work with the text based UI of Google Test (it only adds some GUI to Google test).
The gtest-gbar is a bit more sophisticated than the console output. Also it's really an easy tool to run specific tests (since gtest supports all kinds of test filtering).
The latest stable release of gtest-gbar is available for download here.
Points of Interest
In this post, I have outlined some basic settings that you should do to start working with Google C++ Testing Framework under Visual C++ 2010. In this short tutorial, I have briefly explained how to write an unit-test. For more details, please see the Documentation on Google Test version 1.7 and, of course, read the Advanced topics on using Google C++ Testing Framework. If you want to see some Google Test sample code, please watch this samples folder, which has a number of well-commented samples showing how to use a variety of Google Test features.
History
- 13th December, 2013: Initial post


 General
  News
News  Suggestion
  Question
  Bug
Bug  Answer
  Joke
Joke  Praise
  Rant
Rant  Admin
Admin 


 .
.