Introduction
Login is one of the most frequent activities that we do everyday. It is the commonest way for us to secure and access our private space in the Internet. Understandably, login UIs become compulsory feature on almost every web application. Since login UI is a must-have feature on every web application, why not have it as a plug-in so that developers can just plug it into their code and get a working login UI right out of the box? It will help improve the productivity of any web development project. With this in mind, I have set out to build a jQuery login plugin that is Ajax enabled and easily customizable.
Minimally, a login UI always comprises two text boxes - one for username and another for password, and a submit button. A login UI may take up the whole or part of a web page and styled with CSS language. This article describes the building of this jQuery plug-in and discusses some of the learning points. I have also built a sample web application to demonstrate the use of this plug-in.
Using the Code
First of all, let's set up the sample web application so that we can see what the plug-in can do. Unzip the source file and we should get a folder called "jquery_ajaxlogin_demo" and a SQL script named "testdb.sql".
Import the "testdb.sql" into a MySQL server and we shall see a database named "testdb" with a table called "user" being created. We may set up a user name and password for our database.
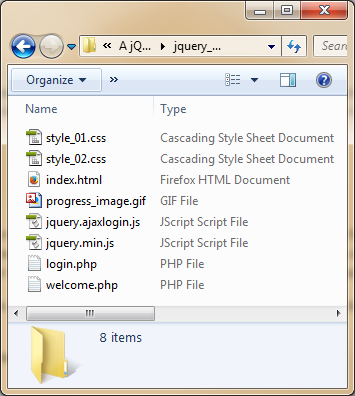
The "jquery_ajaxlogin_demo" folder contains the plug-in "jquery.ajaxlogin.js" alongside other files.
In the "jquery_ajaxlogin_demo" folder, open the "login.php" file in some text editor, change the "username" and "password" of the mysqli_connect() to those that we have assigned to our "testdb" database. Next, move the "jquery_ajaxlogin_demo" folder to the webroot of a Apache server.
Start the Apache and MySQL servers, then launch a browser and enter "http://localhost/jquery_ajaxlogin_demo/index.html" and we should get the following screen:

Enter "peterleow@somemail.com" and "password" in the "Email" and "Password" boxes respectively, click the "Sign in" button to log in. While waiting for the result, the button will be replaced by an animated icon as shown below.
Upon successfully Log in, we will be redirected to a new page called "welcome.php". Try logging in with any other invalid username and password and see the response yourself.
We have seen how the plug-in works with the help of the sample web application. Now, let's look into the plug-in "jquery.ajaxlogin.js" itself. Open this file in a text editor to view its content below.
(function($) {
$.fn.ajaxLogin = function(args){
if (args.length == 0 || args.action == undefined || args.success_redirect_page == undefined) {
alert ("Missing parameters!");
return
};
this.html('<div class="ajaxlogin_container"><form action=""
id="ajaxlogin_action"><header
id="ajaxlogin_header">Please Log in...</header>
<div><input type="text" placeholder="Username"
required id="ajaxlogin_username" /></div>
<div><input type="password" placeholder="Password"
required id="ajaxlogin_password" /></div>
<div id="progress"><input type="submit"
value="Log in" id="ajaxlogin_submit"
/></div></form></div>');
$("#ajaxlogin_action").attr("action", args.action);
success_redirect_page = args.success_redirect_page;
if (args.success_response != undefined) {
success_response = args.success_response;
} else {
success_response = "true";
};
if (args.error_msg != undefined) {
error_msg = args.error_msg;
} else {
error_msg = "Sign in unsuccessful!";
};
if (args.username_label != undefined) {
$("#ajaxlogin_username").attr("placeholder", args.username_label);
};
if (args.password_label != undefined) {
$("#ajaxlogin_password").attr("placeholder", args.password_label);
};
if (args.submit_label != undefined) {
$("#ajaxlogin_submit").attr("value", args.submit_label);
};
if (args.header_label != undefined) {
$("#ajaxlogin_header").html(args.header_label);
};
var progress_image_src = "";
if (args.progress_image_src != undefined) {
progress_image_src = args.progress_image_src;
};
$("#ajaxlogin_action").submit(function(){
var username=$("#ajaxlogin_username").val();
var password=$("#ajaxlogin_password").val();
var oldcontent=$("#progress").html();
$.ajax({
type: "POST",
url: "login.php",
data: "username="+username+"&password="+password,
success: function(response){
if(response == success_response)
{
window.location = success_redirect_page;
}
else
{
if (progress_image_src != ""){
$("#progress").html(oldcontent);
}
alert(error_msg);
}
},
beforeSend: function()
{
if (progress_image_src != ""){
$("#progress").html('<img src="'+
progress_image_src+
'" alt="Loading in progress..." id="ajaxlogin_progress_image" />');
}
}
});
return false;
});
return this;
};
}( jQuery ));
To use this plug-in to insert login UI on a web page, say "index.html" in our sample web application, first put the jQuery library "jquery.min.js" and the plug-in "jquery.ajaxlogin.js" alongside "index.html", then copy the following code to the head section of "index.html" and update the respective parameters with the actual values. There are altogether nine parameters, each serves a different purpose, but only two of them are compulsory.
<script src="jquery.ajaxlogin.js"></script>
<script>
$(document).ready(function(){
$("id of div that will contains the login elements").ajaxLogin({
action: "name of server-side script to process your login",
success_redirect_page: "name of web page to re-direct to upon successful login",
success_response: "value returned from server to indicate successful login",
error_msg: "erro message for alert box upon failed login",
username_label: "label for username textbox",
password_label: "label for password textbox",
submit_label: "label for submit button",
header_label: "label for login header",
progress_image_src: "location of animated image"
});
});
</script>
The following example shows how to include the plug-in in the "index.html" page with only two compulsory parameters and it produces the screen that follows:
<!DOCTYPE HTML>
<html>
<head>
<title>JQuery Ajax Login Plugin Demo</title>
<link href="style_01.css" rel="stylesheet" type="text/css">
<!--
<script src="jquery.min.js"></script>
<script src="jquery.ajaxlogin.js"></script>
<script>
$(document).ready(function(){
$(".container").ajaxLogin({
action: "login.php",
success_redirect_page: "welcome.php",
});
});
</script>
</head>
<body>
<div style="text-align: center;">
<h2>JQuery Ajax Login Plugin Demo</h2>
</div>
<div class="container"></div>
<div style="text-align: center;">
<p>Created by Peter Leow</p>
</div>
</body>
</html>
We can customise the labels of the login UI by providing different values to the optional parameters of the plug-in. The first screen image that we have seen in this article is produced by the following page that uses the plug-in with all parameters:
<!DOCTYPE HTML>
<html>
<head>
<title>JQuery Ajax Login Plugin Demo</title>
<link href="style_01.css" rel="stylesheet" type="text/css">
<!--
<script src="jquery.min.js"></script>
<script src="jquery.ajaxlogin.js"></script>
<script>
$(document).ready(function(){
$(".container").ajaxLogin({
action: "login.php",
success_redirect_page: "welcome.php",
success_response: "true",
error_msg: "Sign in failed, try again.",
username_label: "Email",
password_label: "Password",
submit_label: "Sign in",
header_label: "Please Sign in...",
progress_image_src: "progress_image.gif"
});
});
</script>
</head>
<body>
<div style="text-align: center;">
<h2>JQuery Ajax Login Plugin Demo</h2>
</div>
<div class="container"></div>
<div style="text-align: center;">
<p>Created by Peter Leow</p>
</div>
</body>
</html>
Next, we can customize the look and feel of the login UI through CSS. The plug-in exposes five selectors for this purpose. The CSS file "style_01.css" below provides the look and feel for the first screen that we have seen at the beginning of this article.
.ajaxlogin_container {
margin-left:auto;
margin-right:auto;
border:2px solid #c3c3c3;
padding: 30px 30px;
background:#cccccc;
width: 300px;
border-radius:10px;
box-shadow: 8px 8px 8px #666666;
font-family:Arial,Helvetica,sans-serif;
}
#ajaxlogin_action{
margin-left:auto;
margin-right:auto;
width:80%;
}
#ajaxlogin_username, #ajaxlogin_password{
width:80%;
margin-left: 23px;
border: 1px solid #656565;
-webkit-border-radius: 8px;
-moz-border-radius: 8px;
border-radius: 8px;
outline:0;
height:25px;
padding-left:10px;
padding-right:10px;
}
#ajaxlogin_submit{
margin-left: 160px;
height:: 22px
border-top: 1px solid #96d1f8;
background: #64c9d7;
background: -webkit-gradient(linear, left top, left bottom, from(#3e779d), to(#65a9d7));
background: -webkit-linear-gradient(top, #3e779d, #65a9d7);
background: -moz-linear-gradient(top, #3e779d, #65a9d7);
background: -ms-linear-gradient(top, #3e779d, #65a9d7);
background: -o-linear-gradient(top, #3e779d, #65a9d7);
padding: 5px 10px;
-webkit-border-radius: 8px;
-moz-border-radius: 8px;
border-radius: 8px;
-webkit-box-shadow: rgba(0,0,0,1) 0 1px 0;
-moz-box-shadow: rgba(0,0,0,1) 0 1px 0;
box-shadow: rgba(0,0,0,1) 0 1px 0;
text-shadow: rgba(0,0,0,.4) 0 1px 0;
color: white;
font-size: 14px;
font-family: Georgia, serif;
text-decoration: none;
vertical-align: middle;
}
#ajaxlogin_submit:hover {
border-top-color: #28597a;
background: #28597a;
color: #ccc;
}
#ajaxlogin_submit:active {
border-top-color: #1b435e;
background: #1b435e;
}
#ajaxlogin_progress_image{
margin-left: 160px;
width: 22px;
height:: 22px;
}
#ajaxlogin_header{
margin-left: 23px;
}
For comparison, I have provided another CSS file "style_02.css" which will produce a more simplistic look and feel like this:
Points of Interest
I would like to share the following learning points:
- A jQuery plug-in is a custom function that extends the jQuery prototype object, i.e. "
jQuery.fn" or "$.fn". By extending the prototype object, we can enable all jQuery objects to inherit any functions that we add. So to create this plug-in, we just have to add the function "ajaxLogin" to "jQuery.fn" and it will be available just like any other jQuery function. We can then invoke the plug-in in the usual jQuery way, that is:
$(".element_id").ajaxLogin({...})
- There are two more issues to consider, one is to make this plug-in chainable, another one is to prevent conflict with other libraries that also use "
$". The first one is easy, just add "return this" to the end of the plug-in function and it is done. Add an animate() function after the "ajaxLogin()" in the "index.html" page as shown and test it on a browser to see the effect.
$(document).ready(function(){
  $(".container").ajaxLogin({
        ...
        ...
 }).animate({
      opacity:'0.5',
    });
 });
- To address the second issue, we have to put our plug-in function inside an Immediately Invoked Function Expression, passing it the function "jQuery" and the parameter "
$".
(function ($) {
$.fn.ajaxLogin = function(args){
...
...
return this;
};
}( jQuery));
- Last but not least, it is about using animated Image to replace the login button while awaiting server's response. Besides showing the users that their requests are being processed, it has a more important function, that is to remove the login button so that impatient users cannot click on it incessantly. It is far more gracious than simply disabling the button. If the login attempt fails, the login button will be restored and an alert box is then popped up to inform the users. Check out the code in "
$.ajax()" to see how it is being done.
We have come to the end of this article. I hope this article will give our readers a head start to developing jQuery plug-ins. Thank you.
History
- Second edition: 24 Nov 2013, Inserted 'testdb.sql' in the source folder. My oversight in the first edition. I must thank Member 10421332 for reminding me.
- First edition: 11 Nov 2013
“Live as if you were to die tomorrow. Learn as if you were to live forever.”
― Mahatma Gandhi
子曰:"三人行,必有我师焉;择其善者而从之,其不善者而改之."


 General
  News
News  Suggestion
  Question
  Bug
Bug  Answer
  Joke
Joke  Praise
  Rant
Rant  Admin
Admin 


