Here we'll learn how to use OpenCV to work with images and video sequences. We learn how to read, write and display images and videos from a webcam and video files.
In 2020, social distancing suddenly became very important as the COVID-19 crisis swept the world. Social distancing measures are essential to public health, but it's also impossible to enforce everywhere at once.
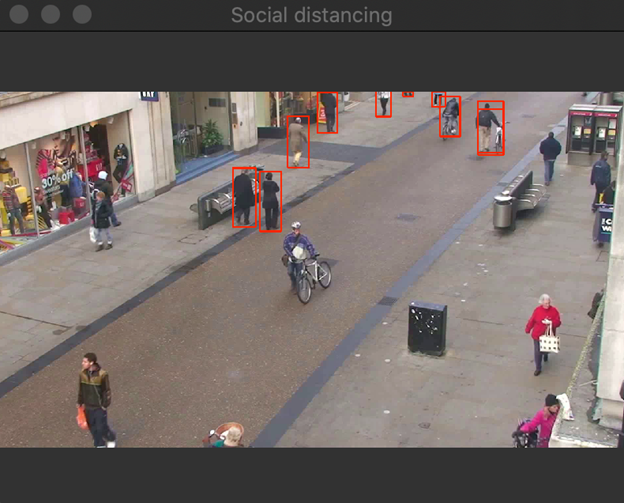
In this article series, we'll look at how to use AI and deep learning on video frames to ensure people are maintaining adequate social distancing in crowds. By the end of the series, you'll understand how to use AI to determine with people don't appear to be following social distancing protocols:
The social distancing detector, like any other, is usually applied to images or a video sequence. We start this series by explaining how you can capture images from a camera, read and write illustrations, and video sequences with Python 3 and OpenCV. In the next step, we will learn how to use OpenCV to annotate detected objects.
OpenCV is the popular open-source, cross-platform library for real-time computer vision applications. It provides a convenient API for image processing, object detection, machine learning, deep learning, computational photography, and more. To start using OpenCV in your Python 3 applications, just install the opencv-python package:
pip3 install opencv-python
Then import the cv2 modules as follows:
import cv2 as opencv
With that, you are ready to use OpenCV. In the subsequent sections, we will use the OpenCV API to read, display, and write images. Then, we will learn how to work with video streams, and capture video from a webcam. You can find the companion code here.
Reading and Displaying Static Images
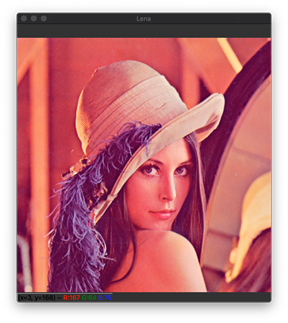
We start by reading the image from the Lena.png file. I downloaded this file from Wikipedia. Here's the full Python script to load and display the image:
import cv2 as opencv
file_path = 'Lena.png'
lena_img = opencv.imread(file_path)
opencv.imshow('Lena', lena_img)
opencv.waitKey(0)
First, I use the imread function to read an image from the file. I store the result of this operation in the lena_img variable. Then, I display this image using imshow method. This method accepts two arguments: The caption of the window in which the image will be displayed, and the image to be displayed. Note the last call to the waitKey function. It will block the script execution to display the image until the user presses any key. The argument of the waitKey function is the timeout. I am passing 0, which means an infinite timeout.
After running the above script, you will see the Lena image:
Note that the imread function, apart from the image file path, also accepts an optional argument that indicates the image color scale. You can use one of three values:
IMREAD_GRAYSCALE or 1 – The image will be loaded in grayscale.IMREAD_COLOR or 0 – The image will be loaded in color, neglecting the transparency channel.IMREAD_UNCHANGED or -1 – The image will be loaded using the original color scale and include the transparency.
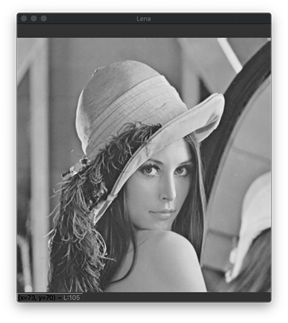
The IMREAD_COLOR option is the default. That's why we see the color version of the Lena image. Let's see how to load an image in grayscale. To do so, modify imread as follows:
lena_img = opencv.imread(file_path, opencv.IMREAD_GRAYSCALE)
After rerunning the script, you will see the following output:
Writing Images
Now that we know how to read and display images, let's see how to write an image to the disk. To do so, we will extend our script with the following statements:
kernel_size = (11,11)
sigma_X = 0
lena_img_processed = opencv.GaussianBlur(lena_img, kernel_size, sigma_X)
output_file_path = 'Lena-processed.jpg'
opencv.imwrite(output_file_path, lena_img_processed)
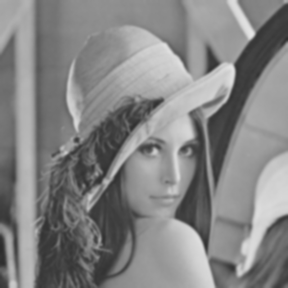
The above script first blurs the image with a predefined kernel size of 11x11 pixels based on the GaussianBlur method from OpenCV. The blurred image is stored in the lena_img_processed variable, which is then saved to Lena-processed.png file with imwrite method. As shown above, the imwrite accepts two parameters. The first one is the path to the file, and the second is the image to be written. Optionally, imwrite accepts an array of compression parameters. You can pass them as follows:
opencv.imwrite(output_file_path, lena_img_processed, [int(opencv.IMWRITE_JPEG_QUALITY), 100])
The result of the modified script will be Lena-processed.jpg, which looks like this:
Video Capture
To capture a frame from a webcam, you use the VideoCapture object from OpenCV. Its constructor accepts either an integer, representing an index of the camera, or the video file's path. I start with the camera index, and pass 0:
import cv2 as opencv
video_capture = opencv.VideoCapture(0)
Then, to capture frames from the webcam, you use the read function of the VideoCapture class instance. This method returns the capture status (a boolean) and the acquired frame. So, the next step is to check the status and display the frame using the imshow function:
quit_key = ord('q')
while(True):
(status, camera_frame) = video_capture.read()
if(status):
opencv.imshow('Camera preview', camera_frame)
key = opencv.waitKey(10)
if(key == quit_key):
break
The above process is continued until the user presses 'Q' on the keyboard. When running this script you will see the video sequence captured from the default webcam.
Writing Camera Frames to a Video File
You can also write the captured frame to a file. You use VideoWriter for that purpose. When creating an object of this type, you need to provide the video file's path, video codec, frame rate, and the frame size. OpenCV uses the fourCC codec, which you create using VideoWriter_fourcc object. You pass a collection of letters, representing the codec. For example, to use the MJPG codec, pass each letter as an argument as follows:
codec = opencv.VideoWriter_fourcc('M','J','P','G')
Here is a complete example showing how to write the video sequence from a webcam to the video file (see video_capture.py from the companion code):
import cv2 as opencv
quit_key = ord('q')
video_capture = opencv.VideoCapture(0)
video_file_name = 'camera_capture.avi'
codec = opencv.VideoWriter_fourcc('M','J','P','G')
frame_rate = 25
video_writer = None
while(True):
(status, camera_frame) = video_capture.read()
if(status):
opencv.imshow('Camera preview', camera_frame)
if(video_writer == None):
frame_size = camera_frame.shape[-2::-1]
video_writer = opencv.VideoWriter(video_file_name,
codec, frame_rate, frame_size)
video_writer.write(camera_frame)
key = opencv.waitKey(10)
if(key == quit_key):
break
video_writer.release()
The above script extends the script for capturing frames from the webcam by using the VideoWriter. Note that I initialize the VideoWriter once, after successfully capturing the first frame. I do so to have access to the camera frame size. I unpack frame size from the shape property of the camera_frame. Then, I invoke the write method to add a new frame to the video file. Once the writing is done, I call the release method to close the VideoWriter.
Reading the Video File
In this last step, I will show you how to read a video sequence with OpenCV. Again, use the VideoCapture object, but this time you need to pass the video file name:
video_capture = opencv.VideoCapture(video_file_name)
Then, read the consecutive frames in the same way you did with capturing video from a webcam:
video_capture.read()
You can display the loaded frames with imshow method. Here is the complete script that implements such a functionality (see video_preview.py from the companion code):
import cv2 as opencv

video_file_name = 'camera_capture.avi'
frame_rate = 25

video_capture = opencv.VideoCapture(video_file_name)

while(True):
    (status, camera_frame) = video_capture.read()

    if(status):
        opencv.imshow('Video file', camera_frame)
        opencv.waitKey(int(1000/frame_rate))
    else:
        break
Wrapping Up
We learned how to use OpenCV to perform basic operations on images (load, write, and display) and video streams (read and write). This, along with image annotations, will serve as a foundation for building our AI object detector. In the next article, we will learn how to add annotations to images. These annotations will indicate detected objects.
Dawid Borycki is a software engineer and biomedical researcher with extensive experience in Microsoft technologies. He has completed a broad range of challenging projects involving the development of software for device prototypes (mostly medical equipment), embedded device interfacing, and desktop and mobile programming. Borycki is an author of two Microsoft Press books: “Programming for Mixed Reality (2018)” and “Programming for the Internet of Things (2017).”


 General
  News
News  Suggestion
  Question
  Bug
Bug  Answer
  Joke
Joke  Praise
  Rant
Rant  Admin
Admin 


