Here, we’ll train our model using a curated dataset of lightning images, and then export the model in the Tensorflow Lite (TFLite) format, which is suitable for the Android environment.
You can either follow the given step-by-step screenshot tutorial below or, just watch the attached video in the first part of this article.
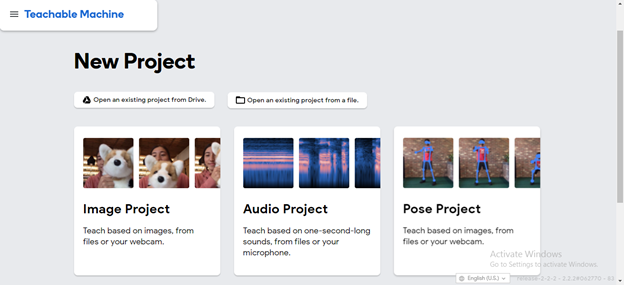
Image Project
You can save your project to Google Drive and then open it from there to avoid loading the images every time you want to train the model.
Go to the Teachable Machine web page and click Get Started. Alternatively, you can go directly to the model training page and click Image Project.
Delete Class 2

As Teachable Machine provides you with two classes, named Class 1 and Class 2, delete Class 2. We won’t need it because we aren’t working on a classification problem.
- Rename the class and upload the images
Rename Class 1 to Lightning or some other meaningful name. When you generate the model, this name will be used in a class tag.
Upload the images from your dataset.
Training
Click the Train Model button. We suggest that you keep the default setting unless you feel adventurous… or know exactly what you want to achieve.
Epochs = 50
One epoch means that each sample in the training dataset has been pushed through the training model at least once. If your number of epochs is set to 50, it means that the model you are training will work through the entire training dataset 50 times. Generally, the higher this number, the better your model will learn to make predictions. You’ll probably want to tweak this number until you get good prediction results without letting the training process run too long.
Batch size = 16
A batch is a set of samples used in a single training iteration. For example, let’s say that you have 80 images and you chose a batch size of 16. This means that data will be split into 5 batches. Once all 5 batches have been fed to the model, one epoch will be completed. You probably won’t need to change this parameter.
Learning rate = 0.001
Be careful with this number! Even small differences in the learning rate value can have a significant effect on how well your model learns. If your learning rate is too low, model training will take ages. And if your learning rate is too high, your model will fail to converge on the best possible network for the problem you’re trying to solve.
Export Model
Once you’ve trained your model, you need to export it. We’ll be using this exported model later in this article series, so be sure to make note of where you save it. Click the Export Model button and download the TFLite model.
You can experiment with the preview - have two or more classes to train and compare the percentages of object detection. You can use your webcam or upload an image to the preview to understand how it works.
Tensorflow Lite
Click the Download My Model button to convert the TF model to the Lite version, which is compatible with the Android Studio IDE.
In the screenshot, you can see the Android example that can handle one or more classes. This is a great tutorial with a link to a GitHub project.
- Model Conversion
Sit back and relax while your model is being converted to TFLite.
Voila!
Voila! Your zip file is downloaded, and it contains the model and the label file. You are ready for Android.
Note that you could have come to this point the hard way – using "raw" Tensorflow Python, Keras, and at least intermediate knowledge of the ML and DL concepts. We took a nice shortcut.
Before we dive into Android development, make sure you have downloaded the Android Studio and installed the required dependencies, as well as updated the IDE and the associated Software Development Kit (SDK) and the build files.
Next Steps
In the next article, we’ll go over the basic UI setup in the Android environment. Stay tuned!

