Introduction
This tutorial is written as a basic proof of concept for maintaining source control and enabling continuous integration for Microsoft SQL Server Databases. The objective is to put database code in a cloud-based source control system such as Github and configure continuous integration and delivery pipelines for smooth database development and deployment cycles.
Background
In conventional database development process, there is a centralized development server on which multiple developers work simultaneously with remote access as it is hard to maintain the databases in local(individual) development machines. This method is acceptable when there is a single developer working on the project but as the team size increases, it becomes tedious to find the changes that have been made between two deployment cycles. In addition, the chances for manual errors during deployment are high.
The solution to this problem is to create a database project and maintain the code repository in a source control system. The repository can then be published as a database in various environments, i.e., development, test, staging and production. Since individual developers can clone the repository and database to work separately, it will also be easy to track changes. By building the repository upon each merge, we can also eliminate manual errors and ensure smooth deployment procedure.
Basic Use Case
To understand how to implement continuous integration for database projects, let us take a use case with a database developed in Microsoft SQL Server and source control system on the cloud as Github. The IDE used as part of this example is Visual Studio 2019. Once we have the Source Control mechanism up and running, we will use Jetbrains' TeamCity for integrating continuous build methods and perform unit tests. If the build is successful, we will push the code to Octopus and from there, it will be automatically deployed to different environments without any manual intervention.
Keeping in mind the length of complete process and for better organization of content, this tutorial is divided into three constructive parts:
- SQL Server Database Source Control using Github
- SQL Server Database Continuous Integration using Github and TeamCity
- SQL Server Database Continuous Deployment using Github, TeamCity and Octopus
Prerequisites
As part of this tutorial/course, following tools/platforms were used.
- Microsoft SQL Server 2017 (any edition that suits your need)
- Visual Studio 2019 (2015+) with Data Storage and processing Workload installed
- A Github.com account
- Git Bash/ Git integrated with Visual Studio and basic understanding of Git
- TeamCity Server
- Octopus Deploy
Let us roll now.
1. SQL Server Database Source Control using Github
a. Creating a Database Project for a Brand-New Database
i. Setting Up a Database Project
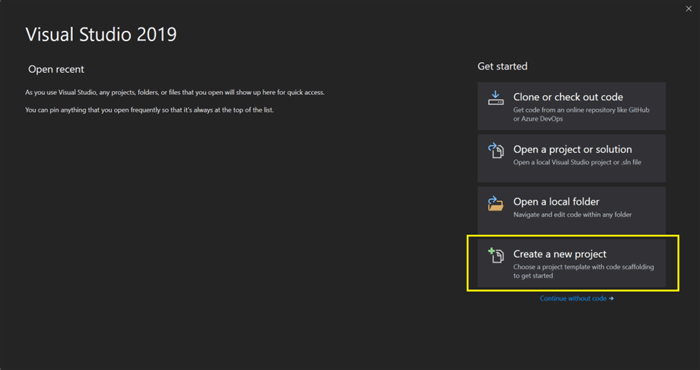
Open Visual Studio and select ‘Create a new project’.
On the next page, we will have to choose the type of project we need to create. As per our use case, it is an SQL Server Database Project. We can scroll down the list of available project types and select the type. If you have a lot of workloads installed, the list is quite big. So, you can search for ‘SQL Server’ in the search bar at the top and choose SQL Server Database Project from the search results. Click next to proceed.

Provide a name for your project. You can also choose a name for the solution and select if you want to place the solution and project in the same directory. For now, let us leave them default and create the project.
ii. Adding Project to Source Control
Once the project is created and the solution is opened in Visual Studio, the first thing that we want to do is to add the solution to Source Control. We can achieve this either by initializing Git via Git Bash or directly adding the solution to Source Control from Visual Studio itself. Right click on the solution and click ‘Add to Source Control’.
This will automatically create a local Git repository and you can see the repository visible under Team Explorer.
This means that Git is ready and watching every change that is being made in all the projects under this solution. Let us go ahead and do some database related work like creating a couple of tables.
iii. Creating SQL Server Objects in Visual Studio
To create a new table using Visual Studio, right click on the project and select Add->New Item.
On the next window, search for table, select ‘Table’ from the result list, specify a name for the table and click on ‘Add’.
This will automatically create the table with a default primary column called Id and opens a window with a split view of Object designer and Query editor. The object’s properties are also visible in this window.
Let us add a couple of columns to the table. We can either use the designer or the query editor to make changes to the table. Modifying in one area will automatically update the other view. Once you are done with the changes, save your changes by pressing Ctrl + S.
iv. Committing Changes Locally
By now, if you had not already noticed, there is a plus (+) icon beside newly generated .sql file. Upon hovering on the icon, it says that the file is ‘Pending Add’.
This means that the files are being tracked but they are not added to commits. Generally, with Git Bash, we would go to the project directory and run ‘git add .’ to add all files to commit but if we are committing from Visual Studio, VS automatically adds these files to commit.
Right click on the solution and click on commit.
This opens Team Explorer window with preparations to commit. You can add the commit message and commit changes. If you look at the ‘Changes’ section, it mentions that the files will be added during the commit.
Once you add a commit message and click on ‘Commit All’, your changes will be committed locally. We can setup a remote repository and sync changes with the remote server.
v. Syncing Changes with Remote Server
Click on ‘Sync’ link in the notification and in the next window, Team Explorer provides options to push changes to a remote server like Azure DevOps or to a remote repository. Click on ‘Publish Git Repo’ and it will ask for the URL of remote repository to which code has to be pushed.
Go to Github.com, create a new repository, copy and paste the link to the empty repository in the URL box and ‘Publish’. Once you publish the changes, they will be pushed to the remote repository on Github.com.
Refresh your Github repository and there is your database project.
Now, we can make changes in our database project and Git will track all the changes for us. We can create separate branches for each individual developer and can merge changes into master branch to keep one source of truth for the database project.
vi. Publishing Database Project
We have the scripts ready now, maintained in a database project. How do we create a database on server with these scripts? Executing these scripts manually on the server is not the best way of doing this. We can create the database again from Visual Studio itself. We can also setup the database connection for debugging. Let us look at how easy it is.
Firstly, to create a database, we need a running instance of SQL Server. It can either reside on local machine or on a remote server. For the time being, let us work with a local instance of SQL Server.
In Visual Studio, click on View->SQL Server Object Explorer.
On the left side, it will show the list of servers that you are currently connected to. We can perform operations such as adding another server or executing a query from here.
To configure which server the database must be created in, we need to apply a connection string for our database project. Right click on the project and go to ‘Properties’.
On the next window, select ‘Debug’ and scroll down the panel until you see the ‘Target Connection String’ section.
Once you reach here, click on the ‘Edit’ button. A new form will be displayed where you can specify connection properties. On this window, select ‘Browse’ tab and input server name. Select authentication type and provide credentials and click ‘Ok’. You can make sure that the credentials are correct by clicking on ‘Test Connection’ button. If test connection is succeeded, you are good to go to publish the database and debugging as well.
Go back to Solution Explorer, right click on the project and click ‘Publish’.
This action will result in a new pop-up asking to configure target database settings. Click on ‘Edit’ button and follow the above procedure to select a target database.
After setting target database, specify a name for the database and click on Publish. You can configure a lot of options like backup, delete etc., under ‘Advanced’ section but currently that is out of scope of this tutorial.
It will take a few moments and your database will be published to the server. If you refresh the server in SQL Server Object Explorer, you should be able to see that the database has been created along with the objects.
Now we can simply go on adding and modifying objects in the database project and publish it to our database. If you want to publish it to different environments like test, staging and production, you can change the target database settings and publish it.
b. Creating a Database Project From Existing SQL Server Database and Adding It to Source Control
It’s all good so far but what if you have a database in production already with a lot of data that you wish to add to source control? Don’t worry, it is not hard either. To demonstrate it, let us create another database project under the same solution for an existing database. Since we already have a database created in the above scenario, let us use the same database to see how we can create a SQL Server Database project from an existing database.
Go back to Solution Explorer, right click on the solution and select Add->New Project.
Follow the same procedure written under ‘Setting up a brand-new database project’ to create a new project. Once the project is created, right click on the project and select Import->Database.
On the next window, click on ‘Select Connection’.
On the next window, go to ‘Browse’ tab and specify the connection criteria such as server name, authentication type and credentials. Most importantly, select the database for which you want to create database project.
After specifying the source database details, leave the default import settings as they are and click on ’Start’ button.
It will take some time depending on the number of objects in your database and will complete importing the schema of the database into the project.
You can verify by expanding your project in the solution explorer to find all the objects imported.
Sweet! Let us add another table in the database project and publish it to verify if everything is working correctly.
Go ahead and create another table in the database project.
Publish the database by following steps mentioned under ‘Publishing the database’ and refresh the SQL Server Object Explorer.
Voila! Your changes are now reflected.
We can see who changed what and when by going to Solution->Source Control->View History.
This will bring up the entire Git log.
By now, our source control is working perfectly with Visual Studio, Microsoft SQL Server and Github.
Points of Interest
We can also add a pre-deployment script and post-deployment script while publishing our database project. As their names suggest, they will be executed before and after creating database respectively.
Typical use cases for a pre-deployment script would be to set permissions on database for any parts of stored procedures that require them. Similarly, a post-deployment script can be used to populate seed data in a table after creating the database.
This can be simply done by right clicking on Project->Add->Script->Pre-deployment Script/Post-deployment Script.
It is generally good to have multiple files for pre/post deployment execution for each table.
Next: SQL Server Continuous Integration using Github and TeamCity
History
- 20th October, 2019: Initial draft of this article
Academically an Automobile Engineer but growing as a Software Engineer purely out of passion. I've been working as a freestyle developer and open-source contributor since teen-age. Forced by pockets to work as a full-time Senior Engineer to fulfill financial needs.
- Proficient in .NET technologies starting from VB .Net to .Net Core 3.0.
- Well-versed with PL/SQL development in Microsoft SQL Server.
- Adding ReactJS into armory.


