Introduction
This article will help you to create child nodes with data in XML file automatically on button click from ASPX page in ASP.NET. Besides, you can retrieve data from the XML file node by node into text box, on label control.
Background
XML is really an interesting file that you can use as database in which you can store a set of data. Say for example, in your website project you want to have a page through which a user can enter his name, email ID and his comments. Such data may not be commercial for you to store in your data base but at the same time you want to have it for goodwill purposes. Here is the solution, store it in an XML file and retrieve its node values on a web page, it is as cool as that.
Using the Code
Here is an example to show how it can be done.
Step 1
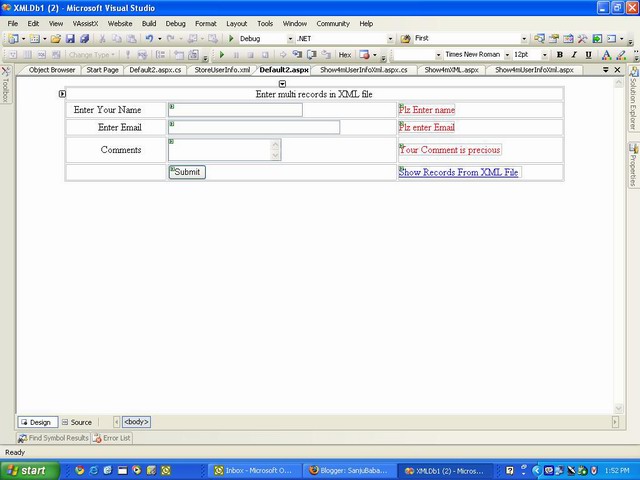
Add a page within your solution with three text boxes to enter name (txtName), email(txtEmail) and comment (txtComment). Also place a button for submit (btnSubmit) as shown in the image below. You may add required field validators too.

Step 2
Add an XML file into your project solution and rename it (StoreUserInfo.xml). Create a root node into it:
="1.0"="utf-8"
<records>
</records>
Step 3
On button click, paste the following code:
protected void btnSubmit_Click(object sender, EventArgs e)
{
    XmlDocument oXmlDocument = new XmlDocument();

    oXmlDocument.Load(@"D:\Sanju\XMLDb1\StoreUserInfo.xml");
    XmlNode oXmlRootNode = oXmlDocument.SelectSingleNode("records");
    XmlNode oXmlRecordNode =     oXmlRootNode.AppendChild(
        oXmlDocument.CreateNode(XmlNodeType.Element,"record",""));
    oXmlRecordNode.AppendChild(oXmlDocument.CreateNode(XmlNodeType.Element,
        "Name", "")).InnerText = txtName.Text;
    oXmlRecordNode.AppendChild(oXmlDocument.CreateNode(XmlNodeType.Element,
        "Email", "")).InnerText = txtEmail.Text;
    oXmlRecordNode.AppendChild(oXmlDocument.CreateNode(XmlNodeType.Element,
         "Comment", "")).InnerText = txtComment.Text;

    oXmlDocument.Save(@"D:\Sanju\XMLDb1\StoreUserInfo.xml");
}
Note: You have to specify the path of XML file correctly as per your project. In my case, it's D:\Sanju\XMLDb1\StoreUserInfo.xml. It will be different for you. This piece of code will automatically create the child nodes along with its values entered in the text boxes at each click of the submit button.
Step 4
Once you have successfully submitted the records, you will like to see all the submitted records on different web pages but within the same project solution. For that, you add a new page in your project. Now you can display the data from XML file on text box, label or richtext box wherever you desire. In my example, I will use both text box as well as Label controls. Design of my Display page is the same as the above page with an additional Label control.
Note: On the display page, you will be needing one HiddenField control to keep count of the node number before each postback occurs so as to track through the child nodes in the XML file.

Step 5
Copy and paste the following code on the Click event of the Show4mXML button:
protected void Page_Load(object sender, EventArgs e)
    {
        if (!IsPostBack)
        {
            Int32 j = 0;
            Hidint.Value = Convert.ToString(j);
        }
    }
Note: Hidint is the ID of the HiddenField control on the ASPX page.
private int increment()
    {
        string strInput = Hidint.Value;
        int incrValue = Convert.ToInt32(strInput);
        incrValue += 1;
        Hidint.Value = incrValue.ToString();
        return incrValue;

    }
protected void btnShow4mXML_Click(object sender, EventArgs e)
    {
        DataSet ds = new DataSet();
        ds.ReadXml(Server.MapPath("StoreUserInfo.xml"));

        Int32 i = increment();
        DataTable dt = ds.Tables[0];
        if (i <= dt.Rows.Count)
        {
            DataRow dr;
            dr = dt.Rows[i-1];
            txtName.Text = dr["name"].ToString();
            txtEmail.Text = dr["email"].ToString();
            txtComment.Text = dr["comment"].ToString();
            Label1.Text = dr["comment"].ToString();
        }
        else
        {
            btnShow4mXML.Enabled = false;
        }
    }
Hope this article has helped you in knowing the XML file better.
History
- 1st April, 2009: Initial post
