Nearly a year ago, Google already deprecated most of its legacy APIs which means you cannot authenticate using the Google.GData.Client.Service and executing the setUsersCredentials method and simply indicating your user and password. It was changed with OAuth making it more secure as it uses tokens and lets the user actually log in to Google’s servers to perform the initial authentication and generation of tokens.
This means gone are the days of quick and easy way of authenticating your user. Instead, you will be performing multiple steps to perform the authentication. This article will explain to you step by step on just how to achieve that in the easiest way. For this article, we will be creating a simple password reset of a user in Google which is very useful when you want to revoke access for a user in your domain but leaving the account readable as long as you have the password. The code that I will be showing also has the capability of updating your user information as we are using the UsersResource in Google’s Directory Service meaning any user information exposed on this object can be manipulated.
But before we start, I am assuming that you will be using a user with a Vault administrator access across your domain so it can perform the needed action on any users on your domain. So I suggest before you continue, secure that access or check whether you have one. To verify this, go and manage your domain...
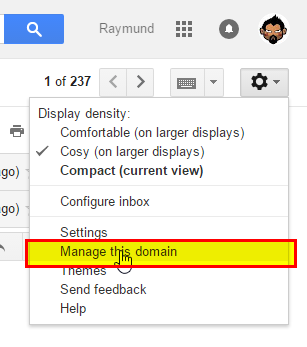
...and see if you have this lock icon used for resetting a password on any user you want to modify.

If you have it, then you can continue, otherwise ask for that access first before continuing. Now let's start!
1. Create a Project in Google’s Developer Console
Go to https://console.developers.google.com/ and log in using your user that has the Vault administrator access. Once in, create a new project and give it a meaningful name.
After it was created, go to OAuth consent screen.
And set a product name shown to users. This is what will be shown to users whenever you request access to their private data.
Then go to credentials and create one.
Choose OAuth client ID.
Then choose other and give it a name.
Once created, you will be given a client Id and a secret token.
Now, you can download that token so that you can use it in the application you are developing.
The download basically is a JSON file which contains your Client Id and other details about your project as well as the client_secret.
So this is where it got its data.
2. Let's Create Your Project Or Atleast the Class You Need
First, you need the references to the APIs that you will be using so using Nuget, install the Google APIs Client Library.
As well as Google APIs Admin Directory.
Other dependencies will be installed so at a minimum you will need them. Take note that you might need to update other references for this to work so in the Manage Nuget Packages screen on the left hand menu, choose updates and update all.
Now let's start coding, for this demo we will just put it in one class to simplify, up to you how you would structure it for your project.
using System;
using System.IO;
using System.Net;
using System.Threading;
using Google.Apis.Admin.Directory.directory_v1;
using Google.Apis.Admin.Directory.directory_v1.Data;
using Google.Apis.Auth.OAuth2;
using Google.Apis.Services;
using Google.Apis.Util.Store;
namespace GoogleOAuthDemo
{
public class GoogleUser
{
static readonly string[] Scopes = { DirectoryService.Scope.AdminDirectoryUser };
private const string ApplicationName = "Google Directory API Demo";
private const string ClientSecretJsonFile = "client_secret.json";
private const string GoogleFolder = "Google";
public static void RunPasswordReset(string userEmailString, string userPassword)
{
try
{
var googleTokenLocation = Path.Combine(Environment.CurrentDirectory, GoogleFolder);
var fileStream = new FileStream(Path.Combine
(Environment.CurrentDirectory, ClientSecretJsonFile), FileMode.Open, FileAccess.Read);
var credentials = GoogleWebAuthorizationBroker.AuthorizeAsync(
GoogleClientSecrets.Load(fileStream).Secrets,
Scopes,
"user",
CancellationToken.None,
new FileDataStore(googleTokenLocation)).Result;
var directoryService = new DirectoryService(new BaseClientService.Initializer()
{
HttpClientInitializer = credentials,
ApplicationName = ApplicationName
});
var userkey = userEmailString;
var userBody = new User
{
Password = userPassword
};
var updateRequest = directoryService.Users.Update(userBody, userkey);
updateRequest.Execute();
}
catch (Exception ex)
{
}
}
}
}
If you see from the code, we have indicated where you will be storing your client secret JSON file. We also had indicated a location where Google will store the Token response file. This file gets updated once it expires and you need to make sure the user running the application can read and write both file and folder locations.
From here, it's quite simple, you will not see any user and password unlike the old authentication mechanism, the JSON file identifies you and when you first run the application, you will need to sign in as the user you used in generating the secret file. This way, it's more secure.
From here, you can basically do anything with the user, so I leave it up to you what you want but for this sample, I will just do a change password.
That’s it. You can run call that method RunPassword reset like such:
GoogleUser.RunPasswordReset("testuser@test.com", "s0m3R4nd0mP455w0rd!");
3. Authorizing for the Application for the First Time
On the first instance, you run the code, when you call AuthorizeAsync.
It will open your default browser (make sure sign out every Google account before running your app) and ask you for your credentials.
Enter the user’s email (still that user with Vault admin access) and password
It will then ask you whether you want to allow that application to have access using your credentials.
Once you allowed it, it will create a token on your GoogleFolder that you nominated on your codes.
And the browser will give you a return message that you received the verification code.
On succeeding runs, this will not do this anymore unless you revoke the applications access. Another layer for security.
4. Managing the Application Access
Go to https://myaccount.google.com/security, using the same user go to the section where it says Connected apps & sites. You will see here the application you just developed.
From here, you can manage it and remove its access.
That app only will show here once a token is created.
That it, it’s that simple.


 General
  News
News  Suggestion
  Question
  Bug
Bug  Answer
  Joke
Joke  Praise
  Rant
Rant  Admin
Admin 


