Contents
This article is a complete, from start to finish, tutorial on:
- Setting up an Amazon EC2 Windows free tier instance
- Creating a static IP for your instance
- Getting Remote Desktop to work with your instance
- Setting up an SSH server
- Setting up PuTTY and WinSCP for terminal and file transfer
- Associating your instance with a domain (I'll be using Namecheap)
- Setting up an email server
- Creating a real SSL certificate for your webserver
In this process, we'll learn about various tools, such as:
- PuTTY
- PuTTYgen
- WinSCP
- MailEnable
- Bitvise SSH Server
- netsh
- certutil
We'll also learn about:
- Configuring ports on the EC2 instance
- Configuring ports on the Windows Firewall
- Configuring Outlook
- Setting up SSL certificates
There's a lot of steps here, and the reason I'm writing this is because this process is not documented anywhere in one consolidated place -- what you're seeing here is the result of lots of different pieces and time figuring out all this stuff, especially the pain points of setting up an email server and obtaining an SSL certificate (which requires an email server to the instance domain!)
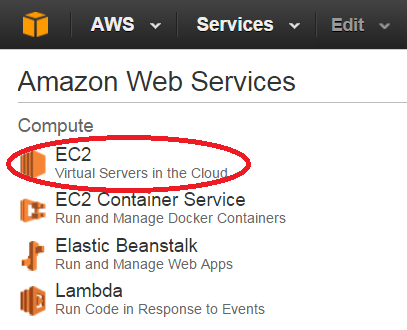
Before proceeding, you will need an AWS account. If you do not have one, create one now here. Once you have created an account, you will be presented with a huge list of Amazon Web Services (AWS). Select the first one, EC@ Virtual Servers in the Cloud:
From the AWS EC2 Dashboard, click on the Launch Instance button:

Choose the Microsoft Windows Server 2012 R2 Base (Windows Free tier eligible) Amazon Machine Image (AMI)
Click on Select on the right:
Select the t2.micro (Free tier eligible) instance:
Click on Review and Launch:
On the next screen, click on Launch (we'll edit security settings later.
Next, we create a key pair for Remote Desktop Access (RDP). A dialog pops up saying "Select an existing key pair or create a new key pair". Select "Create a new key pair" and enter a key pair name, then click on Download Key Pair.
After the key pair downloads, save this in a secure location. This key pair is required to obtain the password used to log into your instance, and should not be accessible by anyone else.
Next, click on Launch Instances:
The next screen gives you some information on regarding monitoring your free usage tier and how to connect to your Windows instance. Click on View Instances:
While you instance is initializing, you will see something similar to this (I've redacted information specific to the server I've created):
Wait until the instance status change from "Initializing" to 2/2 checks passed:"
REMEMBER THE INSTANCE ID!
Once the instance is initialized, we will create an elastic IP (a static IP) for this instance so that we can associate a domain name with the IP address of our instance. Click on "Elastic IPs" from the menubar on the left:
Click on the "Allocate New Address" button:
Confirm the dialog:
Click on the Close button. You will see an entry in the list of elastic IPs:
Note that there is no instance associated with this elastic IP. Select the newly created elastic IP (the checkbox on the left):
Then, from the Action menu, select "Associate Address":
Did you remember the instance ID? Click on the box to the right of "Instance" and select your instance ID:
Then click on "Associate":
REMEMBER YOUR ELASTIC IP!
Click on EC2 Dashboard at the top of the menubar on the left:
Then click on "Running Instances" (I have 4 instances, your number will be 1 or some other value if you've done this before):
Now if you select (the checkbox on the left) your instance, you will see that the Public IP and Elastic IP (displayed at the bottom right in the Description tab) are both the same.
Click on Connect:
On the "Connect To Your Instance" popup, before doing anything else, click on "Get Password":
On the next popup, click on "Choose File" and select the "pem" file that you downloaded when you created the instance:
Once the file is selected, click on "Decrypt Password":
SAVE THIS PASSWORD!
Now you can either download the RDP file or launch Remote Desktop Connection yourself. If you choose the latter, enter the IP address for the computer name and, when you expand "Options", enter the username and decide whether to save your credentials. You may wish to save your RDP connection for future use:
Click the Connect button, then click the Connect button in the confirmation dialog, then enter the password that was decrypted above:
You will get a dialog indicating that the remote computer could not be authenticated. Click on "Don't ask me again for connections to this computer" then click on the Yes button to proceed with the connection.
Give it a minute or so for your instance to initialize your first-time connection. When it's done, you'll see the desktop (bigger than this reduced screenshot here!)
We could install FileZilla and set up FTP, but I prefer to use an SSH server as it provides both file copy and terminal (command prompt) connections.
It's a lot easier to manage your instance with an SSH server. You can access the command line and transfer files very easily with tools such as PuTTY and WinSCP. This section describes how to install the Bitvise SSH Server on your instance. Please note that this product can be used for free only for non-commercial use.
Fussing with Internet Explorer on your instance is a painful experience of constantly adding exceptions for each page that you visit. Rather than circumventing this (usually by installing Chrome or Firefox), simply download the Bitvise SSH Server (here) to your client computer (not the instance.) Once downloaded, you can right click on the install exe, select copy, and then paste the install exe to the desktop of your instance, via your RDP connection. It's a bit slow to upload the installer, but once we have the ability to SCP (Secure CoPy), we won't have to go through the copy-paste process again.
Once copied to your desktop, double click on the installer:
Agree to the terms (please purchase a copy if your instance will be for commercial use, or find a different SSH server), and click on the Install button. Do not change any of the default options.
On the second dialog, select the appropriate edition, standard (for commercial use) or personal, for non-commercial use:
If you choose the personal edition, you will be prompted to fill in your name:
Once installed, click OK on the final dialog, then click "Start Server" on the Bitvise SSH Server Control Panel:
If you haven't done so before, download and install the PuTTY client from here. This is a necessary step in order to convert the PEM file downloaded earlier into a file that PuTTY (for remote terminal access) and WinSCP (for file transfer) requires (a PPK file).
Make sure you download both PuTTY and PuTTYgen.
Once downloaded, use PuTTYgen to convert your PEM file to a PPK file:
Launch PuTTYgen. When the dialog box opens, select "Load":
In the file dialog box, select "All Files", then select your PEM file that you downloaded earlier from Amazon.
Click on "Save private key" to convert the PEM file to a PPK file:
Click on Yes to save without a passphrase (or enter a passphrase if you wish.)
Save the file. You are now ready to install WinSCP and connect to your instance with WinSCP.
To SSH into your server, you'll need to open Port 22 on both the EC2 instance and the Windows firewall.
On the selected instance (make sure the instance is checked -- the blue checkbox -- on the list of instances) click on the launch-wizard-x link next to :Security groups" (mine shows launch-wizard-6, yours will most likely be different):
After the security group page loads, click on the Inbound tab and click on Edit:
When the "Edit inbound rules" dialog appears, click on "Add Rule":
Add a rule for SSH:
And specify the source as either Anywhere or, for added security, your specific IP:
Click on the Save button.
Next, the Windows firewall needs to have this port open as well. While Bitvise creates an inbound rule for the Bitvise SSH Server program, experience has shown that this is not sufficient -- a rule has to be created for the port, not program--I have no explanation for why this is.
Launch Windows Firewall, then click on Inbound Rules:
Next, click on New Rule and select Port:
Click on Next, then enter the TCP port 22:
Click next, then accept the default "Allow the connection":
Click next, accept the defaults for applying the rule:
Click next, then enter a descriptive name for the rule, for example:
Click Finish and close the Windows Firewall app. You should now be able to SSH into your server!
If you haven't done so before, download and install the WinSCP client from here.
Once installed, fire up the WinSCP app and enter the elastic (static) IP, your username, password, and select the private key file (the ppk file created with PuTTYGen):
Save the configuration the click on "Login". You will see a warning message:
Click Yes.
If you are still viewing the server's desktop via the remote desktop connection, you should see a couple popup messages, similar to this:
And on your PC, WinSCP should display both your PC's and the remote PC's file system, similar to this:
You can now transfer files easily between your computer and the server.
You can also drag-and-drop from other explorer windows into the server explorer listing in WinSCP, which is convenient.
WinSCP will cache the folders and filenames on the remote server, so once you've browsed to a folder (for the current session), changes that occur exclusively at the server will not be reflected seen until you refresh the server's folder/file list using the refresh icon
Under the Options -> Preferences tab, select the Intregration -> Applications item. Note the PuTTY path.
If you have installed PuTTY elsewhere, you'll need to change this path.
From the Commands menu, select "Open in PuTTY":
Click Yes to the PuTTY Security Alert question. A terminal window should open.
Now here's a trick.
- At the prompt for your password, copy your password on your PC to the clipboard.
- On the PuTTY terminal window, right-click with the mouse once, then press Enter.
The PuTTY terminal will copy the clipboard contents from your computer into the terminal window with a right mouse click. Conversely, if you wish to copy information from the PuTTY terminal to your PC, highlight the desired text with your mouse, then left-click. This copies the highlighted contents to your PC's clipboard.
After logging in, you can access your server through the command line, for example:
Note that you will not be able to launch UI applications (they won't appear on your remote desktop session), but a console session through PuTTY still has its uses, though granted, this is typically a lot more useful when connecting to a Linux instance!
Exit the terminal session by typing "exit" at the command prompt (the graceful way) or simply closing the PuTTY terminal window (the less graceful way.)
You can also open a terminal window by launching PuTTY directly, but you still have to specify the private key file, which is done in the Connection -> SSH -> Auth configuration page:
Some food for thought.
Port 22 for SSH is the standard SSH port. If you want to add a small measure of security, configure the Bitvise SSH server to listen to a different port. You'll also need to change your WinSCP connection information to the new port
Unless you need SSH always on, I prefer to click on the "Stop Server" link on the Bitvise SSH Server Control Panel. This means I have to remote desktop in to the server to re-enable it, but it's an added measure of security to not have the SSH port always open and listening for connections. If left on, I will often see unscrupulous attempts to break into the server!
Use your favorite domain registrar to create an A record for your server. I like namecheap.com, so the screenshots will be from their website. You'll need to get to the "manage your domain", and usually the "advanced DNS" page, or something similar.
Create or edit the CNAME record, pointing to the public DNS that you can find on your Amazon instance page:
Create an "A Record" that is simply the elastic IP of the your server.
Since we're here, let's also create the MX record. Namecheap has an MXE record option (MX Easy) which simply needs the elastic IP of your server. When you're all done, you have the following records set up:
Don't forget to save your changes--check that you've saved both the host records and the mail settings record.
Once you've registered domain, created the appropriate records, and waited the obligatoy 48-72 hours for your domain registration to percolate up to the name servers, you can test some of your record settings.
This involves opening, for now, port 80. Following the instructions we used for opening port 22, also open port 80. Notice that for the EC2 instance, you can select from the predefined "HTTP" type:
Don't forget to open this port on the Windows firewall as well.
Here's a simple server you can use to test your domain. All it does is emit "Hello World!" regardless of what page you browse to:
using System;
using System.IO;
using System.Net;
using System.Text;
using System.Threading;
using System.Threading.Tasks;
namespace TheUtmostBasicWebServer
{
class Program
{
static Semaphore sem;
static void Main(string[] args)
{
sem = new Semaphore(20, 20);
HttpListener listener = new HttpListener();
listener.Prefixes.Add([YOUR PRIVATE IP HERE]);
listener.Start();
Task.Run(() =>
{
while (true)
{
sem.WaitOne();
StartConnectionListener(listener);
}
});
Console.WriteLine("Press a key to exit the server.");
Console.ReadLine();
}
static async void StartConnectionListener(HttpListener listener)
{
HttpListenerContext context = await listener.GetContextAsync();
sem.Release();
HttpListenerResponse response = context.Response;
Console.WriteLine("URL: " + context.Request.Url);
string text = "Hello World!";
byte[] data = Encoding.UTF8.GetBytes(text);
response.ContentType = "text/html";
response.ContentLength64 = data.Length;
response.OutputStream.Write(data, 0, data.Length);
response.ContentEncoding = Encoding.UTF8;
response.StatusCode = 200;
response.OutputStream.Close();
}
}
}
In the code above, replace [YOUR PRIVATE IP HERE] with, you guessed it, your private IP, in the form "http://x.x.x.x/" (the trailing forward slash is critical). Your private IP is show on your EC2 instance page after you've selected the instance, for example:
You can transfer the exe with WinSCP and then launch the server in a PuTTY session. Once started, you should see something similar to this (of course, your domain name will be different):
(What's Poloron? Well, you'll have to wait until I write that article.)
Note that the browser always requests a "favicon.ico" -- the server above doesn't return a valid icon, so you'll see this request always.
Also remember that as soon you terminate the PuTTY session, the server will be terminated.
While the instructions below are simple, it's been quite a struggle to get all the pieces in place for setting up a mail server, so hopefully this will save you much grief. A mail server is critical for the final step of this article, which is to set up a valid SSL certificate. The mail server is necessary because part of the authentication/validation process for setting up an SSL certificate requires e-mailing the certificate to an account on the domain pointing to your server.
The mail server we'll be configuring in this article is Mail Enable. You may want to look at hMailServer as well as an alternative. Download the free edition of MailEnable from their website. I prefer to do this from my computer, and then SCP it to the server. The file name is "Standard901.exe" -- rather descriptive, isn't it?
Once you've moved the file over to your server, install MailEnable using your remote desktop connection. Click OK to the note and warning:
After providing some registration information, select only the mail server component:
Choose your post office name and password. Here I'm using the domain name, since it's the only post office I'll be running on this server:
Enter the domain name for your server, leaving the other fields as is:
Once Mail Enable has finished installing, click on the Start icon and type "mail". I usually pin the icon to the taskbar (right-click on the MailEnable entry) for easier access:
Left-click to open the administration window.
Notice that under Post Offices, for the post office name, there is already a mailbox for "Postmaster":
On both the Amazon instance security group settings and the Windows Firewall, as described earler, open the following inbound ports:
- 25 - SMTP
- 110 - POP3
- 587 - For mail submission (read more here)
Enable mail submission on Mail Enable by:
- right-clicking on the the SMTP server entry in the tree view
- Selecting the Inbound tab
- Checking "Listen on alternate port"
- Entering 587 as the port number
Double-click on the Postmaster mailbox. In the General tab, create a password for this mailbox.
You'll be using this password later on for authenticating with the server to send/receive emails.
Using your favorite email app, send a test email to the postmaster mailbox, something like this:
Wait a few seconds the click on the refresh button in the Mail Enable Admin UI. You should see that the message has been received:
Double-click on the Postmaster mailbox, then click on the "Messages" tab. Double-click on the message filename and you'll be able to see the contents:
We'll set up Outlook now so that you can send and receive email via your postmaster account. I'm using Outlook 2010, other versions may vary slightly in the UI presentation (but they look the same as they did 10 years ago to me!)
First, click on the File tab and then click on Add Account:
Select "manually configure..."
Select "Internet E-Mail":
Enter your domain name (not mine) and the password you created earlier for the postmaster account:
Before clicking Next, click on "More Settings". On the Outgoing Server tab, select "My outgoing server (SMTP) requires authentication":
On the Advanced tab, select port 587 as the outgoing SMTP server port:
Now click on "Next". Outlook will test your settings, and after a minute or so, should display:
Get all the email off your server by clicking on the Send/Receive tab and then Send/Receive All Folders:
Once sync'd, check your junk email folder for the test message that you sent earlier. In your inbox should also be a test message that Outlook sent.
Send a test email to another account (for example, the account you used to send a test email to your server):
I use GMail, and within a few seconds my test email is received:
Check your spam/junk folder if you don't receive an email in the your usual inbox. The mailbox name "postmaster" is often used as a filter for junk mail!
Congratulations -- you've now set up Mail Enable as a mail server and Outlook to send / receive emails using your mail server. You can now set up additional accounts, etc.
We can now programmatically send email via our server. For example:
using System;
using System.Net;
using System.Net.Mail;
namespace SendMailExample
{
public class Program
{
public static void Main(string[] args)
{
string username = [username of the mailbox on your server]
string password = [password of the mailbox on your server]
string toEmail = [email address of recipient]
string fromEmail = [email address of sender -- a mailbox on your server]
string host = [mail.<yourserver>, for example, mail.foo.com]
SmtpClient smtpClient = new SmtpClient();
NetworkCredential basicCredential = new NetworkCredential(username, password);
MailMessage message = new MailMessage();
MailAddress fromAddress = new MailAddress(fromEmail);
smtpClient.Host = host;
smtpClient.Port = 587;
smtpClient.UseDefaultCredentials = false;
smtpClient.Credentials = basicCredential;
message.From = fromAddress;
message.Subject = "Test Mail";
message.IsBodyHtml = true;
message.Body = "<h1>your message body</h1>";
message.To.Add(toEmail);
smtpClient.Send(message);
}
}
}
The following describes how to create a CSR and obtain an SSL certificate without using IIS. We will be using RapidSSL to generate the SSL certificate, and if you are using IIS, you can use the Symantec SSL Assistant for Windows Servers to simplify this whole process. Regardless, it is, in my opinion, a good thing to know how to do this without relying on IIS.
The steps presented here must be performed exactly in the order in which I describe them. It took quite a while to figure out this process, especially the need to create a private key for the certificate in order to bind it to port 443.
First, a Certificate Signing Request (CSR) must be generated. Left-click on the Windows icon and type "mmc" to open the Microsoft Management Console:
Right-click on the application and select "Run as administrator". When the application comes up, click on the File menu and select Add/Remove Snap-in:
Click Certificates, then Add. Select "Computer Account":
Click Next, then select "Local Computer":
Then click Finish and OK.
1. Expand the Certificates
2. Click on Personal
3. From the menu on the right, click on More Actions
4. All Tasks
5. Advanced Operations
6. Create Custom Request
Click Next, then "Proceed without enrollment policy":
Click Next, then select "(No template) CNG key" and verify that "Suppress default extensions" is not selected. Make sure PKCS #10 is selected:
Click Next. Click on the "Details" arrow, then "Properties":
Enter a friendly name and description, which can be anything, for example:
Click on the Subject tab and add the following types:
- Common name: This must be the fully qualified domain name of the server, in my case "www.poloron.net"
- Organization
- State
- Country
- Email
You should have something similar to this:
In the Private Key tab, make sure the Cryptographic Service Provider is RSA, Microsoft Software Key Storage Provider, and that no other providers are selected:
On this same tab, Expand Options and make sure the key size is at least 2048. Also check the box "Make private key exportable":
Click OK, then Next.
Save the CSR as Base 64:
Open the file with notepad and copy it in the clipboard.
Go to www.rapidssl.com and follow the instructions for generating an SSL certificate. When prompted to enter your CSR, paste in the contents of the file that you just created.
When you get to the RapidSSL Enrollment page, select your postmaster email address as the Level 2 Domain Address, for example:
After placing your order, check your postmaster email.
The email you receive will have a link to approve the certificate request. Click on it, then click on I Approve. Oddly, the certificate was emailed to my gmail account (which I used when registering on RapidSSL) and not the postmaster account. Go figure.
The email you received will have a Web Server CERTIFICATE at the bottom of the email. Copy and paste this (including the "---BEGIN CERTIFICATE---" and "---END CERTIFICATE---" to your server into a text file.
Go back to the mmc console and expand the Certificates -> Personal -> Certificates tree. Yes, the "Personal" certificates folder, NOT the Trusted Root Certification Authority folder. Right click on the certificates and select All Tasks -> Import:
Place the certificate in the Personal store:
Click Next -> Finish -> OK. Your certificate is now in the store, similar to this:
Creating a private key for this certificate is a vital step and I found to be the missing link in much of the documentation that I found on the web.
First, double-click on the certificate, click on the "details" tab, and note the serial number:
Second, in a "start as admin" console window, enter:
certutil -repairstore my "093406"
replacing the key serial number in my command above with the serial number for your certificate (remove the spaces.)
Go back to the mmc and press F5. Note the change of the icon on the certificate:
It now has a "key" on it!
Right-click on the certificate and export it:
Click Next, and on the next dialog, select "Yes, export the private key":
Click Next, then Next again, then enter a password for your key'd certificate:
Click Next, enter a file name (without extension), click Next, then Finish.
Right-click on the Certificate folder in the Trusted Root Certificate Authority and select All Tasks -> Import
Select the ".pfx" file that was saved in the preceding section. You will be prompted for your password:
Click Next, Next, and Finish. When you are done, the "keyed" certificate will be in your Trusted Root Certification Authority list.
Double-click on the certificate and, in the Details tab, scroll down to where the "Thumbnail" is displayed.
At the command prompt, enter:
netsh http add sslcert ipport=0.0.0.0:443 certhash=[thumbnail] appid={[some GUID]}
where [thumbnail] is the digital thumbnail of your certificate, without spaces, and [some GUID] is a GUID of your choosing.
IMPORTANT! - the GUID must "braced", for example:
appid={069dd08f-de72-4fee-99bb-40c4022f5719}
Add HTTPS port 443 to both your EC2 inbound rule:
and to the Window Firewall.
Modify the test server above, adding an https listener:
listener.Prefixes.Add("https://x.x.x.x:443/");
Replacing "x.x.x.x" with the private IP of your server.
Fire up the server (remember to close the other server if it's still running) and, in your browser, navigate to https://[yourdomain]. For example:
126 screenshots later, I've finally completed an article I've wanted to write for a couple years: in one place, a complete description of setting up an EC2 instance, configuring it with an SSH server, adding a mail server, and obtaining an SSL certificate. I hope you find it useful when you have to go through this process yourself!
Revisions
May 15 2016: Added an important note that the GUID must be braced. Going through my own steps again after several months, it took me half an hour to figure out this important omission!
How to assign a private key to a new certificate after you use the Certificates snap-in to delete the original certificate in Internet Information Services
Obtain a Certificate on Windows Server 2008 R2 and 2012 (Without Using IIS)
RapidSSL
Namecheap
MailEnable
hMailServer
SSL Certifcate add failed, Error: 1312
OpenSSL - you can generate CSR's with OpenSSL from the command line, which might be easier if you are generating a lot of them or want to automate the process a bit


 General
  News
News  Suggestion
  Question
  Bug
Bug  Answer
  Joke
Joke  Praise
  Rant
Rant  Admin
Admin 


