Intel® Developer Zone offers tools and how-to information for cross-platform app development, platform and technology information, code samples, and peer expertise to help developers innovate and succeed. Join our communities for Android, Internet of Things, Intel® RealSense™ Technology and Windows to download tools, access dev kits, share ideas with like-minded developers, and participate in hackathon’s, contests, roadshows, and local events.
1. Introduction
This article walks through an example Android application that offloads image processing using OpenCL™ and RenderScript programming languages. These programming languages are designed to take advantage of highly parallel graphics hardware (shaders) to compute large data sets and highly repetitive tasks. Although you can use other languages to offload image processing in Android applications, this article shows OpenCL and RenderScript sample code for developing application infrastructure and image processing algorithm code. The OpenCL API wrapper class is also shown and is used to facilitate programming and execution of OpenCL for image processing algorithms. The OpenCL API wrapper class source code is available license-free for anyone to use.
You should be familiar with OpenCL, RenderScript, and Android programming concepts as this article only covers the instructions to offload image processing or media generation computes. You should also have an Android device that is equipped, enabled, and configured to run OpenCL (refer to Intel® SDK for OpenCL for Android device installation).
Note: While other languages and techniques to offload image processing or media generation are available, here, the goal is to only highlight code differences. Future article is planned that will highlight performance differences between OpenCL and RenderScript executing on GPUs.
1.1 Application UI Design
In the sample application, the UI has three radio buttons so that users can quickly switch application execution between RenderScript, OpenCL, or native code. Another menu setting allows users to select whether to run OpenCL on the CPU or GPU. The menu also gives users the list of implemented effects to run, so they can select the effect they want to run. Selecting a device only applies to OpenCL (not RenderScript or native code). Intel® x86 platforms include OpenCL runtime support on both CPU and GPU.
Below is a screenshot of the main UI which shows a version of the plasma effect being processed by OpenCL. The sample application UI shows performance results when running OpenCL, RenderScript, or native code.
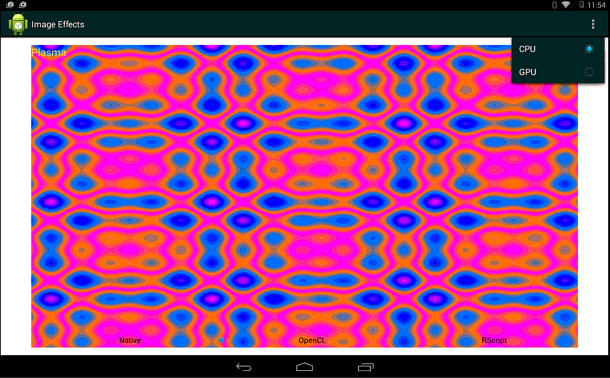
The performance metrics include frame per second (fps), frame render, and effect compute elapsed time. The performance metrics are highlighted in the screenshot below.

Note that performance numbers shown on the screen capture are sample metrics; actual performance metrics will vary depending on the device.
1.1 APIs and SDKs
In addition to the ADT (Android Development Tool which also includes the Android SDK), the main Android based APIs utilized to program the sample application are RenderScript and Intel® SDK for OpenCL for Android applications.
The Intel OpenCL™ SDK is based on and adheres to the OpenCL™ specification which is an open, royalty-free standard for cross-platform programming. For more details, refer to the OpenCL™ standard from the Khronos web site.
RenderScript first became available in 2.2 ADT (API Level 8) and is a framework for running compute-intensive tasks on Android. RenderScript is primarily oriented for use with data-parallel computations, although serial computational workloads can benefit as well. Refer to the Android developer site for more information.
The latest ADT available from Google’s open source repository includes the appropriate packages that need to be imported to use RenderScript, JNI (Java* Native Interface), and runtime APIs. For OpenCL setup, configuration, and runtime refer to this OpenCL Development for Android OS article. For additional programming details see RenderScript or OpenCL.
1.3 Infrastructure Code
The infrastructure code consists of the “main” activity and helper functions. This section highlights helper functions and code for setting up the UI, selecting which effect and language technology to run, and, for OpenCL, which compute device to use.
While several helper functions were implemented to integrate the user selection commands, only two are highlighted here:
The backgroundThread() helper function starts a thread that periodically calls the step process function to process image effects. The code and functionality used in this function is reused from another sample application posted in the Getting Started with RenderScript article, and you can find further details here (PDF).
The processStep() function is called by the backgroundThread() to process and run the image effects. The function relies on a radio button callback function to determine which language to use. The processStep() function invokes the appropriate method to process the image effect using OpenCL, RenderScript, or plain native C/C++ code. Since this code runs on a background thread, users can select a language to run by simply clicking or touching a radio button, even while an effect is being processed. The application dynamically switches to execute the appropriate step render function for a given image effect.
private void processStep() {
try {
switch (this.type.getCheckedRadioButtonId()) {
case R.id.type_renderN:
oclFlag = 0;
stepRenderNative();
break;
case R.id.type_renderOCL:
oclFlag = 1;
stepRenderOpenCL();
break;
case R.id.type_renderRS:
oclFlag = 0;
stepRenderScript();
break;
default:
return;
}
} catch (RuntimeException ex) {
Log.wtf("Android Image Processing", "render failed", ex);
}
}
1.4 Java Definition of Native Functions
The sample application implements a NativeLib class, which primarily defines functions that call into the native functionality through JNI to process a given effect. For instance, the sample application implements three effects: plasma, sepia, and monochrome. As such, the class defines the renderPlasma(…), renderSepia(…), and renderMonoChrome(…) functions. These Java functions serve as entry points through JNI to either run native or OpenCL functionality.
The JNI function executes either C/C++ code or sets up and executes the OpenCL program that implements the image effect. The class uses Android bitmap and AssetManager packages. The BitMap objects are utilized to pass and return data for the image or media being processed. The application relies on the AssetManager object to gain access to the OpenCL files (i.e., sepia.cl) where the OpenCL kernels are defined.
Below is the actual NativeLib Java class definition. The //TODO comment is included to illustrate that the application can be easily extended to implement additional image effects.
package com.example.imageprocessingoffload;
import android.content.res.AssetManager;
import android.graphics.Bitmap;
public class NativeLib
{
public static native void renderPlasma(Bitmap bitmapIn, int renderocl, long time_ms, String eName, int devtype, AssetManager mgr);
public static native void renderMonoChrome(Bitmap bitmapIn, Bitmap bitmapOut, int renderocl, long time_ms, String eName, int simXtouch, int simYtouch, int radHi, int radLo, int devtype, AssetManager mgr);
public static native void renderSepia(Bitmap bitmapIn, Bitmap bitmapOut, int renderocl, long time_ms, String eName, int simXtouch, int simYtouch, int radHi, int radLo, int devtype, AssetManager mgr);
static {
System.loadLibrary("imageeffectsoffloading");
}
}
Note that the Android AssetManager and BitMap objects are passed for image input and image results to the native code. The AssetManager object is used by native code to be able to access CL files where the OpenCL kernels are defined. The BitMap object is used to make pixel data available for native code to compute and produce image results.
The UI parameter deviceType is used to indicate whether to execute OpenCL on the CPU or the GPU. The Android system must be configured and capable of running OpenCL on both devices. Modern Intel® Atom™ and Intel® Core™ processors can run OpenCL on the CPU and the integrated graphics processor or GPU.
The eName parameter is passed to indicate which OpenCL kernel to compile and run. Although the sample application implements a JNI function per image effect, this might appear unnecessary. However, it is possible to define multiple related image effects in a single CL file and/or JNI function. In such cases the eName would be used to compile and load the appropriate CL program and/or kernel.
The renderocl parameter is used as a flag that indicates whether to run OpenCL or native C/C++ code. This flag is only set when a user selects the OpenCL radio button; otherwise, it remains unset.
The time_ms parameter is used to pass a time stamp (milliseconds), which is used to calculate the performance metrics. In the plasma effect the time stamp is used to calculate the plasma effect stepping.
Other arguments are specific to the image effect algorithm to render the effect radially from the center of the image. For example, the simXtouch, simYtouch, radLo, and radHi parameters along with the width and height are used to calculate and show radial progress of the monochrome and sepia effects.
1.5 Definitions and Resources to run Native Code (C or OpenCL)
This section includes the JNI native function definitions for each effect implemented in the sample application. As previously mentioned, one function per effect is utilized to simplify the explanation and illustrate the functional elements used to offload image effect processing with OpenCL. The C or serial code is referenced and code snippets are also included in hopes that a future version of the sample application will be used to assess performance between these language technologies.
The JNI functions have a 1:1 relationship with the Java native functions. So it is very important to have the correct declaration and definition of the JNI counterpart functions. The Java SDK includes the javah tool that helps generate the correct and exact JNI function declaration. This tool is highly recommended to avoid the struggles that could result when code compiles correctly but produces errors at runtime.
Below are the JNI functions for the “image effects offloading” in sample application. The JNI function signatures were generated by the javah tool utility.
#ifndef _Included_com_example_imageprocessingoffload_NativeLib
#define _Included_com_example_imageprocessingoffload_NativeLib
#ifdef __cplusplus
extern "C" {
#endif
JNIEXPORT void JNICALL Java_com_example_imageprocessingoffload_NativeLib_renderPlasma
(JNIEnv *, jclass, jobject, jint, jlong, jstring, jint, jobject);
JNIEXPORT void JNICALL Java_com_example_imageprocessingoffload_NativeLib_renderMonoChrome
(JNIEnv *, jclass, jobject, jobject, jint, jlong, jstring, jint, jint, jint, jint, jint, jobject);
JNIEXPORT void JNICALL Java_com_example_imageprocessingoffload_NativeLib_renderSepia
(JNIEnv *, jclass, jobject, jobject, jint, jlong, jstring, jint, jint, jint, jint, jint, jobject);
}
#endif
The javah tool can generate the correct JNI function signatures; however, the class or classes that define the Java native function must already be compiled in your Android application project. If a header file is to be generated, the javah command can be used as follows:
{javahLocation} -o {outputFile} -classpath {classpath} {importName}
For the sample application the function signatures were generated as:
javah -o junk.h -classpath bin\classes com.example.imageprocessingoffloading.NativeLib
The JNI function signatures in junk.h were then added to the imageeffects.cpp, which has the functionality to set up and run OpenCL or C code. Next we allocate resources to be able run OpenCL or native code for the implemented effects: plasma, monochrome, and sepia.
1.5.1 Plasma Effect
The Java_com_example_imageprocessingoffload_NativeLib_renderPlasma(…) function is the entry code to execute either OpenCL or native code for the plasma effect. The functions startPlasmaOpenCL(…), runPlasmaOpenCL(…), and runPlasmaNative(…) are external to the imageeffects.cpp code and are defined in a separate plasmaEffect.cpp source file. For reference, you can find the plasmaEffect.cpp source file in the OpenCL wrapper class code download.
The renderPlasma(…) entry function utilizes the OpenCL wrapper class to query the Android device system for OpenCL support. It calls the wrapper class function ::initOpenCL(…) to initialize the OpenCL environment. The device type passes CPU or GPU as the device to create the OpenCL context. The Android asset manager uses the ceName parameter to identify and load the CL file for the kernel code to compile.
If and when the OpenCL environment is successfully set up, the renderPlasma(…) entry function calls the startPlasmaOpenCL() function to allocate OpenCL resources and start execution of the plasma OpenCL kernel. Note that gOCL is a global variable that holds the object instance of the OpenCL wrapper class. The gOCL variable is visible to all JNI entry functions. This way the OpenCL environment can be initialized by any of the programmed effects.
The plasma effect does not use images, media rendered on the screen is generated by the programmed algorithm. The bitmapIn parameter is a BitMap object that holds the media that is generated by the plasma effect. The pixels parameter passed in the startPlasma(…) function is mapped to the bitmap texture and is used by the native or OpenCL kernel code to read and write pixel data for textures to render on the screen. Once again, the assetManager object is used to access the CL file that contains the OpenCL kernel for the plasma effect.
JNIEXPORT void Java_com_example_imageprocessingoffload_NativeLib_renderPlasma(JNIEnv * env, jclass, jobject bitmapIn, jint renderocl, jlong time_ms, jstring ename, jint devtype, jobject assetManager) {
JNIEXPORT void Java_com_example_imageprocessingoffload_NativeLib_renderPlasma(JNIEnv * env, jclass, jobject bitmapIn, jint renderocl, jlong time_ms, jstring ename, jint devtype, jobject assetManager) {
…
ret = AndroidBitmap_lockPixels(env, bitmapIn, &pixels);
…
If OCL not initialized
AAssetManager *amgr = AAssetManager_fromJava(env, assetManager);
gOCL.initOpenCL(clDeviceType, ceName, amgr);
startPlasmaOpenCL((cl_ushort *) pixels, infoIn.height, infoIn.width, (float) time_ms, ceName, cpinit);
else
runPlasmaOpenCL(infoIn.width, infoIn.height, (float) time_ms, (cl_ushort *) pixels);
…
}
The startPlasmaOpenCL(…) external function generates and populates the Palette and Angles buffers that contain data needed for the plasma effect. To start running the plasma OpenCL kernel, the function relies on OpenCL command queue, context, and kernel, which are defined as data members of wrapper class.
The runPlasmaOpenCL(…) function runs the plasma OpenCL kernel continually. A separate function is utilized once the OpenCL kernel gets started, and subsequent kernel executions only need a new time stamp value as input. Only the kernel argument for the time stamp value needs to be sent for the next kernel run iteration, hence the need for a separate function.
extern int startPlasmaOpenCL(cl_ushort* pixels, cl_int height, cl_int width, cl_float ts, const char* eName, int inittbl);
extern int runPlasmaOpenCL(int width, int height, cl_float ts, cl_ushort *pixels);
extern void runPlasmaNative( AndroidBitmapInfo*  info, void*  pixels, double  t, int inittbl );
The runPlasmaNative(…) function contains the plasma algorithm logic written in C code. The inittbl argument is used as Boolean to indicate whether the Palette and Angles data needed by the plasma effect needs to be generated or not. The OpenCL kernel code for the plasma effect can be found in the plasmaEffect.cpp source file.
#define FBITS 16
#define FONE (1 << FBITS)
#define FFRAC(x) ((x) & ((1 << FBITS)-1))
#define FIXED_FROM_FLOAT(x) ((int)((x)*FONE))
#define PBITS 8
#define ABITS 9
#define PSIZE (1 << PBITS)
#define ANGLE_2PI (1 << ABITS)
#define ANGLE_MSK (ANGLE_2PI - 1)
#define YT1_INCR FIXED_FROM_FLOAT(1/100.0f)
#define YT2_INCR FIXED_FROM_FLOAT(1/163.0f)
#define XT1_INCR FIXED_FROM_FLOAT(1/173.0f)
#define XT2_INCR FIXED_FROM_FLOAT(1/242.0f)
#define ANGLE_FROM_FIXED(x) ((x) >> (FBITS - ABITS)) & ANGLE_MSK
ushort pfrom_fixed(int x, __global ushort *palette)
{
if (x < 0) x = -x;
if (x >= FONE) x = FONE-1;
int idx = FFRAC(x) >> (FBITS - PBITS);
return palette[idx & (PSIZE-1)];
}
__kernel
void plasma(__global ushort *pixels, int height, int width, float t, __global ushort *palette, __global int *angleLut)
{
int yt1 = FIXED_FROM_FLOAT(t/1230.0f);
int yt2 = yt1;
int xt10 = FIXED_FROM_FLOAT(t/3000.0f);
int xt20 = xt10;
int x = get_global_id(0);
int y = get_global_id(1);
int tid = x+y*width;
yt1 += y*YT1_INCR;
yt2 += y*YT2_INCR;
int base = angleLut[ANGLE_FROM_FIXED(yt1)] + angleLut[ANGLE_FROM_FIXED(yt2)];
int xt1 = xt10;
int xt2 = xt20;
xt1 += x*XT1_INCR;
xt2 += x*XT2_INCR;
int ii = base + angleLut[ANGLE_FROM_FIXED(xt1)] + angleLut[ANGLE_FROM_FIXED(xt2)];
pixels[tid] = pfrom_fixed(ii/4, palette);
}
The RenderScript kernel code for the plasma effect:
#pragma version(1)
#pragma rs java_package_name(com.example.imageprocessingoffload)
rs_allocation *gPalette;
rs_allocation *gAngles;
rs_script gScript;
float ts;
int gx;
int gy;
static int32_t intFromFloat(float xfl) {
return (int32_t)((xfl)*(1 << 16));
}
const float YT1_INCR = (1/100.0f);
const float YT2_INCR = (1/163.0f);
const float XT1_INCR = (1/173.0f);
const float XT2_INCR = (1/242.0f);
static uint16_t pfrom_fixed(int32_t dx) {
unsigned short *palette = (unsigned short *)gPalette;
uint16_t ret;
if (dx < 0) dx = -dx;
if (dx >= (1 << 16)) dx = (1 << 16)-1;
int idx = ((dx & ((1 << 16)-1)) >> 8);
ret = palette[idx & ((1<<8)-1)];
return ret;
}
uint16_t __attribute__((kernel)) root(uint16_t in, uint32_t x, uint32_t y) {
unsigned int *angles = (unsigned int *)gAngles;
uint32_t out = in;
int yt1 = intFromFloat(ts/1230.0f);
int yt2 = yt1;
int xt10 = intFromFloat(ts/3000.0f);
int xt20 = xt10;
int y1 = y*intFromFloat(YT1_INCR);
int y2 = y*intFromFloat(YT2_INCR);
yt1 = yt1 + y1;
yt2 = yt2 + y2;
int a1 = (yt1 >> 7) & ((1<<9)-1);
int a2 = (yt2 >> 7) & ((1<<9)-1);
int base = angles[a1] + angles[a2];
int xt1 = xt10;
int xt2 = xt20;
xt1 += x*intFromFloat(XT1_INCR);
xt2 += x*intFromFloat(XT2_INCR);
a1 = (xt1 >> (16-9)) & ((1<<9)-1);
a2 = (xt2 >> (16-9)) & ((1<<9)-1);
int ii = base + angles[a1] + angles[a2];
out = pfrom_fixed(ii/4);
return out;
}
void filter(rs_script gScript, rs_allocation alloc_in, rs_allocation alloc_out) {
rsForEach(gScript, alloc_in, alloc_out);
}
1.5.2 Monochrome Effect
The Java_com_example_imageprocessingoffload_NativeLib_renderMonochrome(…) function is the entry code to execute either OpenCL or native code for the monochrome processing. The functions executeMonochromeOpenCL(…), and executeMonochromeNative(…) are external to the imageeffects.cpp code and are defined in a separate source file. As with the plasma effect, this entry function also utilizes the OpenCL wrapper class to query the Android device system for OpenCL support and calls the function ::initOpenCL(…) to initialize the OpenCL environment.
The following two lines of code simply extern (or make visible to the NDK compiler) the function signature of the executeMonochromeOpenCL(…), and executeMonochromeNative(…) functions. These lines are necessary as these functions are defined in a separate source file.
extern int executeMonochromeOpenCL(cl_uchar4 *srcImage, cl_uchar4 *dstImage, int radiHi, int radiLo, int xt, int yt, int nWidth, int nHeight);
extern int executeMonochromeNative(cl_uchar4 *srcImage, cl_uchar4 *dstImage, int radiHi, int radiLo, int xt, int yt, int nWidth, int nHeight);
Unlike the plasma effect, this effect uses an input and an output image. Both bitmapIn and bitmapOut are allocated as ARGB_8888 bitmaps, and both are mapped to CL buffers of cl_uchar4 vectors. Note that pixelsIn and pixelsOut are typecasted as this is necessary for OpenCL to map the BitMap objects to buffers of cl_uchar4 vectors.
JNIEXPORT void JNICALL Java_com_example_imageprocessingoffload_NativeLib_renderMonochrome(JNIEnv * env, jclass obj, jobject bitmapIn, jobject bitmapOut, jint renderocl, jlong time_ms, jstring ename, jint xto, jint yto, jint radHi, jint radLo, jint devtype, jobject assetManager) {
…
ret = AndroidBitmap_lockPixels(env, bitmapIn, &pixelsIn);
ret = AndroidBitmap_lockPixels(env, bitmapOut, &pixelsOut);
…
If OpenCL
If OCL not initialized
AAssetManager *amgr = AAssetManager_fromJava(env, assetManager);
gOCL.initOpenCL(clDeviceType, ceName, amgr);
else
executeMonochromeOpenCL((cl_uchar4*) pixelsIn,(cl_uchar4*) pixelsOut, radiHi, radiLo, xt, yt, infoIn.width, infoIn.height);
else
executeMochromeNative((cl_uchar4*) pixelsIn,(cl_uchar4*) pixelsOut, radiHi, radiLo, xt, yt, infoIn.width, infoIn.height);
…
}
When executeMonochromeOpenCL(…) is called, the function typecasts and passes pixelsIn and pixelsOut as cl_uchar4 buffers. The function uses OpenCL APIs to create buffers and other resources as appropriate. It sets kernel arguments and queues up necessary commands to execute the OpenCL kernel. The image input buffer which is pointed to by pixelsIn is allocated as a read_only buffer. The kernel code uses the pixelsIn pointer to get incoming pixel data. The pixel data is used by the kernel algorithm to convert the incoming image to a monochrome image. The output buffer is read_write buffer that holds the image results and is pointed to by pixelsOut. For further details on OpenCL refer to Intel’s programming and optimization guide.
The executeMonochromeNative(…) function has the monochrome algorithm programmed in C code. The algorithm is basic and consists of an outer loop (for y loop) and inner loop (for x loop) to compute the pixel data whose result is stored in dstImage pointed to by pixelsOut. The srcImage pointed to by pixlesIn is used to dereference input pixel data for the algorithm formula to convert to monochrome pixels.
The OpenCL kernel code for the monochrome effect:
constant uchar4 cWhite = {1.0f, 1.0f, 1.0f, 1.0f};
constant float3 channelWeights = {0.299f, 0.587f, 0.114f};
constant float saturationValue = 0.0f;

__kernel void mono (__global uchar4 *in, __global uchar4 *out, int4 intArgs, int width) {
    int x = get_global_id(0);
    int y = get_global_id(1);

    int xToApply = intArgs.x;
    int yToApply = intArgs.y;
    int radiusHi = intArgs.z;
    int radiusLo = intArgs.w;
    int tid = x + y * width;
    uchar4 c4 = in[tid];
    float4 f4 = convert_float4 (c4);
    int xRel = x - xToApply;
    int yRel = y - yToApply;
    int polar = xRel*xRel + yRel*yRel;

    if (polar > radiusHi || polar < radiusLo)   {
        if (polar < radiusLo)   {
            float4 outPixel = dot (f4.xyz, channelWeights);
            outPixel = mix ( outPixel, f4, saturationValue);
            outPixel.w = f4.w;
            out[tid] = convert_uchar4_sat_rte (outPixel);
        }
        else  {
            out[tid] = convert_uchar4_sat_rte (f4);
        }
    }
    else   {
         out[tid] = convert_uchar4_sat_rte (cWhite);
    }
}

The RenderScript kernel code for the monochrome effect:

#pragma version(1)
#pragma rs java_package_name(com.example.imageprocessingoffload)

int radiusHi;
int radiusLo;
int xToApply;
int yToApply;

const float4 gWhite = {1.f, 1.f, 1.f, 1.f};
const float3 channelWeights = {0.299f, 0.587f, 0.114f};
float saturationValue = 0.0f;

uchar4 __attribute__((kernel)) root(const uchar4 in, uint32_t x, uint32_t y)
{
    float4 f4 = rsUnpackColor8888(in);
    int xRel = x - xToApply;
    int yRel = y - yToApply;
    int polar = xRel*xRel + yRel*yRel;
    uchar4 out;

    if(polar > radiusHi || polar < radiusLo) {
        if(polar < radiusLo) {
            float3 outPixel = dot(f4.rgb, channelWeights);
            outPixel = mix( outPixel, f4.rgb, saturationValue);
            out = rsPackColorTo8888(outPixel);
        }
        else {
            out = rsPackColorTo8888(f4);
        }
    }
    else {
         out = rsPackColorTo8888(gWhite);
    }
    return out;
}
1.5.3 Sepia Effect
The code for the sepia effect is very similar to the code for the monochrome effect. The only difference is in the algorithm calculation of the pixels. Different formula and constants are used to arrive at the resultant pixel data. Here are the function declarations for the sepia effect to run OpenCL and native C code. As you can see, the function declarations and definitions, if not for the name difference, are identical.
extern int executeSepiaOpenCL(cl_uchar4 *srcImage, cl_uchar4 *dstImage, it int radiHi, int radiLo, int xt, int yt, int nWidth, int nHeight);
extern int executeSepiaNative(cl_uchar4 *srcImage, cl_uchar4 *dstImage, int radiHi, int radiLo, int xt, int yt, int nWidth, int nHeight);
JNIEXPORT jstring JNICALL Java_com_example_imageprocessingoffload_NativeLib_renderSepia(JNIEnv * env, jclass obj, jobject bitmapIn, jobject bitmapOut, jint renderocl, jlong time_ms, jstring ename, jint xto, jint yto, jint radHi, jint radLo, jint devtype, jobject assetManager) { … }
Source code snippets in Java_com_example_imageprocessingoffload_NativeLib_renderSepia(…) are very similar to the monochrome sample and are therefore omitted.
When executeSepiaOpenCL(…) is called, the function typecasts and passes pixelsIn and pixelsOut as cl_uchar4 buffers. The function uses OpenCL APIs to create buffers and other resources as appropriate. It sets kernel arguments and queues up necessary commands to execute the OpenCL kernel. The image input buffer which is pointed to by pixelsIn is allocated as a read_only buffer. The kernel code uses the pixelsIn buffer pointer to get pixel data. The pixel data is used by the kernel algorithm to convert the incoming image to a monochrome image. The output buffer is a read_write buffer that holds the image results and is pointed to by pixelsOut.
The executeSepiaNative(…) function has the sepia algorithm programmed in C code. The algorithm is basic and consists of an outer loop (for y loop) and inner loop (for x loop) to compute the pixel data whose result is stored in dstImage pointed to by pixelsOut. The srcImage pointed to by pixlesIn is used to dereference input pixel data for the algorithm formula to convert to monochrome pixels.
The OpenCL kernel code for the sepia effect
constant uchar4 cWhite = {1, 1, 1, 1};
constant float3 sepiaRed = {0.393f, 0.769f, 0.189f};
constant float3 sepiaGreen = {0.349f, 0.686f, 0.168f};
constant float3 sepiaBlue = {0.272f, 0.534f, 0.131f};

__kernel void sepia(__global uchar4 *in, __global uchar4 *out, int4 intArgs, int2 wh)
{
    int x = get_global_id(0);
    int y = get_global_id(1);
    int width = wh.x;
    int height = wh.y;

    if(width <= x || height <= y) return;

    int xTouchApply = intArgs.x;
    int yTouchApply = intArgs.y;
    int radiusHi = intArgs.z;
    int radiusLo = intArgs.w;
    int tid = x + y * width;

    uchar4 c4 = in[tid];
    float4 f4 = convert_float4(c4);
    int xRel = x - xTouchApply;
    int yRel = y - yTouchApply;
    int polar = xRel*xRel + yRel*yRel;

    uchar4 pixOut;

    if(polar > radiusHi || polar < radiusLo)
    {
        if(polar < radiusLo)
        {
        	float4 outPixel;
            float tmpR = dot(f4.xyz, sepiaRed);
            float tmpG = dot(f4.xyz, sepiaGreen);
            float tmpB = dot(f4.xyz, sepiaBlue);

            outPixel = (float4)(tmpR, tmpG, tmpB, f4.w);
            pixOut = convert_uchar4_sat_rte(outPixel);
        }
        else
        {
            pixOut= c4;
        }
    }
    else
    {
         pixOut = cWhite;
    }
    out[tid] = pixOut;
}

The RenderScript kernel code for the sepia effect:

#pragma version(1)
#pragma rs java_package_name(com.example.imageprocessingoffload)
#pragma rs_fp_relaxed

int radiusHi;
int radiusLo;
int xTouchApply;
int yTouchApply;

rs_script gScript;
const float4 gWhite = {1.f, 1.f, 1.f, 1.f};

const static float3 sepiaRed = {0.393f, 0.769f, 0.189f};
const static float3 sepiaGreen = {0.349f, 0.686, 0.168f};
const static float3 sepiaBlue = {0.272f, 0.534f, 0.131f};

uchar4 __attribute__((kernel)) sepia(uchar4 in, uint32_t x, uint32_t y)
{
    uchar4 result;
    float4 f4 = rsUnpackColor8888(in);

    int xRel = x - xTouchApply;
    int yRel = y - yTouchApply;
    int polar = xRel*xRel + yRel*yRel;

    if(polar > radiusHi || polar < radiusLo)
    {
    	if(polar < radiusLo)
      {
        	float3 out;

        	float tmpR = dot(f4.rgb, sepiaRed);
        	float tmpG = dot(f4.rgb, sepiaGreen);
        	float tmpB = dot(f4.rgb, sepiaBlue);

        	out.r = tmpR;
        	out.g = tmpG;
        	out.b = tmpB;
        	result = rsPackColorTo8888(out);
        }
        else
        {
            result = rsPackColorTo8888(f4);
        }
    }
    else
    {
         result = rsPackColorTo8888(gWhite);
    }
    return result;
}
1.6 Code and Resources to Run RenderScript
What does a RenderScript implementation need to execute image effects? While not a rule or even a recommendation, the sample application uses common resources and variables defined in the global scope for the sake of simplicity. Android developers can use different methods to define common resources based on the application’s complexity.
The following common resources and global variables are declared and defined in the MainActivity.java source file.
private RenderScript rsContext;
The rsContext variable is common to all scripts and is used to store the RenderScript context. The context is set up as part of the RenderScript framework. To learn more about the inner-workings, please refer to the RenderScript framework.
private ScriptC_plasma plasmaScript;
private ScriptC_mono monoScript;
private ScriptC_sepia sepiaScript;

The plasmaScript, monoScript, and sepiaScript variables are instances of the class that wraps access to the specific RenderScript kernels. Eclipse* IDE automatically generates the Java class from the rs files i.e., ScriptC_plasma from plasma.rs, ScriptC_mono from mono.rs, and ScriptC_sepia from sepia.rs. Specific RenderScript wrapper classes are generated and can be located in Java files under the gen folder. For example, for the sepia.rs file, the Java class is found in the ScriptC_sepia.java file. To generate the Java code, the rs file must completely define the RenderScript kernel code and be syntactically correct to compile. For the sample application, all ScriptC_<*> classes were imported in the MainActivity.java code.
private Allocation allocationIn;
private Allocation allocationOut;
private Allocation allocationPalette;
private Allocation allocationAngles;
Allocations are memory abstractions that RenderScript kernels operate on. For example, allocationIn and allocationOut hold texture data for input and output images. The input to the script in the sample application is AllocationIn, and AllocationOut is the output that holds image data produced by the RenderScript kernel or kernels. The Palette and Angles allocations are used to pass angle and lookup table data to the kernel. The data is generated in the main activity code prior to invoking the RenderScript for the plasma effect. The Palette and Angles data is needed to produce the plasma effect media.
The code to glue resources and generated code together to run RenderScript kernels is defined in the initRS(…) helper function for the sample application.
protected void initRS() { … };
The initRS() function initializes the RenderScript context via the create method of the RenderScript object. As previously stated, the context handle is common to all render scripts and is stored in the rsContext global variable. A RenderScript context is required by the instantiation of a RenderScript object. The following line of code creates the RenderScript context in the scope of the sample application MainActivity, hence “this” is passed on the RenderScript.create(…) method call.
rsContext = RenderScript.create(this);
Once the RenderScript context is created, the specific application RenderScript object required to execute the kernel code is allocated. The following lines of source code show the logic in the initRS() function that instantiates RenderScript objects as appropriate.
if (effectName.equals("plasma")) {
plasmaScript = new ScriptC_plasma(rsContext);
} else if (effectName.equals("mono")) {
monoScript = new ScriptC_mono(rsContext);
} else if (effectName.equals("sepia")) {
sepiaScript = new ScriptC_sepia(rsContext);
}
The stepRenderScript(…) is a helper function that is called to run RenderScript for a given effect. It uses the RenderScript object to set required parameters and to invoke the RenderScript kernel. The source code below is part of the stepRendeScript(…) function and shows how the RenderScript kernels are invoked for the plasma and monochrome effects.
private void stepRenderScript(…) {
…
if(effectName.equals("plasma")) {
plasmaScript.bind_gPalette(allocationPalette);
plasmaScript.bind_gAngles(allocationAngles);
plasmaScript.set_gx(inX - stepCount);
plasmaScript.set_gy(inY - stepCount);
plasmaScript.set_ts(System.currentTimeMillis() - mStartTime);
plasmaScript.set_gScript(plasmaScript);
plasmaScript.invoke_filter(plasmaScript, allocationIn, allocationOut);
}
else if(effectName.equals("mono")) {
int radius = (stepApply == -1 ? -1 : 10*(stepCount - stepApply));
int radiusHi = (radius + 2)*(radius + 2);
int radiusLo = (radius - 2)*(radius - 2);
monoScript.set_radiusHi(radiusHi);
monoScript.set_radiusLo(radiusLo);
monoScript.set_xInput(xToApply);
monoScript.set_yInput(yToApply);
monoScript.forEach_root(allocationIn, allocationOut);
if(stepCount > FX_COUNT)
{
stepCount = 0;
stepApply = -1;
}
}
else if(effectName.equals("sepia")) {
…
}
…
};
The gPalette, gAngles, gx, gy, and gScript are global variables defined in the plasma RenderScript kernel. The RenderScript framework generates functions to pass required data to the kernel runtime. All variables are declared in the plasma.rs file. Variables defined as rs_allocation generate bind_<var> function. For the plasma effect the bind_<gvars> functions are generated to bind the Palette and Angles data to the RenderScript context. For scalar arguments such as gx, gy, ts, and gScript a set_<var> method are generated to send specific data for that parameter. The scalar parameters are used to send running x, y values and the time stamp needed by the plasma RenderScript kernel. The invoke_filter(…) function is generated based on the RenderScript definition. Definition of user functions like the filter() function in the plasma script is a way to program configurable and/or reusable RenderScript kernel code.
For the monochrome effect, the radius is used to calculate the radiusHi and radiusLo arguments. These, along with the xInput and yInput, are used to calculate and show radial progress of the monochrome effect. Note that for the monochrome script, instead of invoking a user function the forEach_root() is called directly. The forEach_root(…) is the default method and is generated by the framework for render scripts. Note that the radiusHi, radiusLo, xInput, and yInput are defined as global variables in the kernel code and that set_<var> methods are generated to pass required data to the RenderScript kernel.
For more help, refer to the RenderScript source code definitions.
2. OpenCL Wrapper Class
The wrapper class provides functions for OpenCL APIs to compile and execute OpenCL kernels. It also provides wrapper functions for APIs to initialize the OpenCL runtime. The wrapper class intent is to facilitate initialization and setting of the runtime environment to execute OpenCL kernels. The following is a brief description and use of each method in the wrapper class. Use the Download link to get full source of the OpenCL wrapper class.
class openclWrapper {
private:
cl_device_id* mDeviceIds;
cl_kernel mKernel;
cl_command_queue mCmdQue;
cl_context mContext;
cl_program mProgram;
public:
openclWrapper() {
mDeviceIds = NULL;
mKernel = NULL;
mCmdQue = NULL;
mContext = NULL;
mProgram = NULL;
};
~openclWrapper() { };
cl_context getContext() { return mContext; };
cl_kernel getKernel() { return mKernel; };
cl_command_queue getCmdQue() { return mCmdQue; };
int createContext(cl_device_type deviceType);
bool LoadInlineSource(char* &sourceCode, const char* eName);
bool LoadFileSource(char* &sourceCode, const char* eName, AAssetManager *mgr);
int buildProgram(const char* eName, AAssetManager *mgr);
int createCmdQueue();
int createKernel(const char *kname);
int initOpenCL(cl_device_type clDeviceType, const char* eName, AAssetManager *mgr=NULL);
};
::createContext(cl device) function - is a helper function that uses device type (e.g., CPU or GPU) to validate OpenCL support and to get device Id from the system. This function uses device Id to create the OpenCL execution context. The function is called as part of the OpenCL initialization steps. It returns SUCCESS and sets the class context handle i.e., mContext, or returns FAIL if platform or device Id enumeration and/or creation of the context itself fail.::createCmdQue() function - enumerates the number of devices associated with the CL context. It relies on the private data member mContext to create the command queue. Returns SUCCESS and sets command queue handle, i.e., mCmdQue, or returns FAIL if unable to create the command queue for a device id previously enumerated by the createContext(…) function.- ::buildProgram(effectName, AssetManager) function - is an overloaded function that takes the image processing algorithm name also defined as the effect name and a pointer to the Android JNI asset manager. The asset manager uses the effect name to locate and read the OpenCL file that contains the kernel source code. The wrapper class also uses the effect name to locate and load “inline” OpenCL source code. The function is overloaded as its declaration sets the asset manager pointer to NULL by default. Essentially this function can be invoked only with the effect name or with the effect and a valid pointer to the asset manager to decide when to compile inline-defined OpenCL code or load the OpenCL code from a separate file. This allows the programmer to define and deploy OpenCL programs as inline strings or in separate OpenCL files. The asset manager pointer value is used to invoke either a function that loads the OpenCL program from a string or invoke a function that uses the asset manager APIs to read OpenCL source into buffer.
- The buildProgram(…) function invokes the OpenCL API
clCreateProgramWithSource(…) to create a program with source. The create program with source API returns errors and will fail to create the program if the OpenCL source code has syntax errors. The OpenCL context and source buffer are passed as arguments. The clCreateProgramWithSource(…) returns the program handle if the CL program compile successful. - The
clBuildProgram(…) API takes the program handle that was created by the clCreateProgramWithSource(…) or clCreateProgramWithBinary(…) APIs. The clBuidProgram(…) is called to compile and link the program executable that would run on the CL device. In case of errors, you can use clGetProgramBuildInfo(…) to dump the compile errors. For an example refer to wrapper class source code.
::createKernel(…) function - takes the effect name and uses the program object to create the kernel. If kernel creation is successful, the function returns SUCCESS. A valid kernel handle is stored in mKernel, which is subsequently used to set kernel arguments and to execute the OpenCL kernel that implements the image processing algorithm.- The
::getContext(), ::getCmdQue(), and ::getKernel() methods simply return the context, command queue, and kernel handles. These handles are used in the JNI functions to be able to queue up required commands to run OpenCL kernels.
3. Summary
This article highlighted some of the OpenCL techniques and procedures you can use to offload image processing in Android applications. Similar to RenderScript, OpenCL is a viable and powerful technology to offload your image processing workloads. As more devices support OpenCL, it is good to know that this language technology can offload, and hopefully speed up, your image processing workloads. For more information, refer to the Intel SDK for OpenCL documentation.
4. About the author
Eli Hernandez is an Application Engineer in the Consumer Client and Power Enabling Group at Intel Corporation where he works with customers to optimize their software for power efficiency and to run best on Intel hardware and software technologies. Eli joined Intel in August of 2007 with over 12 years of experience in software development for the telecom and the chemical industry. He received his B.S. in Electrical Engineering in 1989 and completed Master Studies in Computer Science in 1991-1992 from the DePaul University of Chicago.
Intel is inside more and more Android devices, and we have tools and resources to make your app development faster and easier.


 General
  News
News  Suggestion
  Question
  Bug
Bug  Answer
  Joke
Joke  Praise
  Rant
Rant  Admin
Admin 


